Essential Topic for learning Bottango.
In order to move and animate your robot, first you need to create a virtual representation of it. Bottango provides basic modeling tools to create a simple structure that represents your robot.
The structures you model in Bottango should not be picture-perfect representations of your robot. Instead, they are just the virtual controls that you will manipulate to move your robot and visualize its movement.
3D animation involves a process called rigging, in which you create the bones and interaction points (known as a rig) that you then animate to move a 3D object. When animating a 3D model, very rarely are you actually manipulating the object itself; instead, you manipulate the rig that then moves the object.
The figure below shows a 3D model (the gray and black hand) and a rig (the green lines). An animator would animate the green rigging, which then moves the 3D modeled hand.
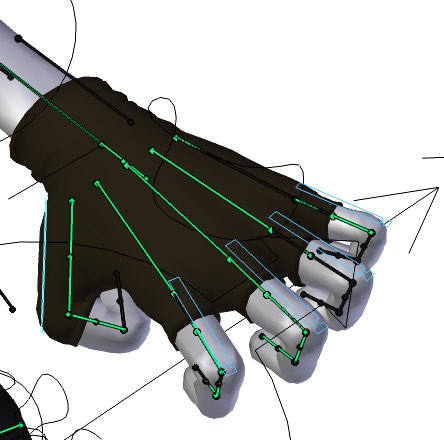
(“Sintel-hand (cropped)” © Blender Foundation / www.sintel.org / CC BY-SA 3.0)
The structures you create in Bottango operate in the same mindset. Your goal is not to recreate your robot, but instead to create approximations that are just detailed enough to view and create animations.
In Bottango, the structures you make are the equivalent of rigging, and your real-world robot is the equivalent of an animated 3D model.
Here is an example of a simple robot structure built in Bottango:
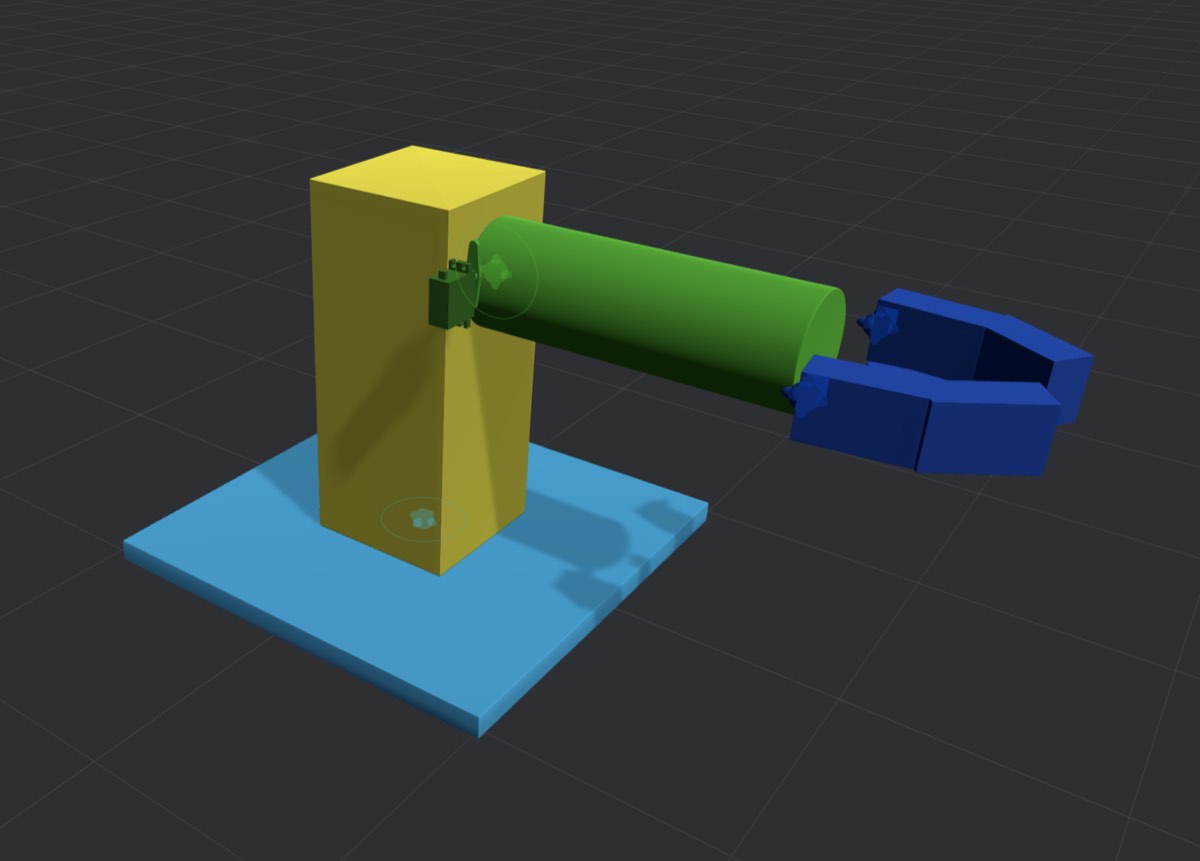
This robot has three points of articulation:
Obviously, the actual physical robot would be far more complicated than this. However, this level of detail is all that’s needed in Bottango to visualize and animate movements. If you want to animate the position of the green arm, the mechanisms that allow the green arm to move aren’t important to the workflow of animating it.
In this section, and in the next few that follow it, we’ll go through the steps to build out this simple example robot.