Advanced Topic Skip if you’re new, explore when you’re ready.
When you first create a control, and select an input to control the selected part, or you press “Settings” on a control, you will be shown the menu to set how using that button moves the selected part.
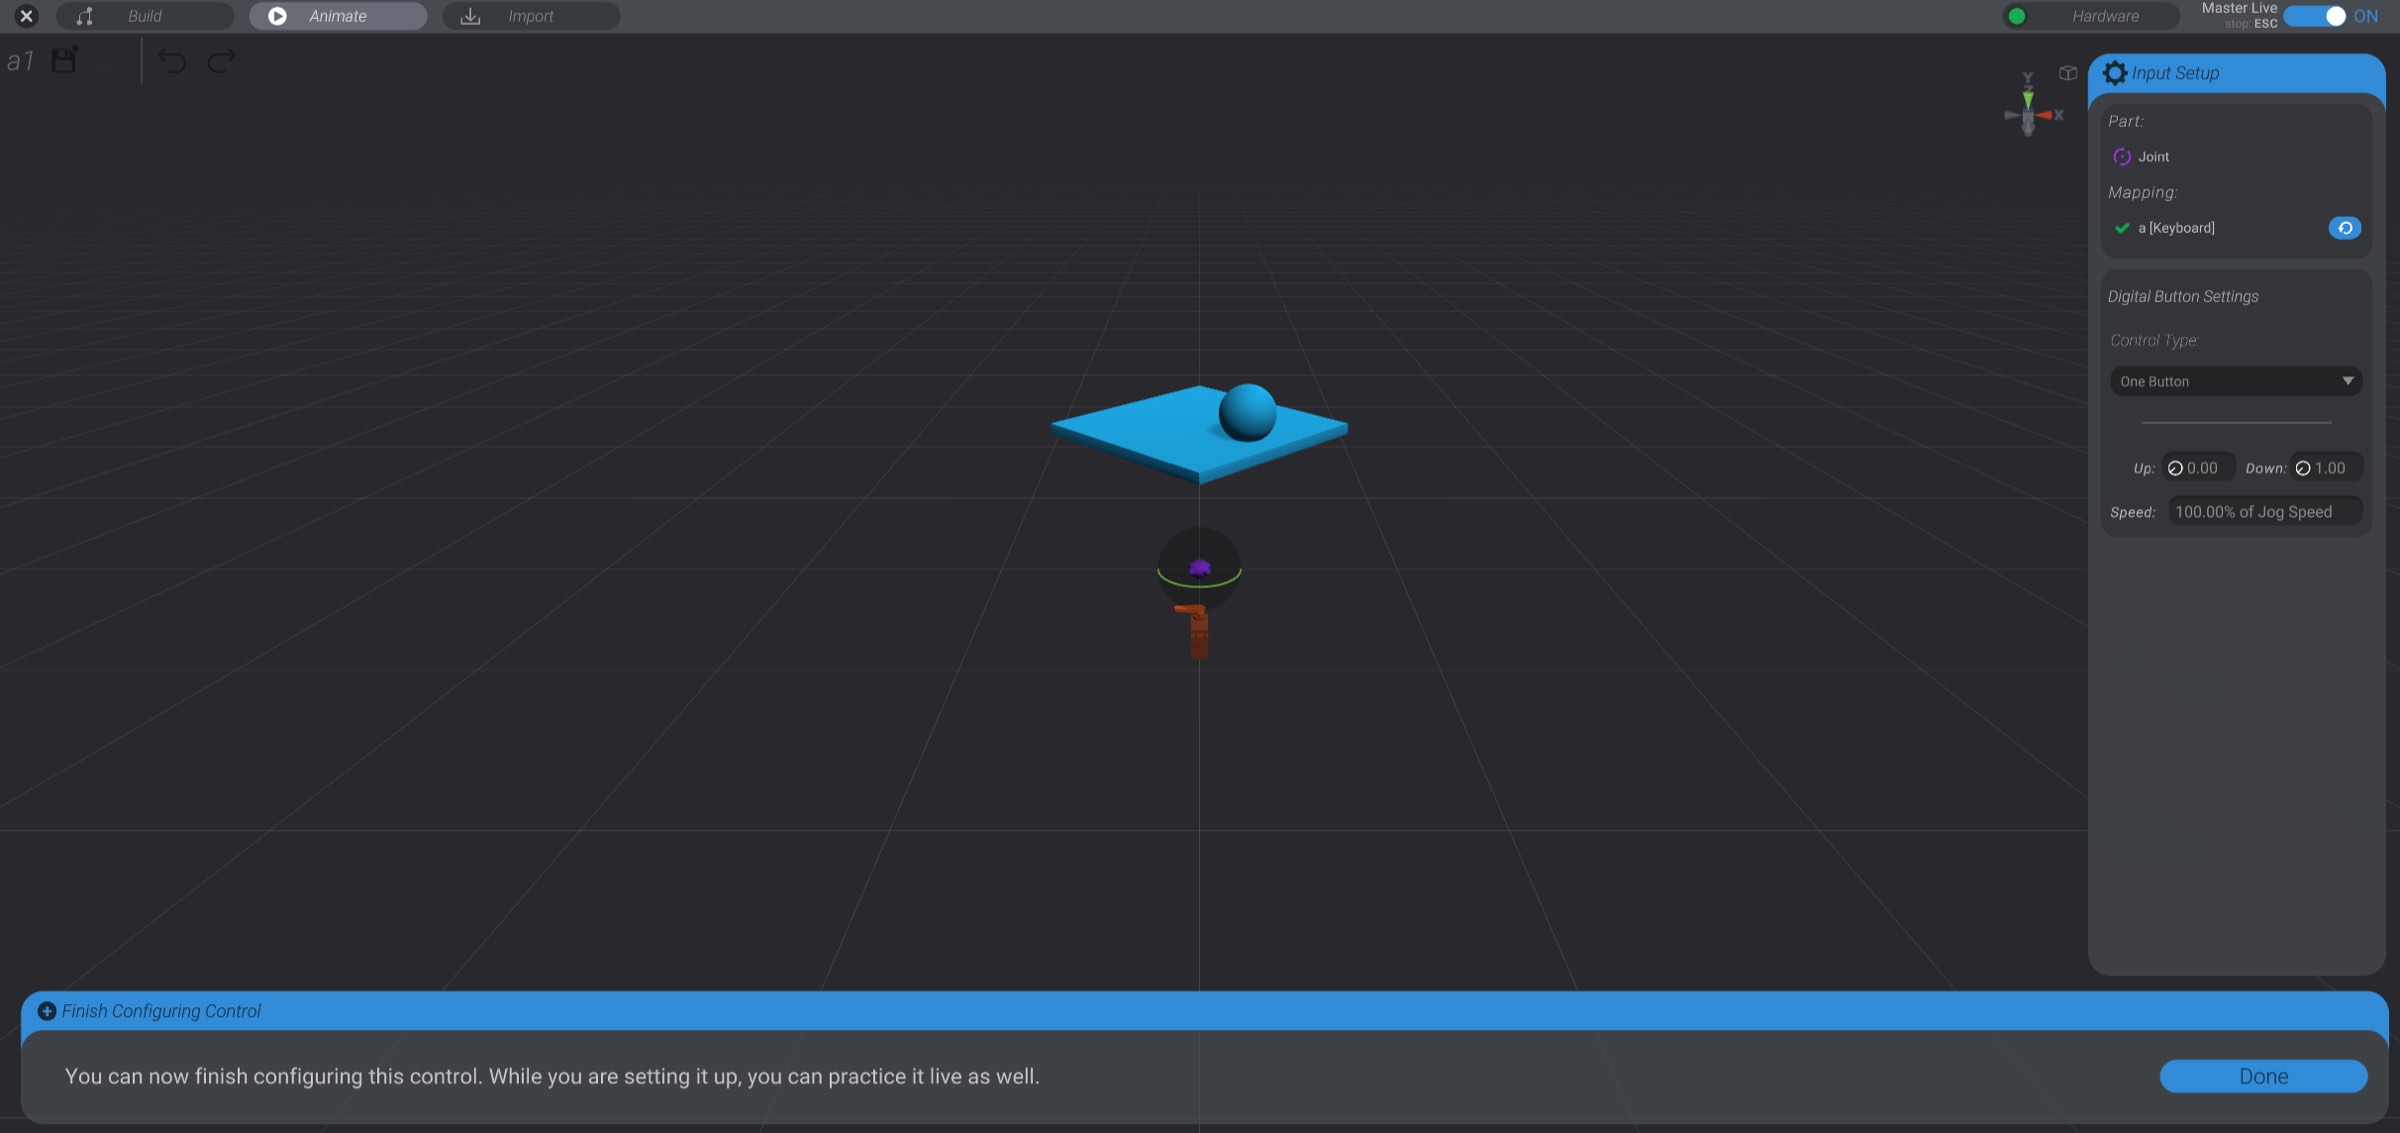
While in this view, the selected control is enabled, and live input is shown so you can test your configuration.
The first portion of the menu shows the name of the part as well as the current binding.
You can press the “refresh” button to select a new binding. You are not limited to the same kind of binding you initially chose. In this case, I could rebind from the “a” key on my keyboard to any other type of input, such as a stick on a game controller.
If you rebind the control, the rest of the settings will change to give you settings for the new kind of selected input.
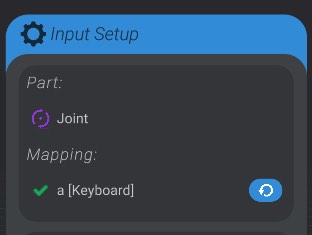
A digital button is a button that is either pressed or released, with no in-between value. An example would be a key on a keyboard, a button on a mouse, or the “A/B/X/Y” buttons on a game controller.
The rest of the menu shown here is the settings to configure how the selected digital button will move or control the selected part.
The first setting is a drop-down, to select the control type. Each control type represents a strategy for how to map input to movement. Each control type has different settings, which we’ll go over in detail:
Control Type: One Button
With “One Button” selected, you can set the movement (![]() ) value for the selected part when the button is pressed, and the movement (
) value for the selected part when the button is pressed, and the movement (![]() ) value when the button is released. The speed value sets the speed your part will move between the two movement (
) value when the button is released. The speed value sets the speed your part will move between the two movement (![]() ) values.
) values.
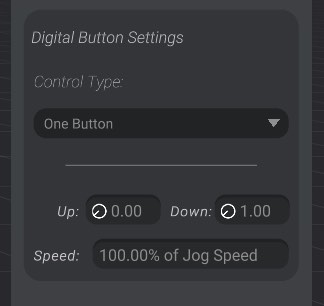
Control Type: Two Buttons
Instead of setting the movement (![]() ) value of a pressed and released single button, you map two different digital buttons to the range of movement.
) value of a pressed and released single button, you map two different digital buttons to the range of movement.
When you first select any input that needs two inputs, you’ll see a prompt to select the second input.
When you press the “Add Second Button” button, you’ll be prompted to select an input of the same type as the first. In this case, another digital button. Here you can see I’ve added the “d” key on my keyboard as the second input:

And now I can finish setting up “Two Buttons.”
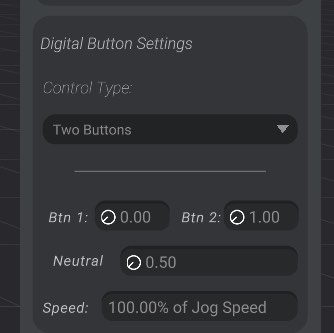
The “Btn 1” movement (![]() ) value sets the desired movement for when I press my first button (the “a” key in this example). The “Btn 2” movement (
) value sets the desired movement for when I press my first button (the “a” key in this example). The “Btn 2” movement (![]() ) value sets the desired movement for when I press my second button (the “d” key in this example). The neutral value sets the desired movement (
) value sets the desired movement for when I press my second button (the “d” key in this example). The neutral value sets the desired movement (![]() ) value when neither button is pressed.
) value when neither button is pressed.
Control Type: Two Buttons Incremental
In “Two buttons” when neither button is pressed, the part returns to a neutral value. In “Two Buttons Incremental” instead, when neither button is pressed, the part stays where it was last input.
An analog button is a button that is pressed or released, or some value in between. An example would be a shoulder button on a gamepad that can be pressed to different degrees, in contrast with a digital button such as a key on a keyboard.
As with the other input types, there are different control types with their own settings.
Control Type: Absolute
In this control type, your input on the button will be mapped 1:1 to the movement range of the selected part. If you’d like to invert the mapping, you can check the “inverted” checkbox.
Control Type: Custom Range Absolute
In this control type, your input on the button will be mapped to a range of your choosing of the selected part.
Control Type: Two Buttons
See the two buttons control type in the previous section on digital buttons. This control type works the same, just for analog buttons instead.
Control Type: Two Buttons Incremental
See the two buttons incremental control type in the previous section on digital buttons. This control type works the same, just for analog buttons instead. Speed in this setting is the speed to move in the given direction when the button is fully depressed.
Analog buttons also have a smoothing value. This function defaults to off, but if you slide it up, you can smooth out the input received by the factor given in the slider.
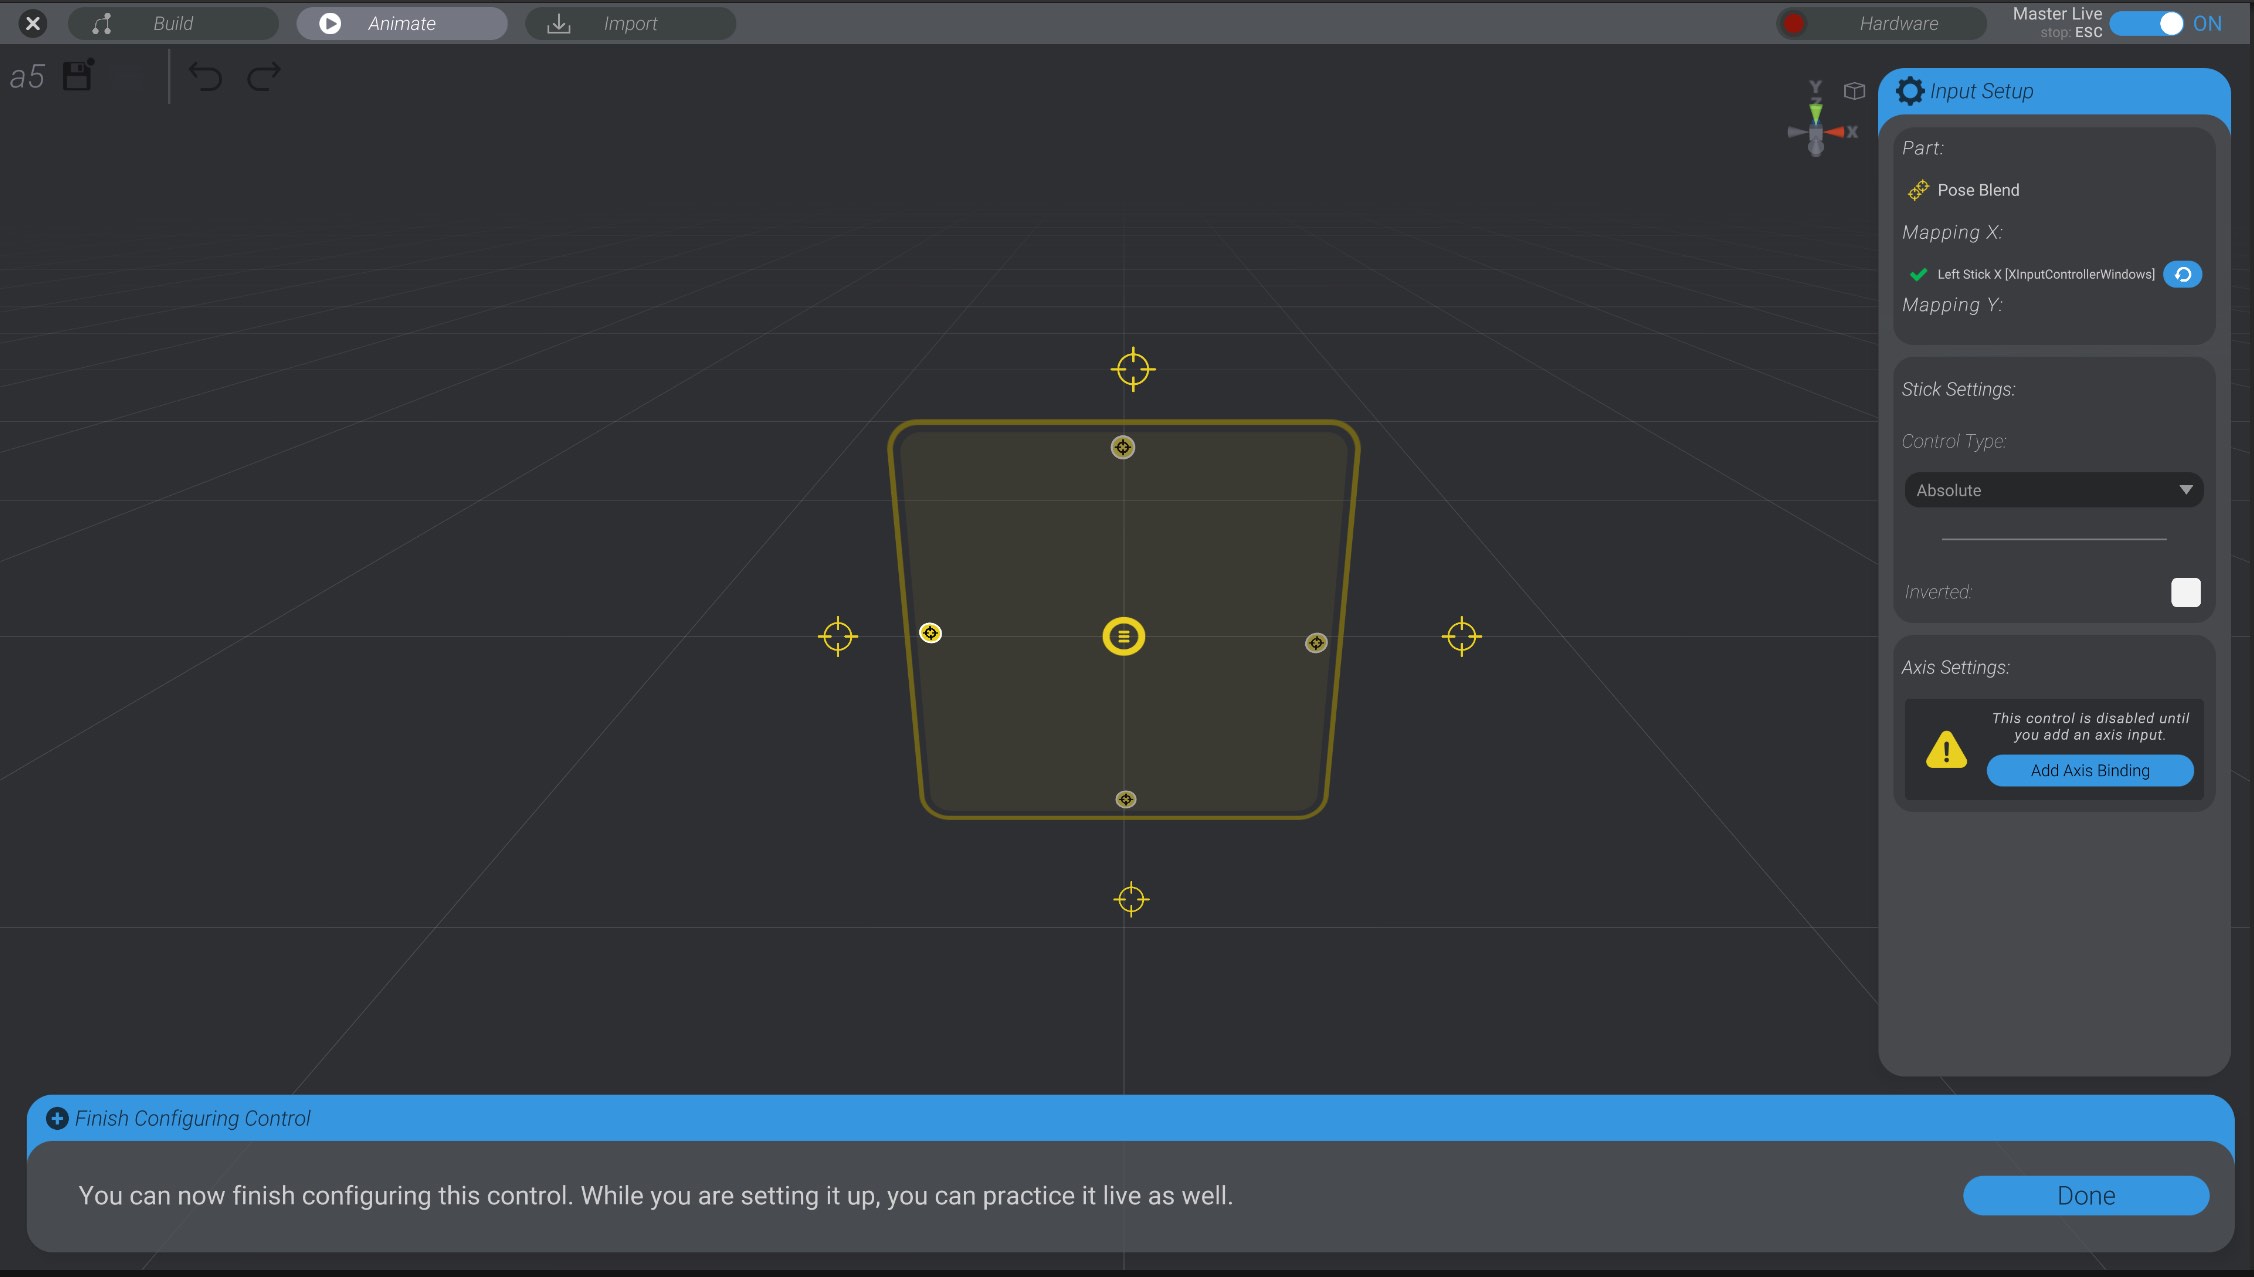
A stick is an input that has an axis of movement, and can be actuated in either direction. An example would be the left/right movement of a stick on a gamepad, or a joystick. Bottango only uses the actuated direction, so you can map the different axes of a stick however you like.
As with the other input types, there are different control types with their own settings.
Control Type: Absolute
In this control type, your input on the stick will be mapped 1:1 to the movement range of the selected part. If you’d like to invert the mapping, you can check the “inverted” checkbox.
Control Type: Custom Range Absolute
In this control type, your input on the stick will be mapped to a range of your choosing of the selected part.
Control Type: Incremental
In this control type, your input on the stick will move in the given directions incrementally, and not return to neutral when the stick is at neutral. Speed in this setting is the speed to move in the given direction when the stick is fully actuated in a given direction.
Control Type: Left/Right/Down/Up Only Absolute
In this control type, your input on the stick will be mapped to a range of your choosing of the selected part. However, only the given half of the stick input will be used. For example, if you use the X axis of a stick, and select left only. Any movement to the right past neutral on the stick will be treated as neutral.
Sticks also have a smoothing value. This function defaults to off, but if you slide it up, you can smooth out the input received by the factor given in the slider.
A similar UI is shown for digital sticks (i.e., a D-pad) and analog sticks (i.e., a left stick on a gamepad).
When selecting the part for your control, if you select a 2D pose blend, you’ll be able to set up both the X and Y axis of the pose blend. The first input you set up will be for the X axis:
After which you can add an additional second binding for the Y axis.
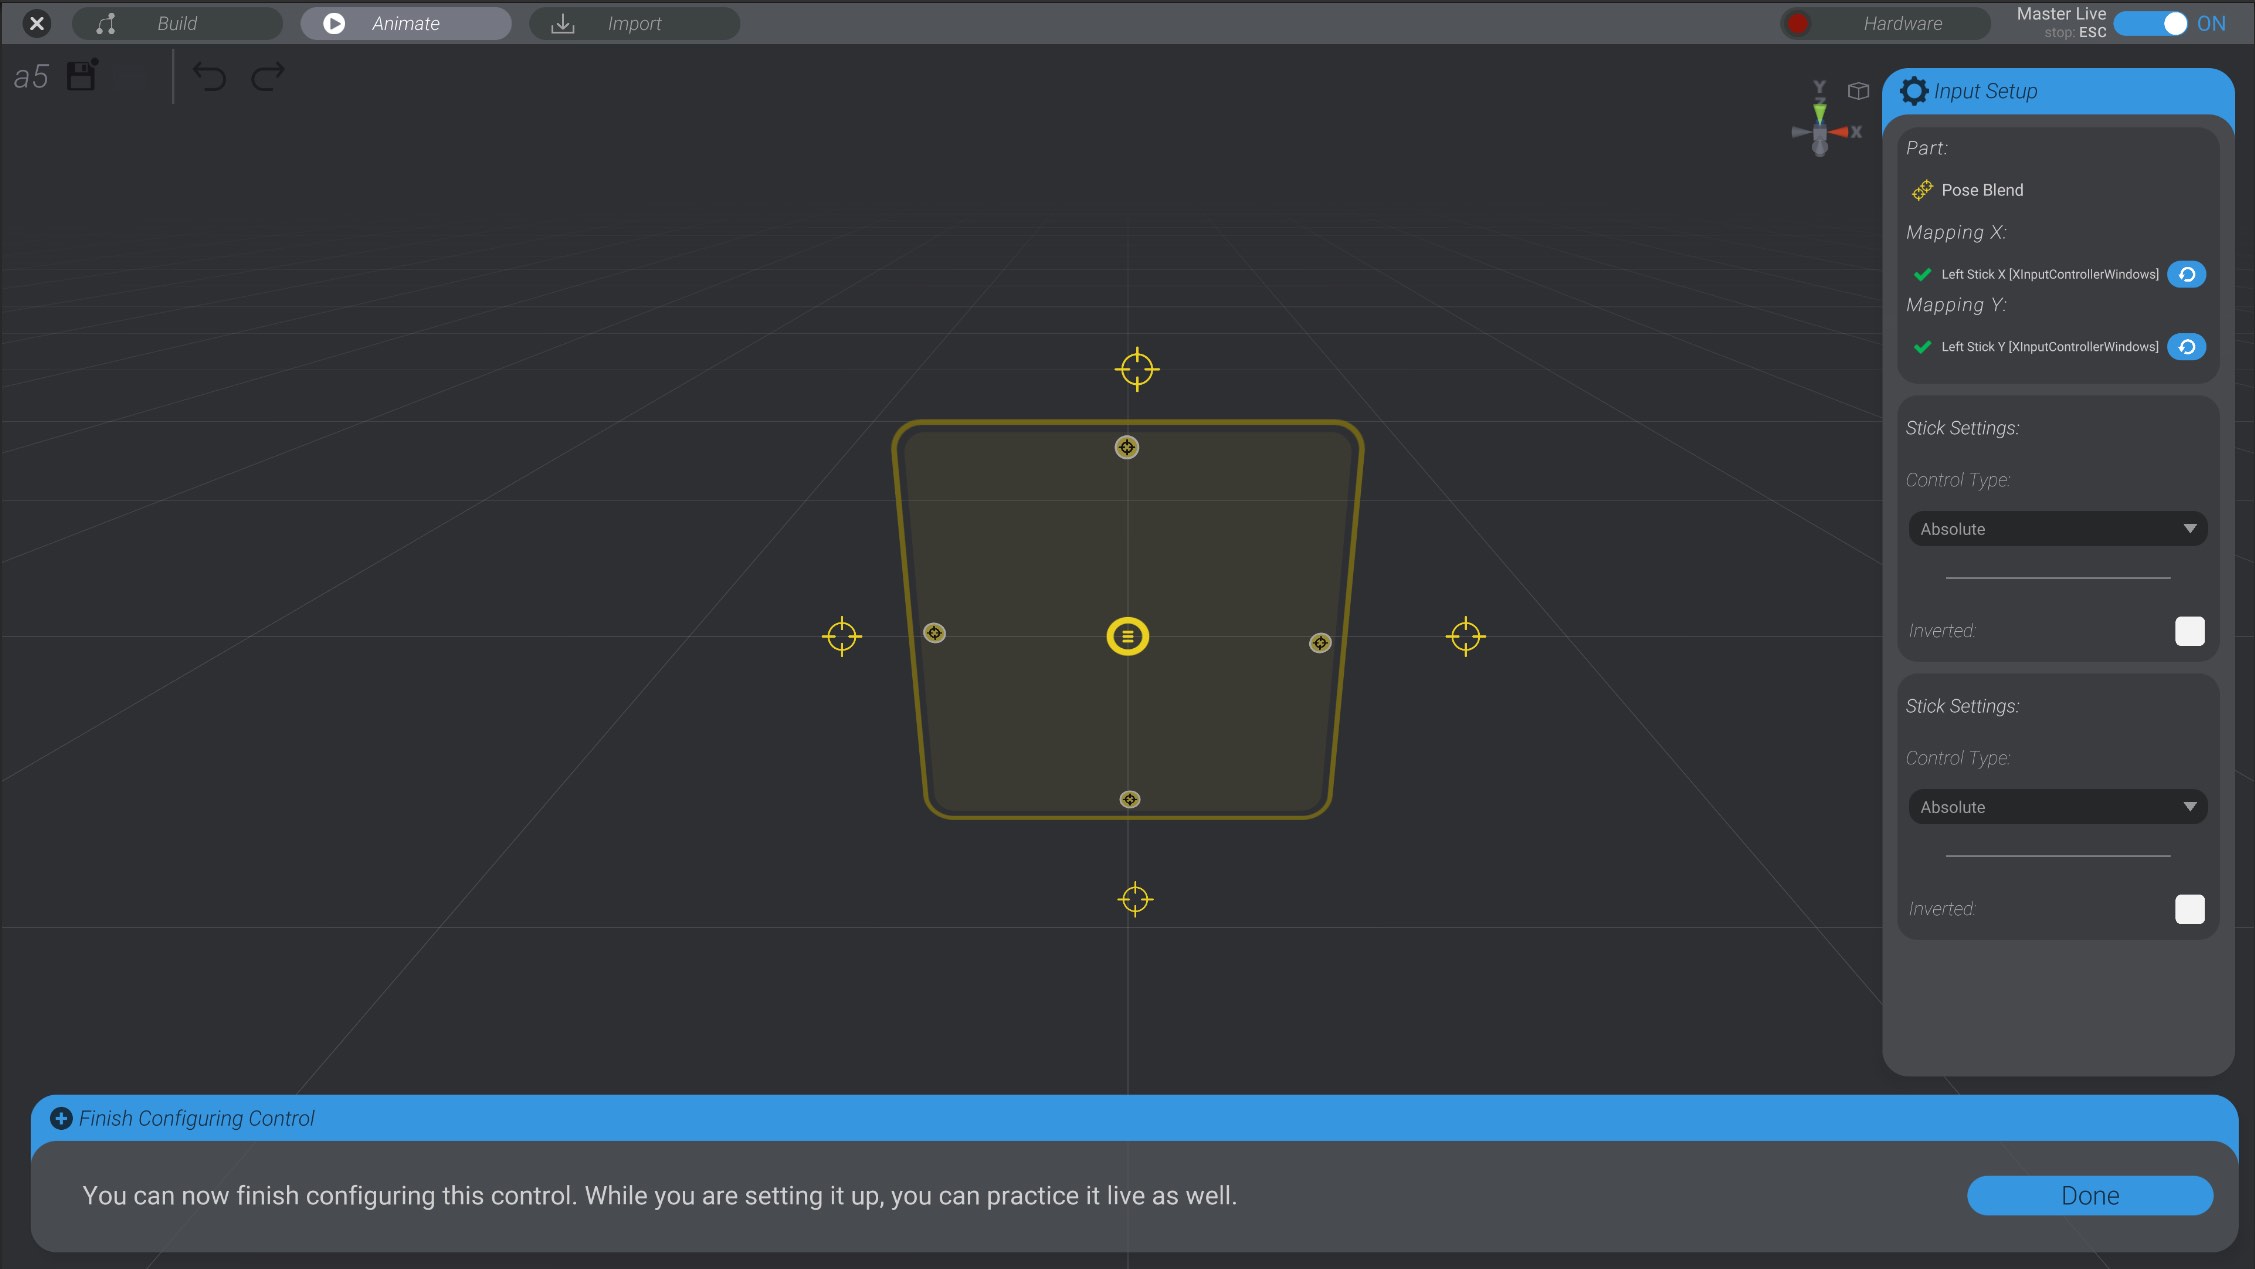
Each axis is independent of the other, so you can mix and match input types however you’d like to control your 2D pose blend.
Trigger events and on/off events behave a bit differently than motors, curved events, pose blends, etc. With a trigger event and an on/off event, there is really only an on/off state or a “fired” state. There is no analog or curved movement. As well, with on/off and trigger events, you can only use a digital or analog button; stick inputs are not supported for these part types.
For on/off events, you have the following control types:
Control Type: Hold
The event will be on while the button is pressed, and off when unpressed. Invert does the opposite of this behavior.
Control Type: Toggle
The event will alternate between on and off with each button press.
For trigger events, you have the following control types:
Control Type: Fire on Press
The event fires when the button is pressed.
Control Type: Fire on Release
The event fires when the button is released.
Control Type: Fire on Press and Release
The event fires when the button is pressed and when it is released.
For both on/off and trigger events, if you use an analog button, there will be an additional threshold value to determine at what point in the press of the analog button a “press” is counted toward changing the on/off state or firing the trigger event.