Beginner Topic used frequently in Bottango workflows.
Live input lets you puppeteer parts in real time and record that performance into editable keyframes and curves, using devices like gamepads, keyboards, and custom controllers. In this section, we’ll look at how Bottango not only supports that workflow, but builds upon it with the power of the modern 3D animation workflow, by converting live recorded input into editable keyframes and Bézier curves.
The short answer to this question is anything that acts as an HID device. If you’re not immediately familiar with what that means, any keyboard, mouse, and most any USB game controller are supported. Although I cannot test all the game controllers that exist, if it’s a fairly common controller or joystick, and you can use it to control a game on your computer, it probably works with Bottango. Even if it’s an esoteric one, it just might as well.
Any device you build yourself that can act as an HID device can be used as well, in case you want to build your own animator’s console with potentiometers, switches, buttons, etc. An Arduino Leonardo is a great way to build your own hardware that can act as an HID device. Look at tutorials on that specific board for how to do so.
You can use an imported audio clip or live microphone input to create animations based on sound-reactive motions. You can also send input values into Bottango to be recorded using the REST API. Finally, with DYNAMIXEL actuators, you’re able to loop back movement on your real-world robot and create digital animations from real-world movement.
The following input types are not yet supported but planned for future versions:
If you can animate it in Bottango, you can puppeteer it! Not only does that include motors and joints, but custom events and pose blends can be puppeteered and recorded as well! As more effectors are added to Bottango in the future, live control support will be included as part of those new features.
To start recording live input and puppeteering, you need to create a Control Scheme. In Bottango a Control Scheme is a set of controls that define the binding between the parts in your project (like a joint or pose blend) and specific inputs, like the “0” button on your keyboard, or the horizontal axis of the left stick of a game controller.
To create your first control scheme, go to the Animate view in Bottango. Underneath the animations menu on the right of the screen, you’ll see a menu to set up a “Controller Input Scheme.”
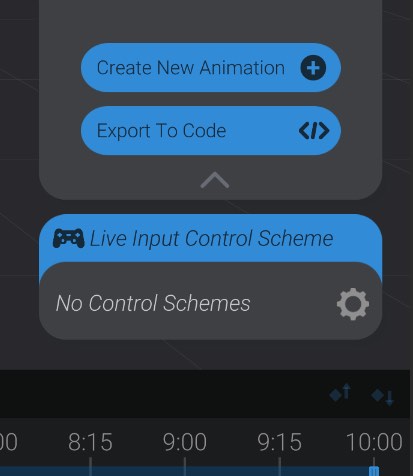
Unless you have previously created a control scheme in your project, you’ll see the warning “No Control Schemes,” indicating that this project does not yet have at least one control scheme in place. Hit the “gear” icon to configure and set up your first control scheme.
Here you’ll see the control scheme editing window, which similarly warns you that you don’t yet have a control scheme set up.
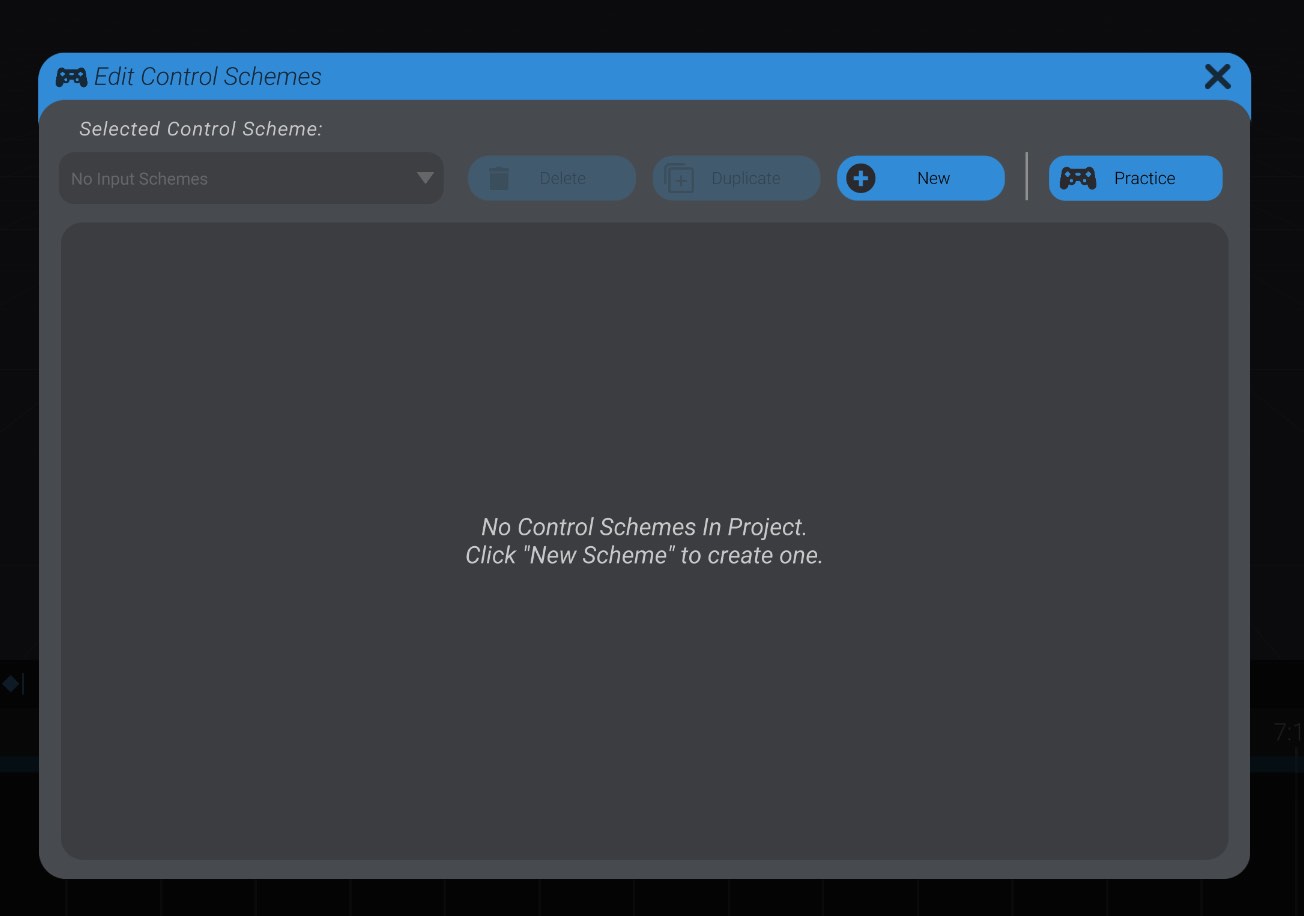
Click the “New” button to create a new, empty control scheme.
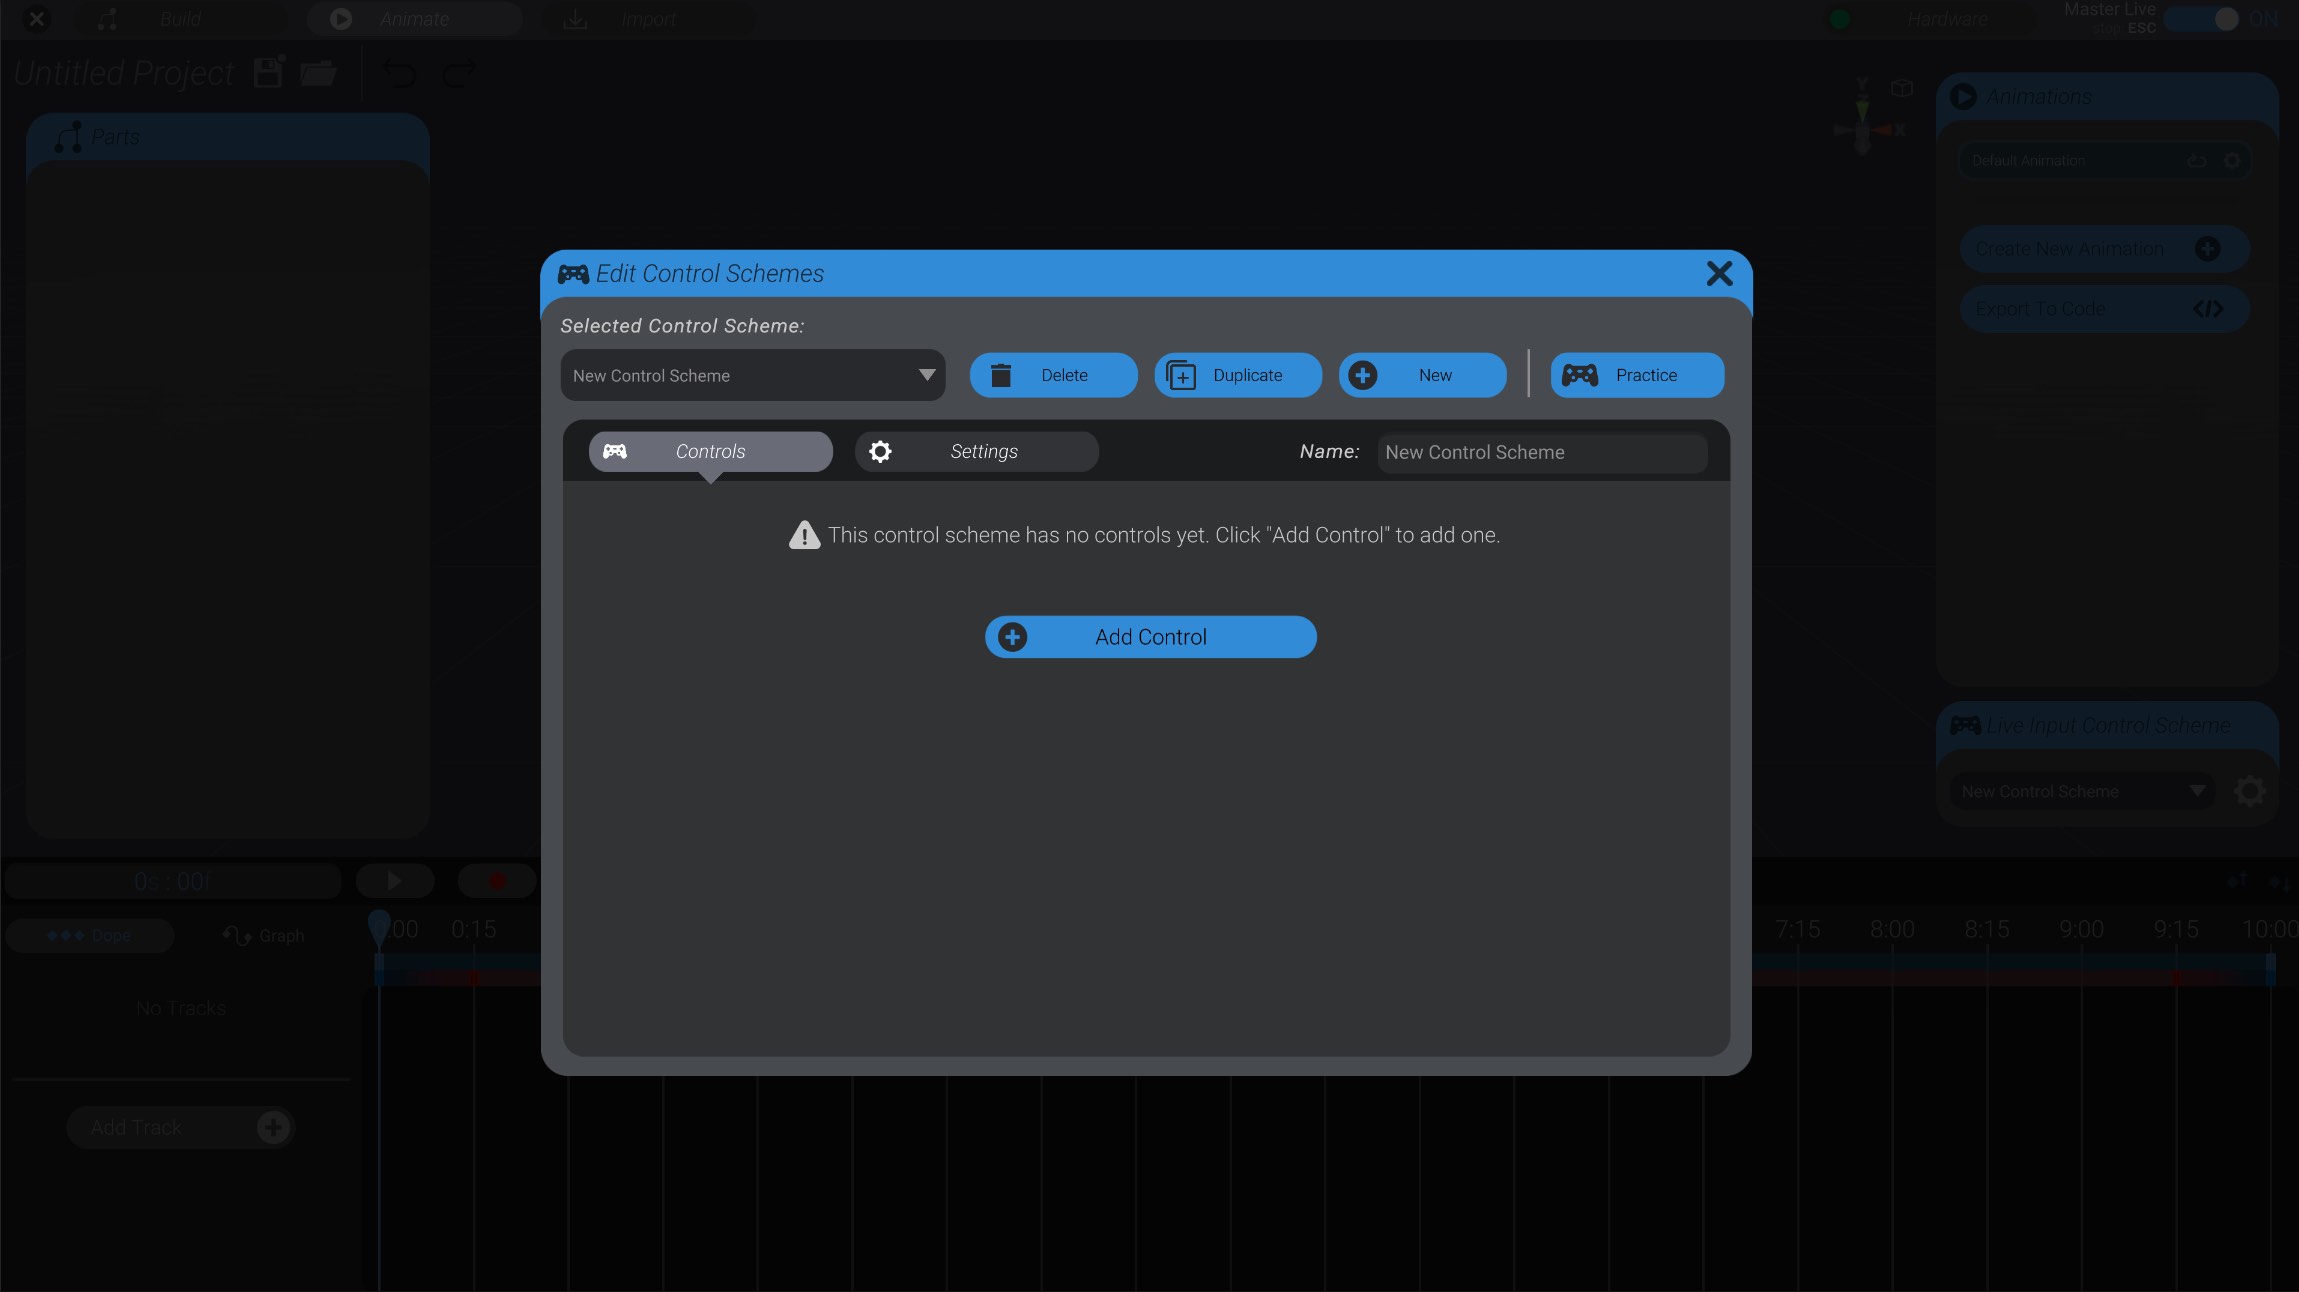
So we now have a new control scheme, which you can see is named “New Control Scheme.” However, a control scheme is a container of controls, and this container is still empty.
Let’s add a first control, by clicking the “Add Control” button.
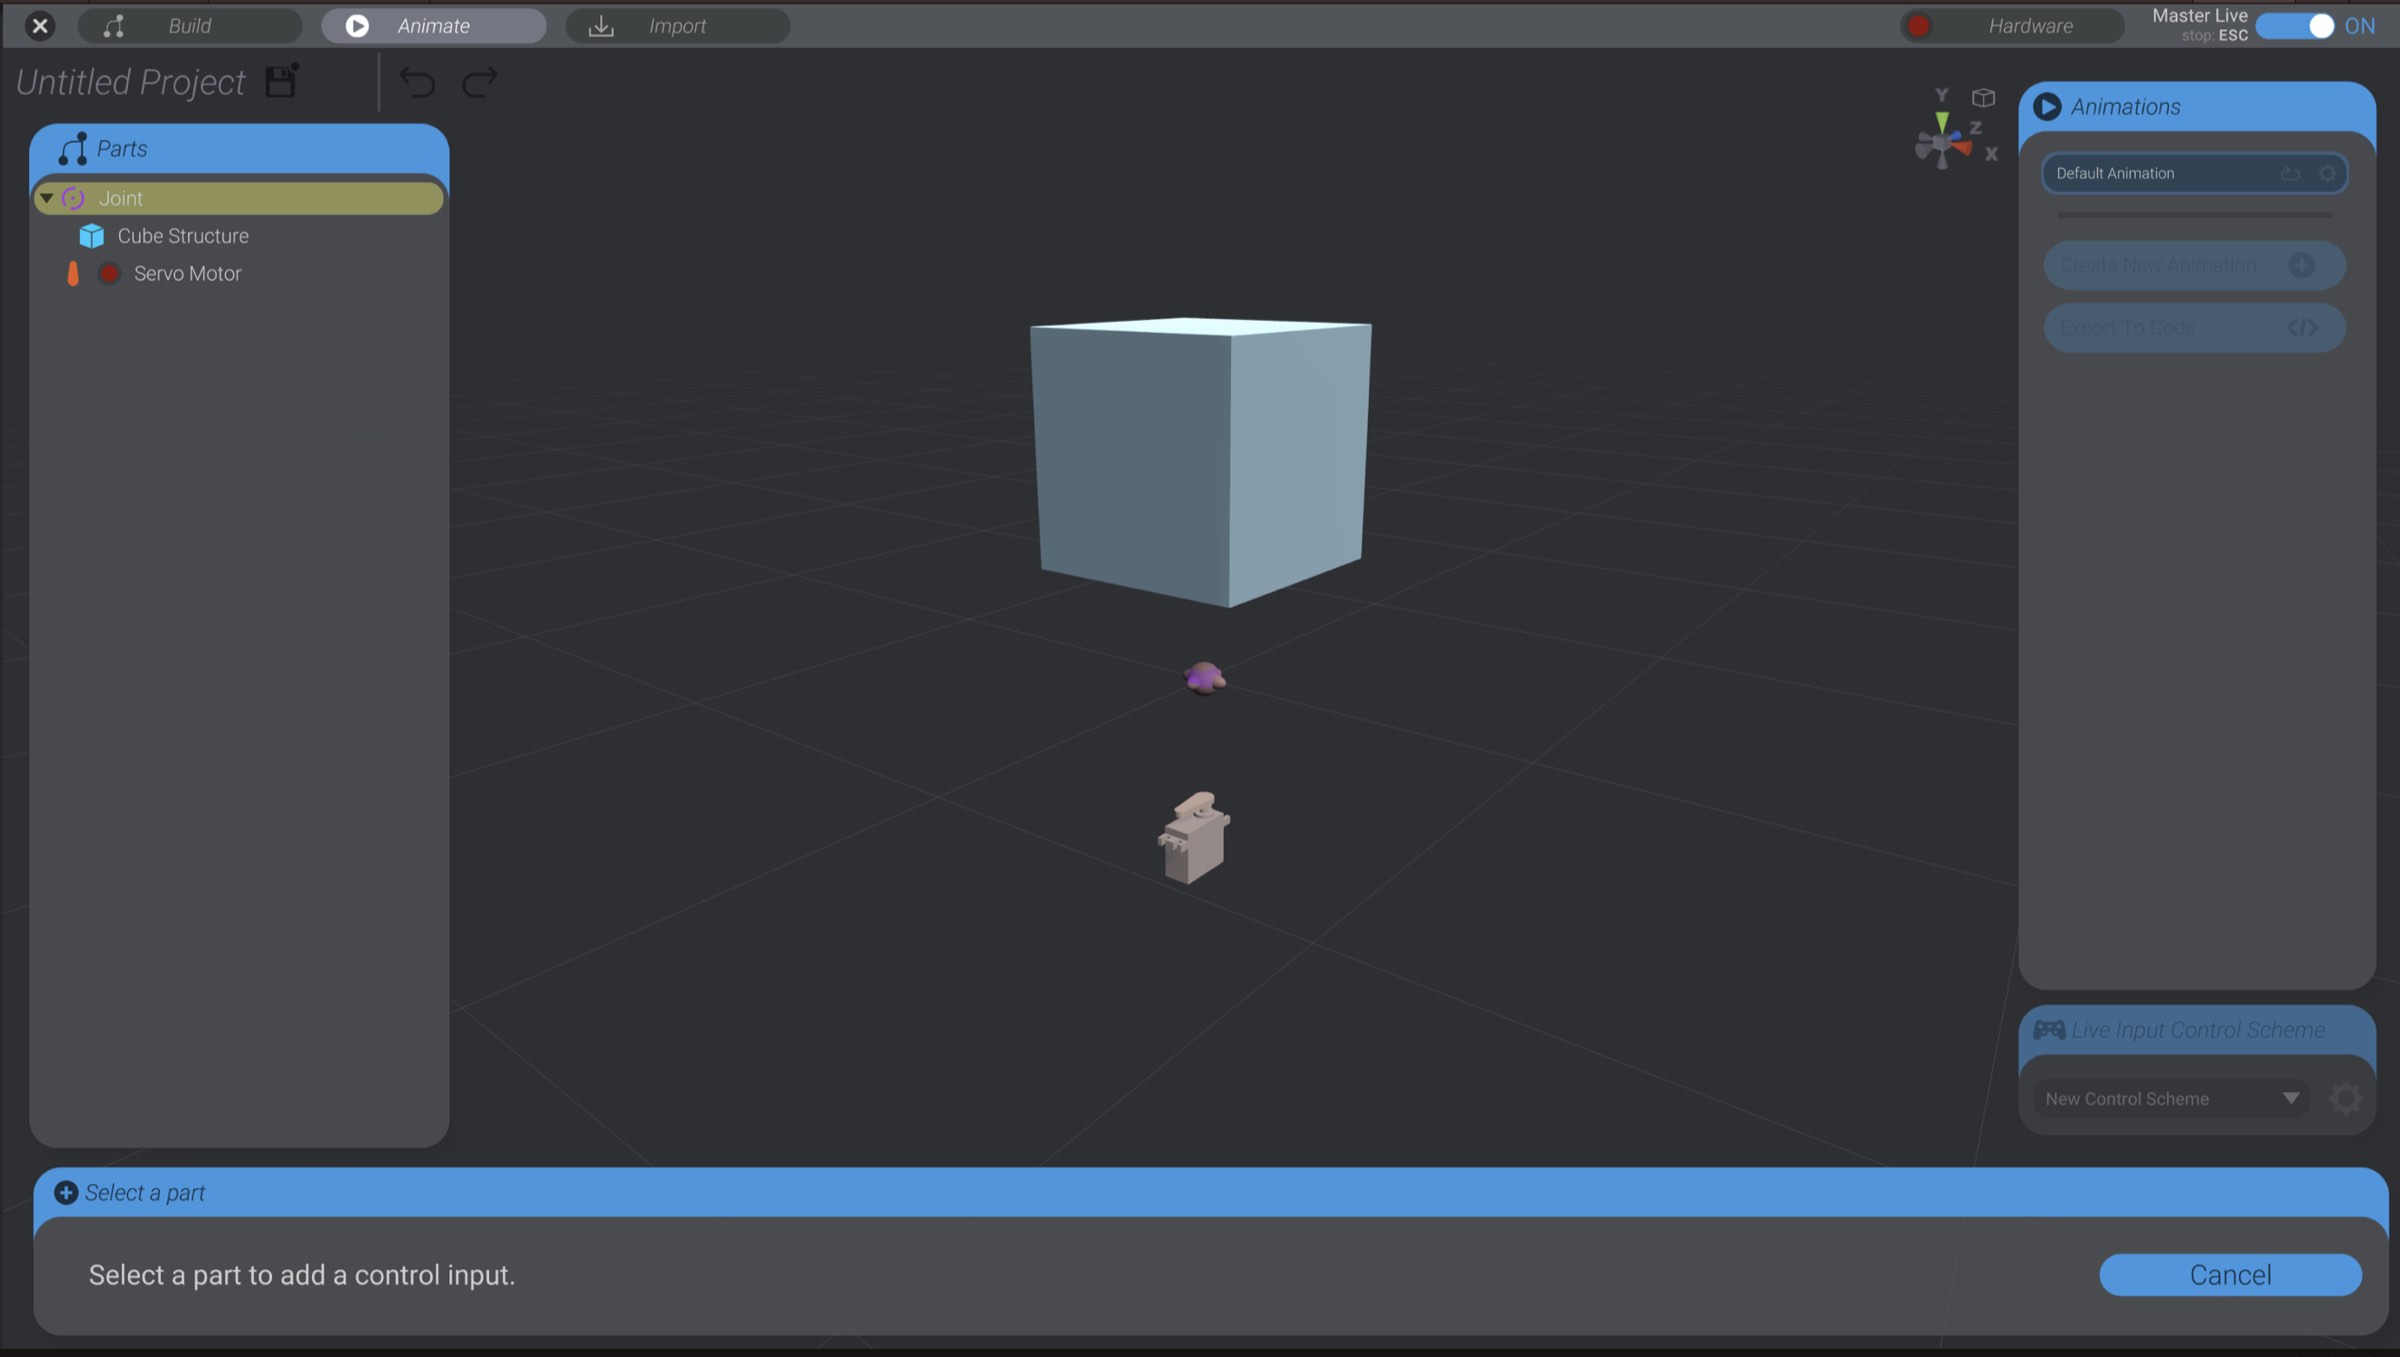
Adding a control has three major steps. First we select the part we want to control with live input. Then we select the input we want to use to control that part. Finally, we tweak and configure the settings of how that input maps to control of the selected part.
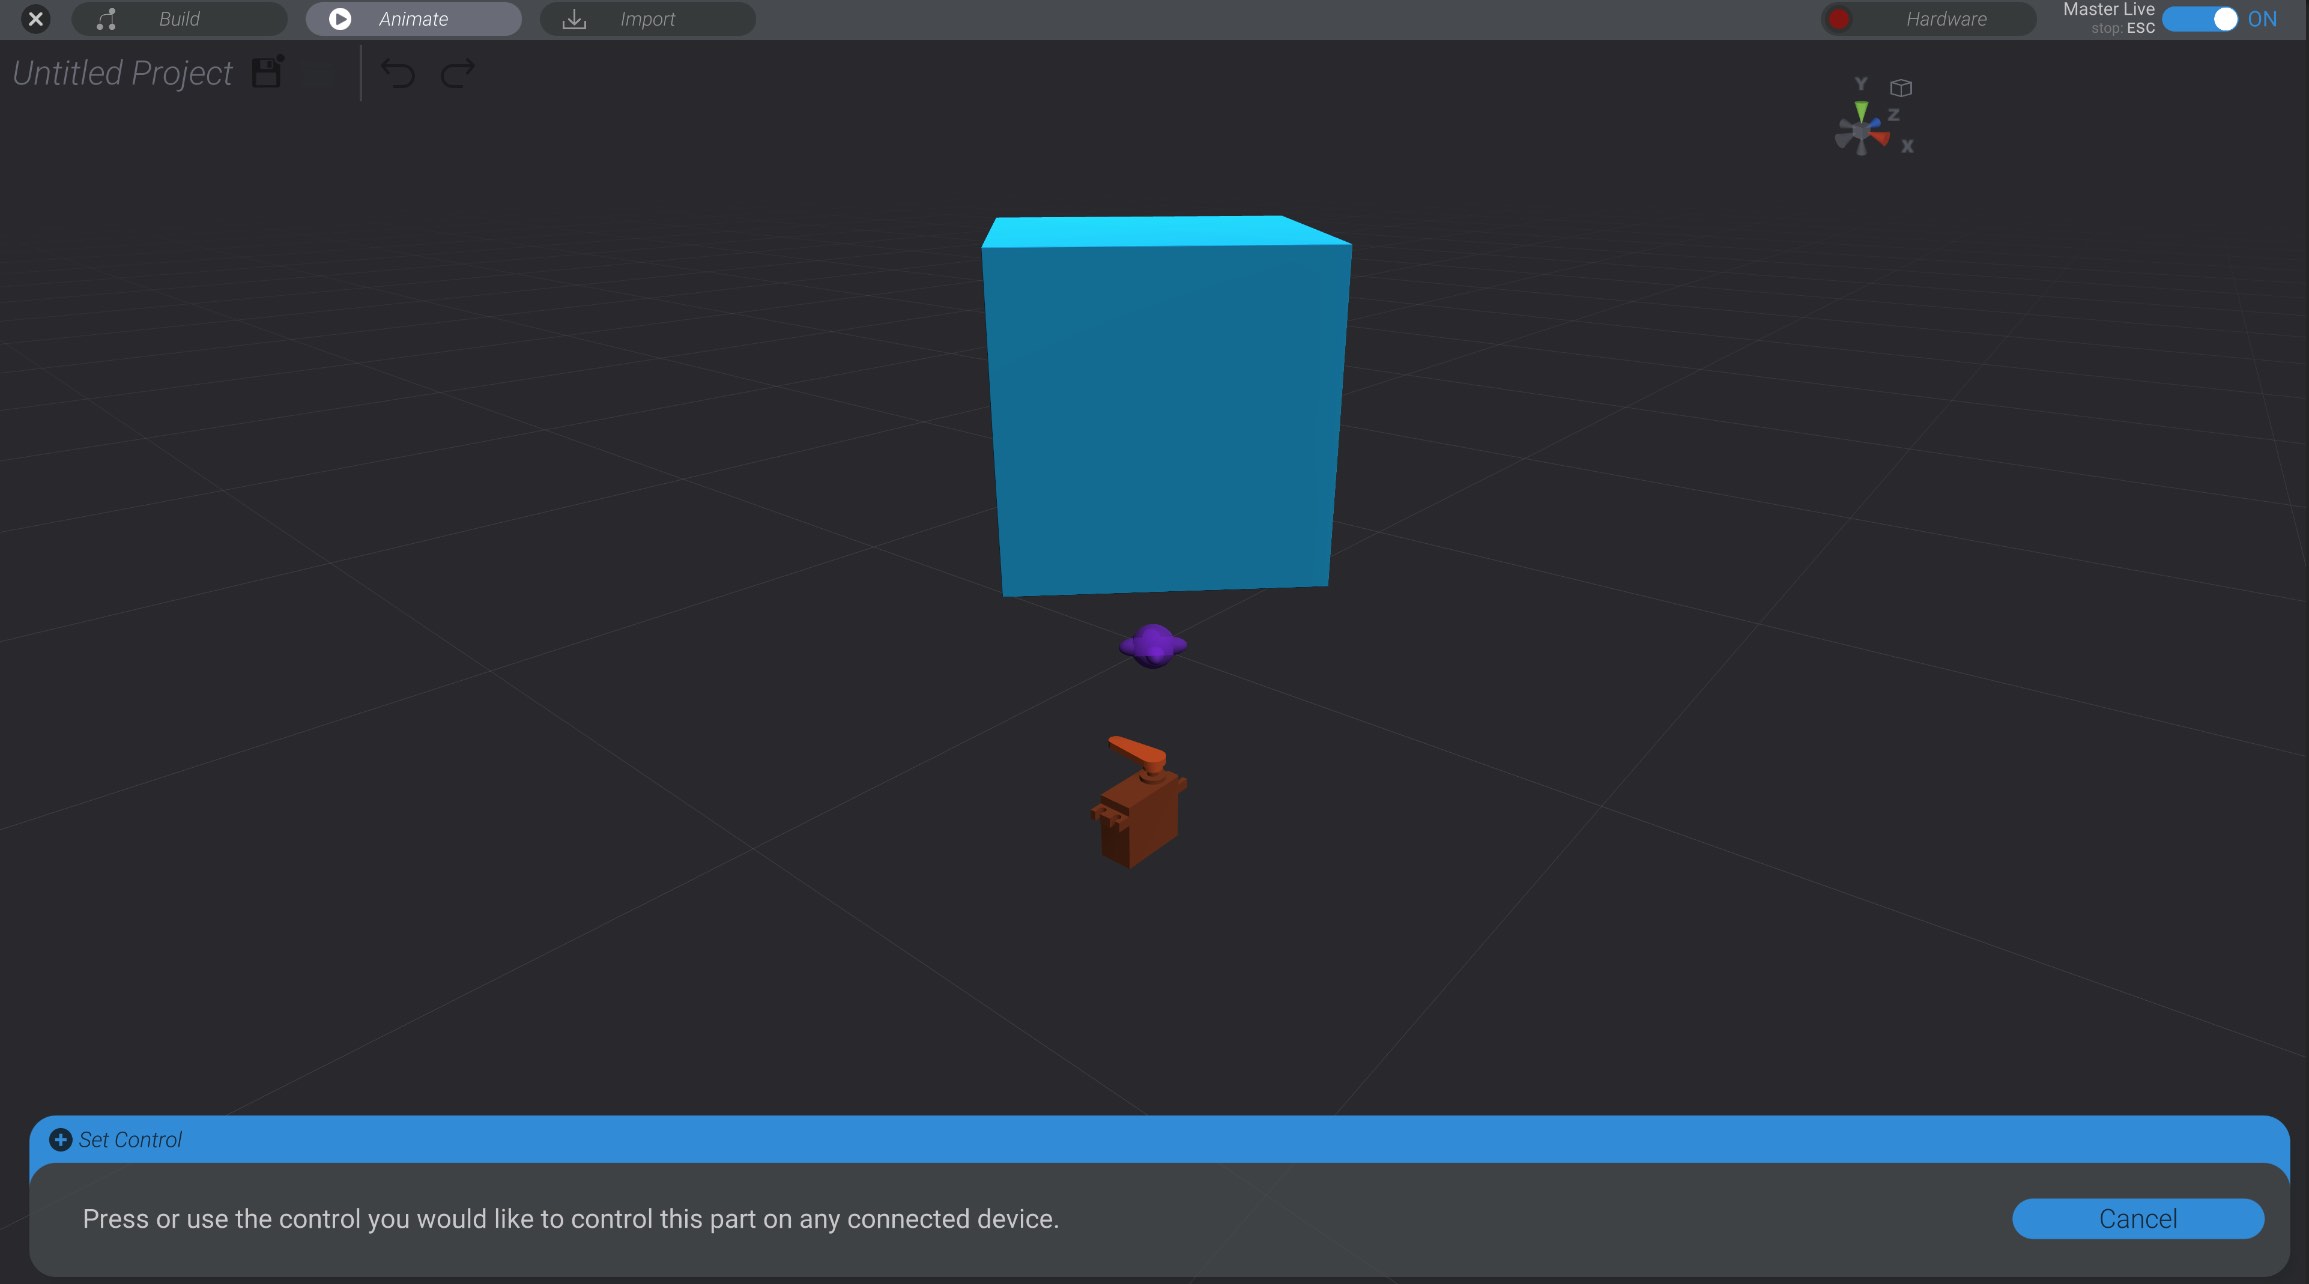
For this documentation, I have a very simple project with a cube in a joint, and that joint linked to a servo motor. When I click add control, I’m prompted to click to select the part I want to control:
I click on the joint, and am prompted to now select the kind of input I want to use to control this part.
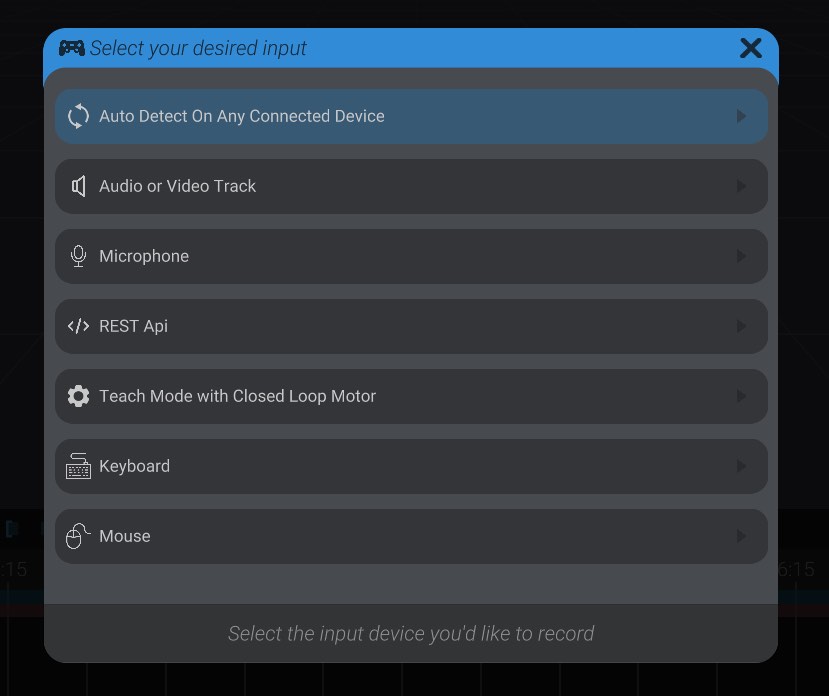
Here you can see I’m presented with a few options. I can select a specific device connected to my computer (mouse, keyboard, joystick, gamepad, etc.), choose an audio or video track, teach mode with a closed-loop motor, REST API, or auto-detect.
If I select auto-detect, I am prompted to press or use the control I would like to use, and Bottango will automatically detect it. For example, if I wanted to use the left/right axis of a gamepad’s left stick, I would just move that stick to the left or right.
You can also select a specific device, and see all the options available on that device.
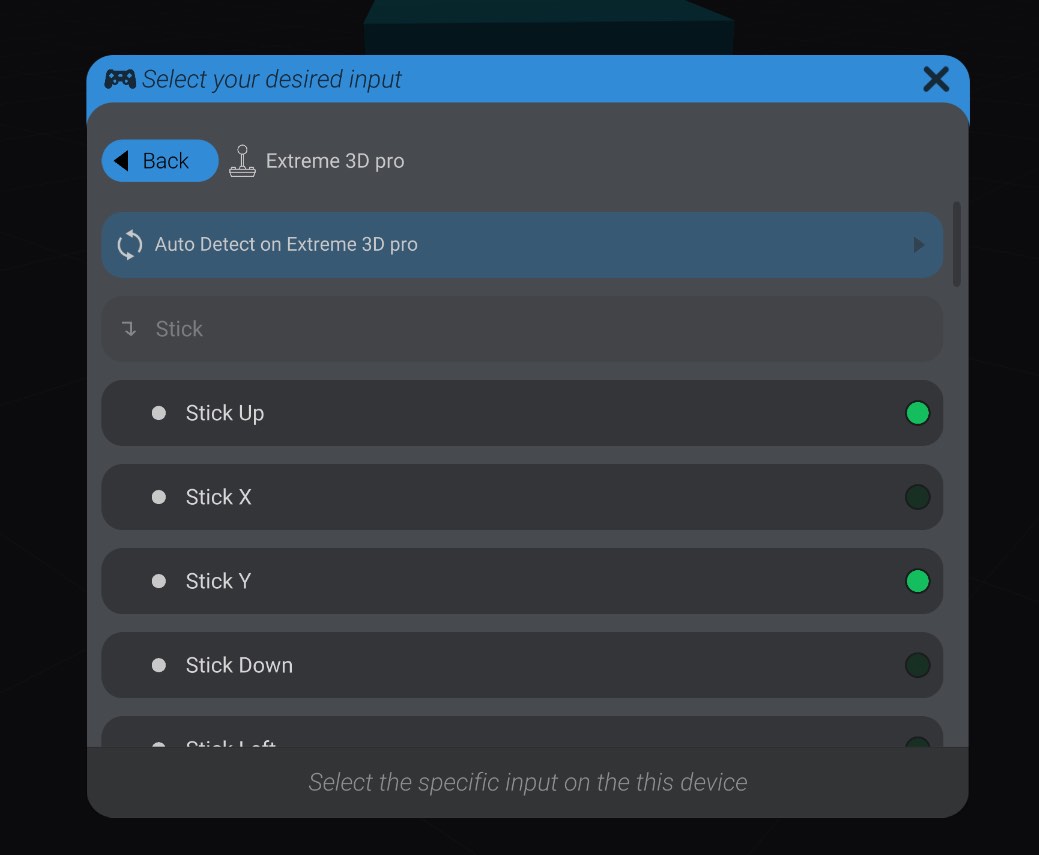
Next to each option will be a green light. If you are moving or using the input in question on that device, the green light will light up to help you identify the input you want to use. Click an option to select that input. You can also auto-detect on only that selected device. This behaves the same as the earlier auto-detect option, except that auto-detecting input is limited to only the selected device.
In this first example, I’m going to use the horizontal axis of the left stick of a game controller that is connected to my computer via USB.
This creates a control in my control scheme, between the selected joint and the left stick of any connected game controller. That control has the default settings chosen, but we can tweak them significantly.
After selecting the joint, and then pressing the horizontal axis of the left stick, I have created the control in my control scheme, and can now practice and configure that setting. You’ll notice while in this menu, using the linked input will live control the selected part, so that you can test out configurations.
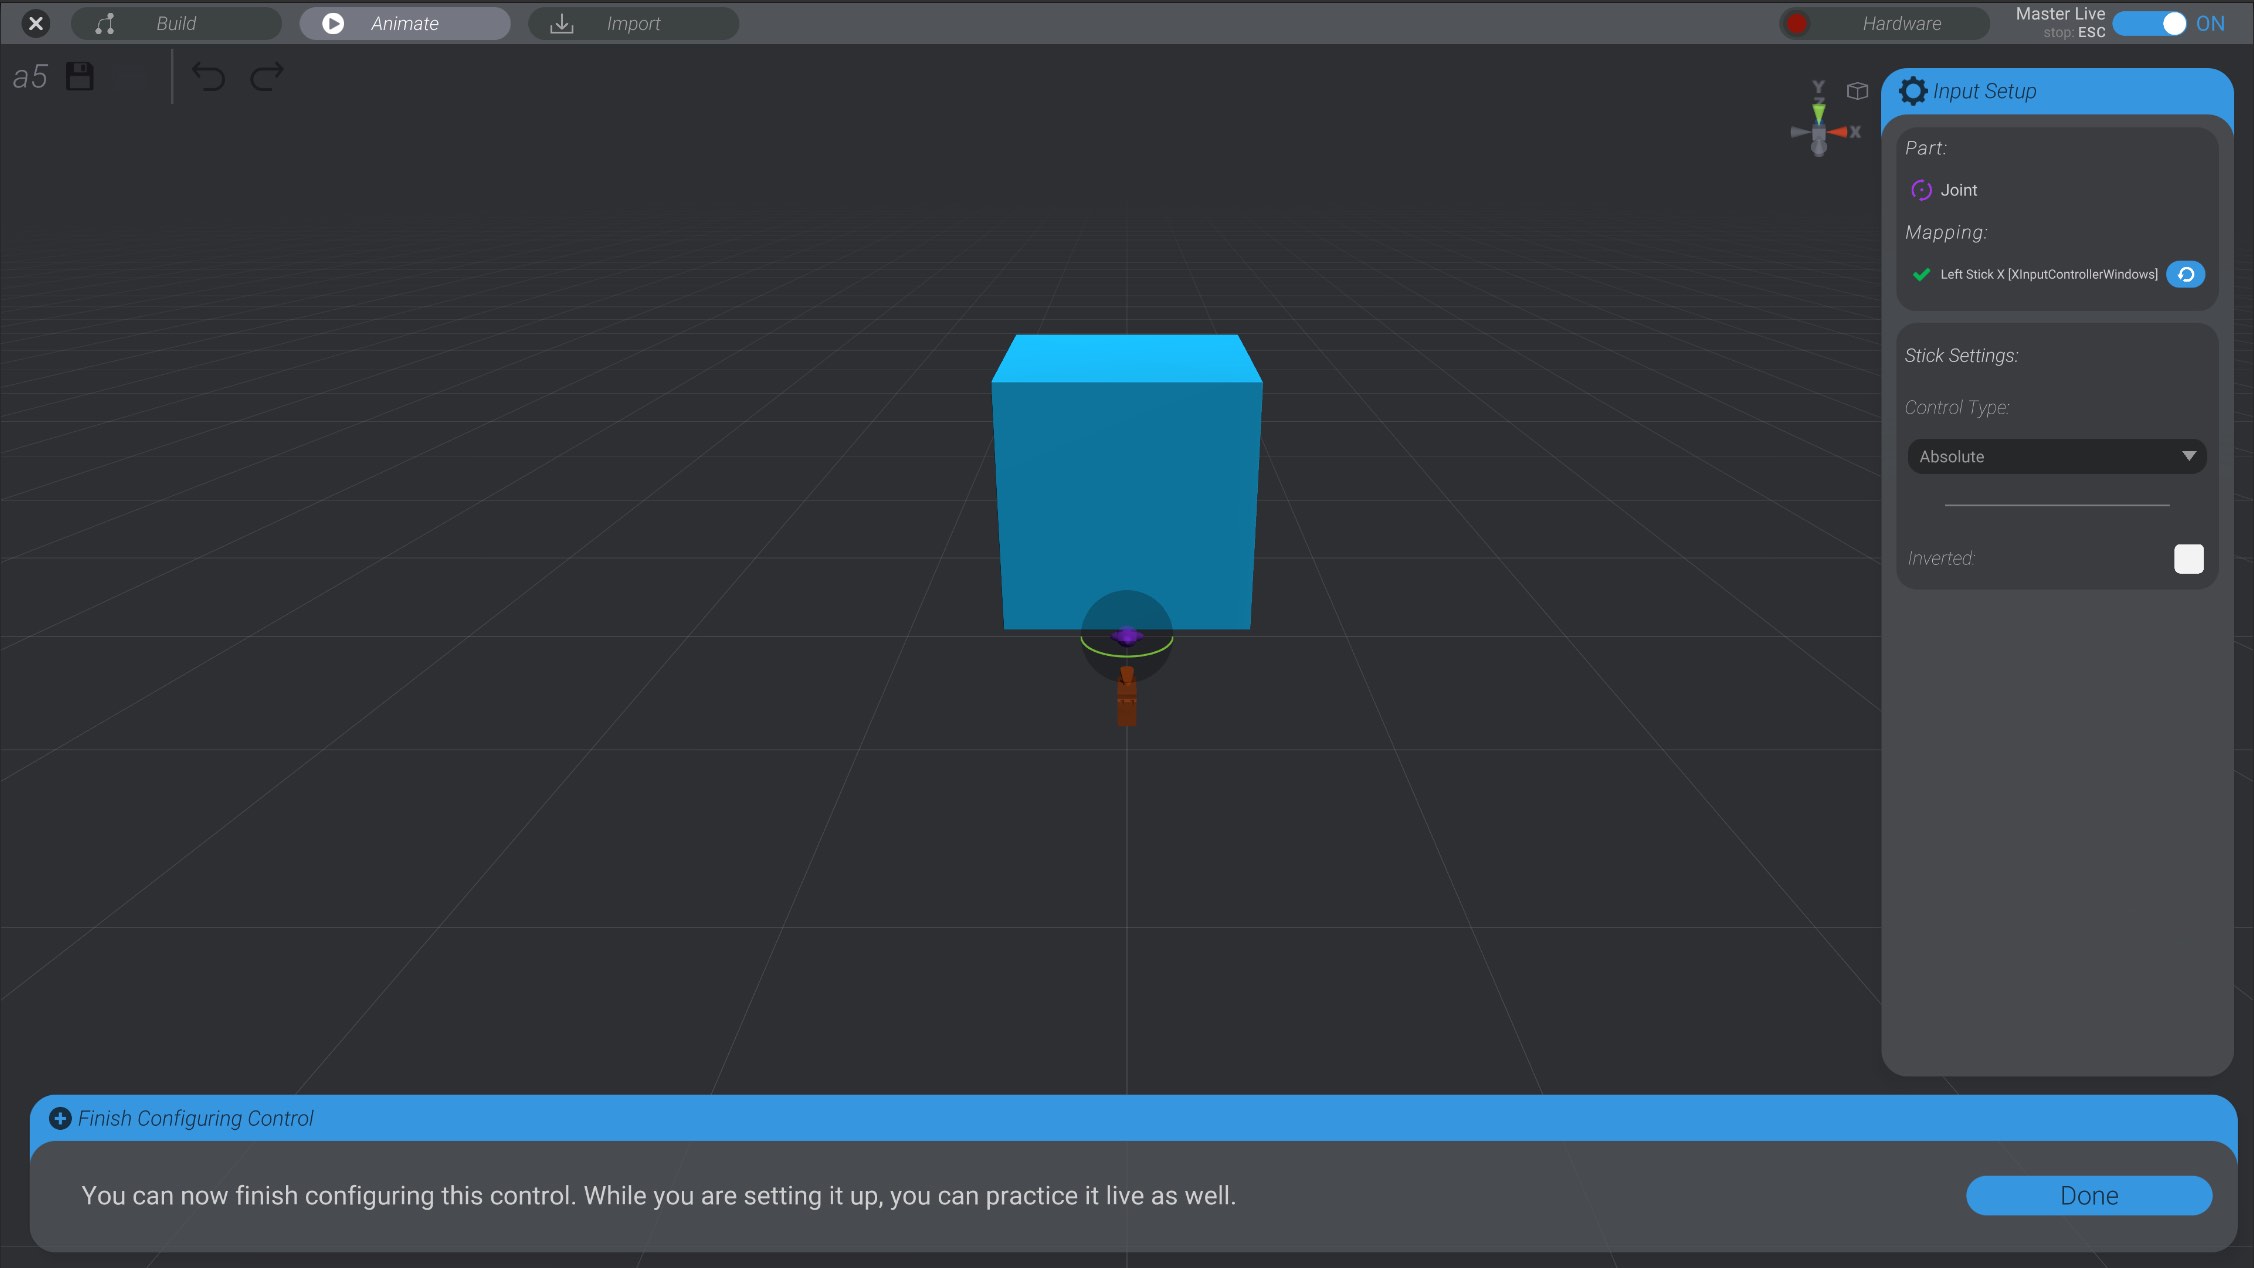
For now, let’s just click “Done” to save this control, and try our hand at recording. We’ll look at configuration options in Control Scheme Settings & Controls and Detailed Control Settings.
Going back to the Animate view, you’ll see that now that we have selected a control scheme, the animation view has changed a little bit.
A record button has been added to the view next to the play button:
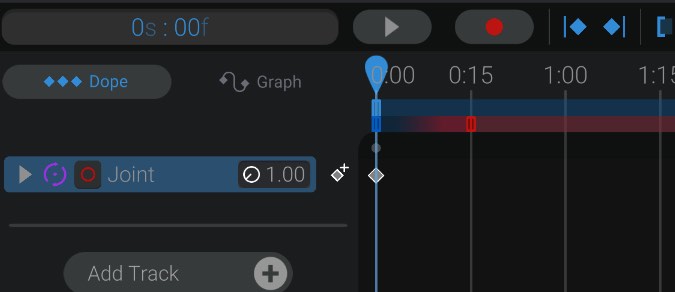
As well, each track that has a recording input associated with it you’ll notice a small red circle button on the track as well. This button allows you to quickly disable or enable recording on that specific track.

A new slider has been added to the work area. This slider represents where in the work area it’s OK to capture and record input. Bottango will capture live input and insert keyframes only where the second smaller slider overlaps. We’ll discuss the different colored handles of this slider in Control Scheme Settings & Controls.
For now, I’ll press the record button in the animation view. This will begin playing my animation. However, it will also begin using my live input, and showing that live input instead of the existing animations when recording. After the animation is finished playing, or I hit pause, my live input will be converted into keyframes, and replace any existing animation data over the record area time.

Here you can see Bottango captured my input, and added keyframes for all the recorded movements. These keyframes are editable just like keyframes you created yourself, if you want to tweak the resultant animation. As well, you can undo recording after it is applied.