Beginner Topic used frequently in Bottango workflows.
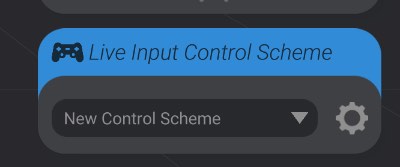
Press the gear button on the Controller Input Scheme menu to edit the settings on your control scheme.
This will bring up the control scheme settings menu.
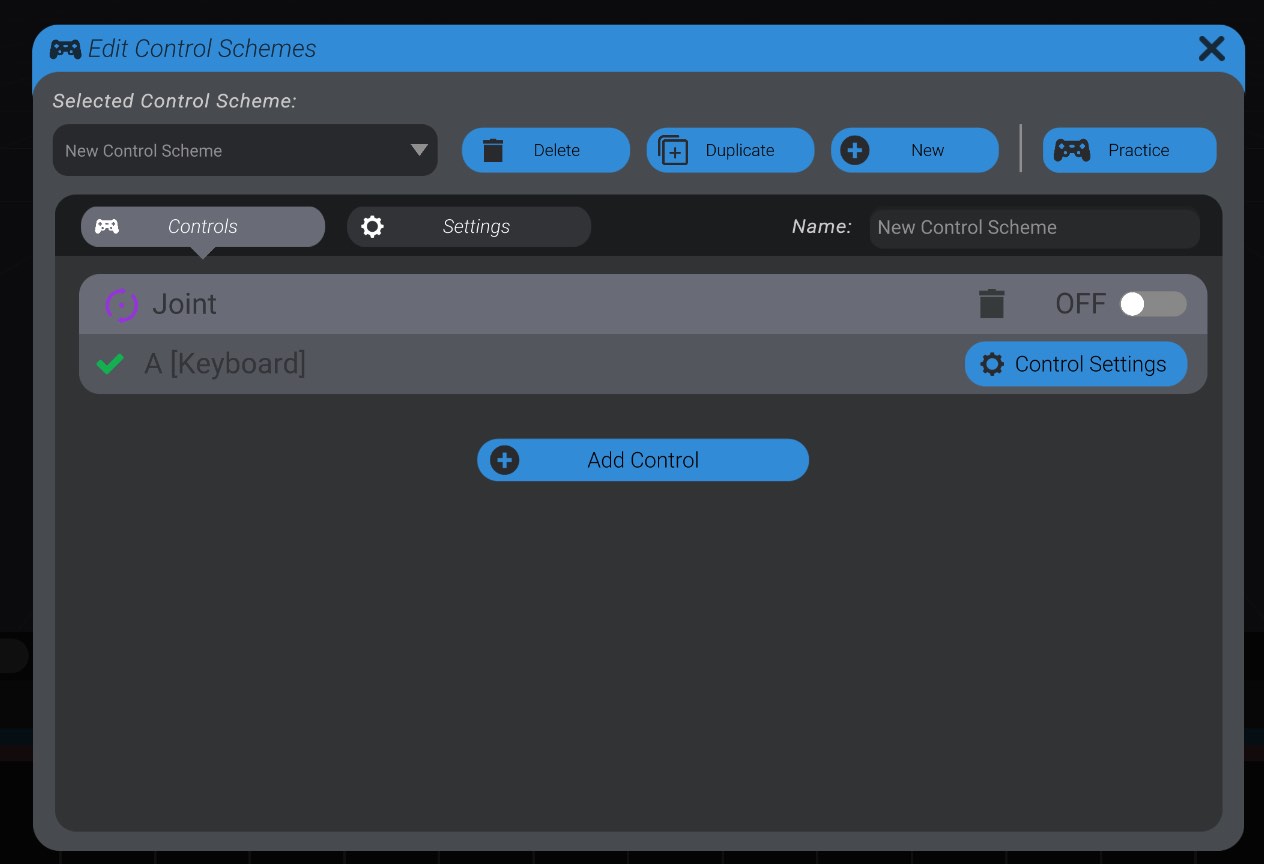
A control scheme is made of any number of individual controls, in which you map between a live input like a button or a stick, and an animatable part in your project. The controls that are in the selected control scheme are listed in the bottom of the menu:
For each control, you’ll see the name of the part selected. You can also press the trash button to delete this control from the control scheme.
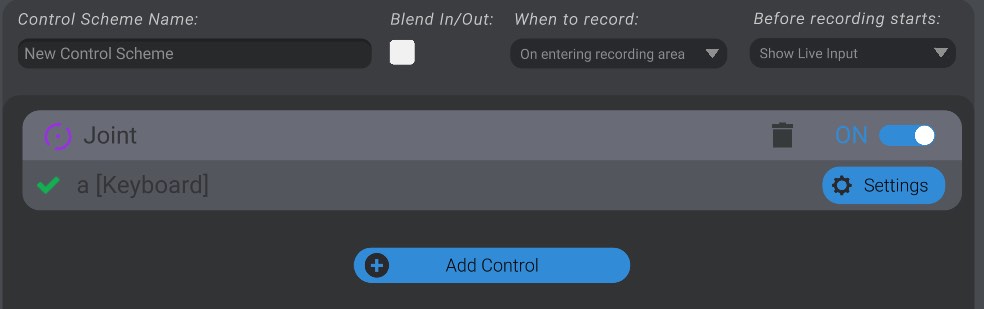
The on/off toggle sets whether that control is enabled. When enabled, it will show live input and capture keyframes while recording. When off, it will act as if the control is not part of the control scheme at all. This can be useful if you want to record just a certain part of your control scheme, and are happy with or don’t want to affect the other animation tracks.
The on/off switch performs the same behavior as the small red button on the track in the animation view:

The bottom portion of each cell shows the current binding. Here you can see this joint is mapped to the “a” key on my keyboard. A check is shown if Bottango has that input currently connected to the computer, and an X is shown if it is disconnected. Finally, you can press the settings button to configure in detail how the live input maps to movement of the selected part.
Finally, you can always add another control to the control scheme using the “Add Control” button.
At the top of this menu, you can see a dropdown labeled “Selected Control Scheme” which lets you select which of your control schemes you are configuring. As well, you can delete or duplicate the selected control scheme, as well as make a new empty control scheme.
As well, at the top of the menu is a “Practice” button. This will turn all your live input on for the selected control scheme, and let you practice and puppeteer your project outside of an animating context.
To the right of the settings button, you can change the name of the selected control scheme.
The menu defaults to the list of controls in the control scheme. You can also configure some settings for the control scheme overall. Click on the “Settings” tab.
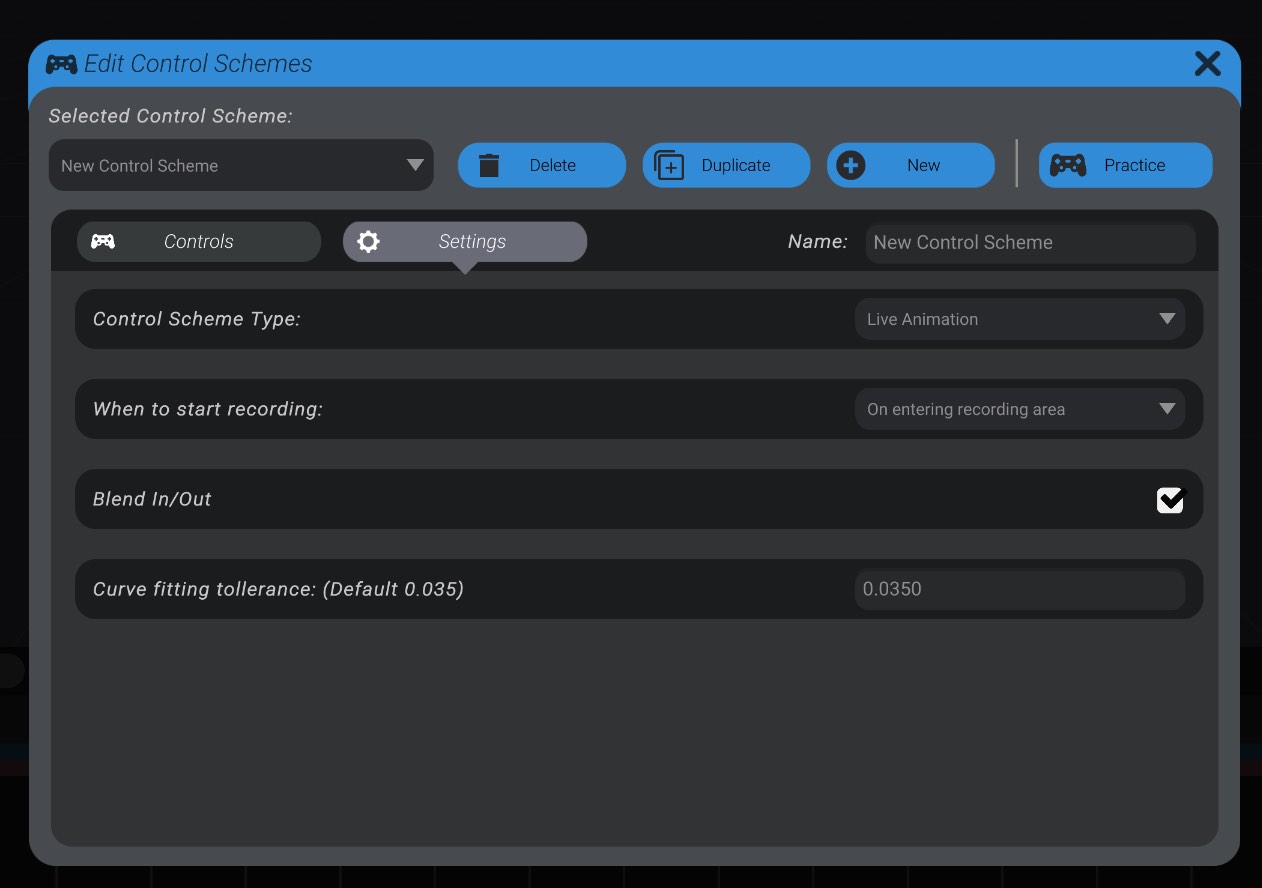
“Control scheme type” lets you switch to snapshot recording. We’ll cover that in Advanced Input & Workflows.
“When to start recording” lets you select when your animation will actually start converting your input into keyframes.
The default setting is “On entering recording area.” This means, once you hit the record button, keyframes will only be captured once your playhead enters the smaller record area slider:

You can also select “On First Input.” With that option selected, keyframes will be captured only once you first use any of the mapped inputs, while your playhead is in the smaller record area.
Finally, you can select “Practice (don’t record).” This will still show live input when you hit the record button, but it won’t actually change or add any keyframes to your animation.
“Blend in/out” is enabled by default and lets you blend smoothly from your existing animation to live input when recording starts. With this option disabled, your animation will jump immediately from any existing animation to whatever state is shown by your live input. However, by enabling it, instead, your capturing will over time blend from your existing animation to your live input. You can control the blend in and out time with the sliders on the record area in the animation view.
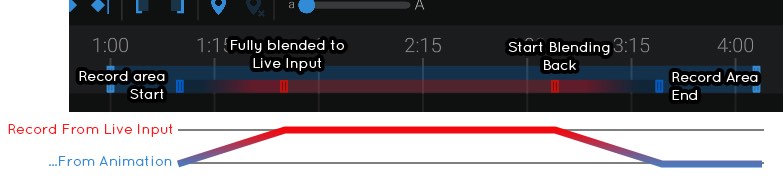
The outside sliders of the record area dictate where the record area begins and ends. The inside sliders dictate the time to blend from existing animation to live input.
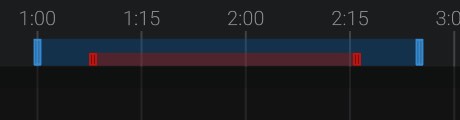
If you disable “blend in/out,” the inside blend time sliders go away, and you can only set the record area range.
“Before recording starts” is shown if you disable Blend in/out. This lets you select what you want to see when you hit the record button, but your playhead hasn’t yet entered the record area. By default, it will show any existing animation data, and then switch to live input once keyframe capturing begins. However, you can set it to “Show Live Input” and you will see live input even when keyframes are not being captured.
“Curve fit tolerance” is an advanced setting that controls how many keyframes are created after a recording session is done. In order to let you edit and tweak the animation after you record it, and as well for performance considerations, Bottango converts your input into a series of keyframes, just like if you had entered them manually. However, that process is inherently lossy, or else you’d have a keyframe on each frame. The lower the number here, the more keyframes will be created. Before you set it to the minimum, consider that more keyframes is not inherently better, as that will make editing and tweaking the result more difficult, and may create so many keyframes that performance of the app and playback is impacted.