Advanced Topic Skip if you’re new, explore when you’re ready.
In addition to USB input, you can create audio-reactive animations, either to an imported audio track or to live microphone input.
When selecting the kind of input you want to control the selected part, choose either audio or microphone.
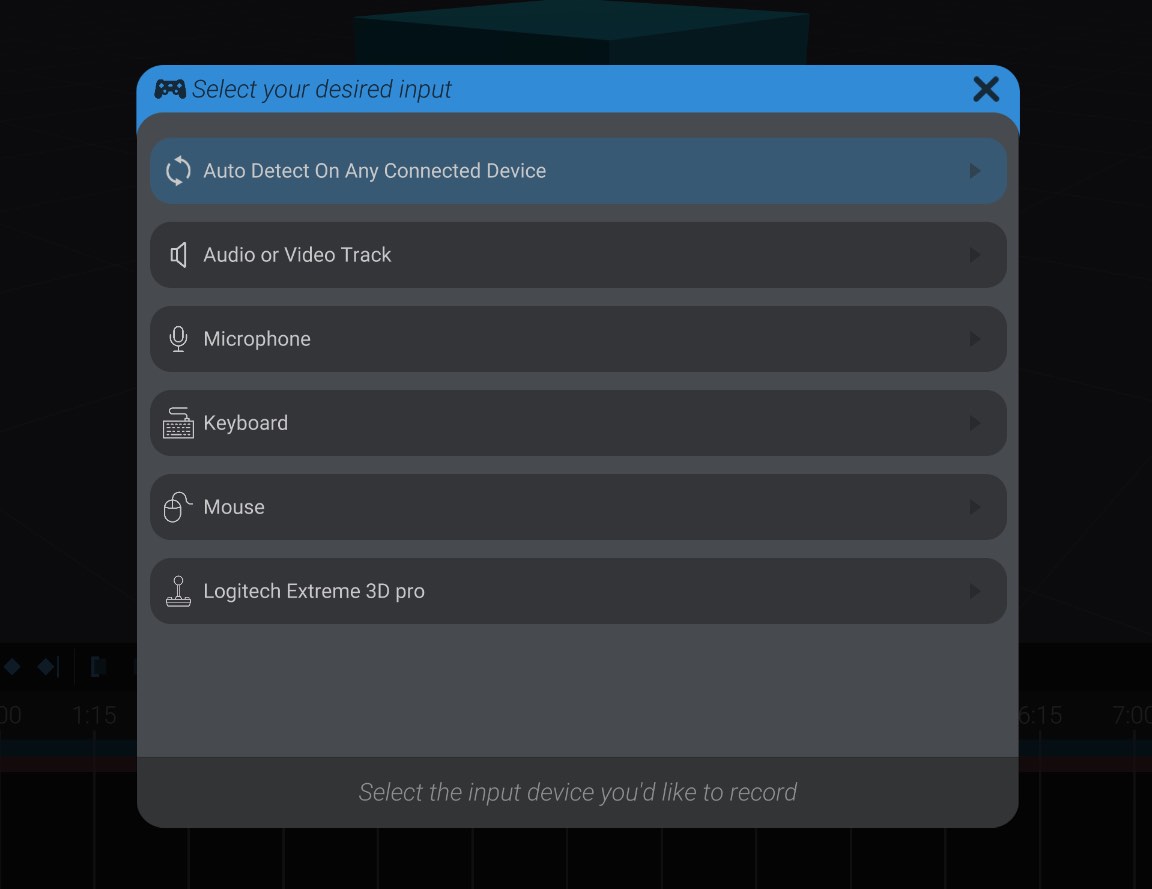
Selecting an audio or video track prompts you to select from an imported audio or video track in the project. If you have not already imported an audio track, and aren’t sure how, see Importing Audio and Video.

Once I’ve selected an audio or video track, you’ll see the following configuration settings for audio-reactive animation:
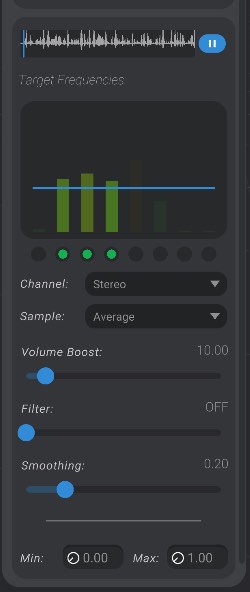
We’ll go through each setting top to bottom.
At the top you’ll see a preview of the audio selected. (Note that no waveform will be shown for a video track.) You can press play to preview your current settings on the animated part, and scrub this section.
Next you’ll see a section to visualize and set what portion of the audio spectrum to create reactive movement to. Bottango splits the spectrum of audio into 8 sections, from the lowest to the highest frequencies. Click to enable which frequencies you want to respond to. As those frequencies are louder, they’ll move the part further, and vice versa as they get quieter. As well you can select which audio channel you want to monitor (left, right, or stereo) and if you want to take the average or peak of the selected frequencies.
In that same section, the blue moving line represents the final calculated movement as the audio plays, taking all settings into account.
Next you have a few options to tweak the audio input. Volume boost will make the overall effect more or less pronounced, as if the audio were louder or quieter overall. Filter will filter out low-end frequencies by the given amount, for example filtering out noise. Finally, smoothing will smooth out the audio reactiveness to make the generated animation more gradual and less hectic. Smoothing is pretty much always recommended in some amount for audio-reactive animation.
The final setting is to set the movement range you want, with the min setting being the movement at the quietest and the max setting being the movement at the loudest. You can set the minimum value to be a higher movement than the maximum if you wish.
On/off events and trigger events controlled by Audio have slightly different configuration:
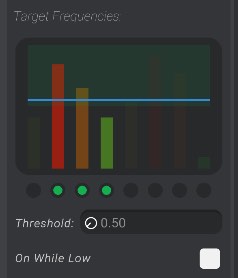
In the frequency setting portion, these parts will show a green band to show the loudness that will cause the trigger or on/off events to change state. As shown in the example above, the on/off event will be on while the loudness is in the top portion, and off while in the bottom portion. You can adjust that band with the threshold value, and invert its driven value for on/off events using the “On While Low” setting. For trigger events you can set if the trigger will fire when the audio enters the band, exits the band, or both.
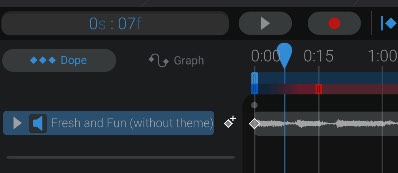
In order to actually create the audio-reactive animation, after you are happy with the animation, you’ll need to be sure to add the audio or video track to the animation. Keyframes are only created on audio-reactive animations while recording if the desired audio is playing.
So in this example, I’ve made sure to add the audio track to the animation using Media Tracks, and have a keyframe on that audio track when I want it to play. If I hit record now, I will create an audio-reactive animation and capture that to keyframes the same as a USB input or other input recording.
If I select Microphone instead of audio or video track in the input selection menu, I’ll be prompted to select a specific connected microphone to use:
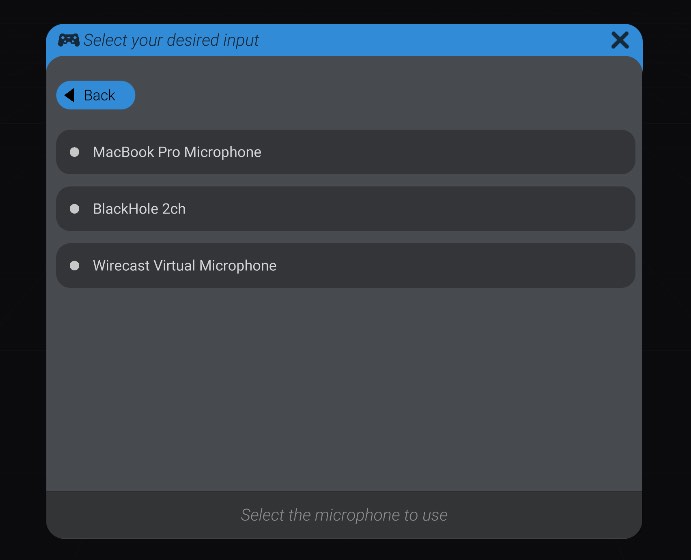
As a note, due to hardware limitations Bottango can only ever record from one microphone at a time. You will be prevented from adding a second control with a different microphone to the same control scheme.
Configuring microphone input uses the exact same settings as an imported audio track. The only difference is there is no preview section to play audio; instead, during setup the microphone is active and example reaction is shown during the configuration process for the selected microphone device.
In the animation view, there is no need to add an audio track for microphone input. Instead, simply begin recording, and the audio will be captured. However, once recording ends, you will be prompted if you want to save the recorded audio to an audio file:
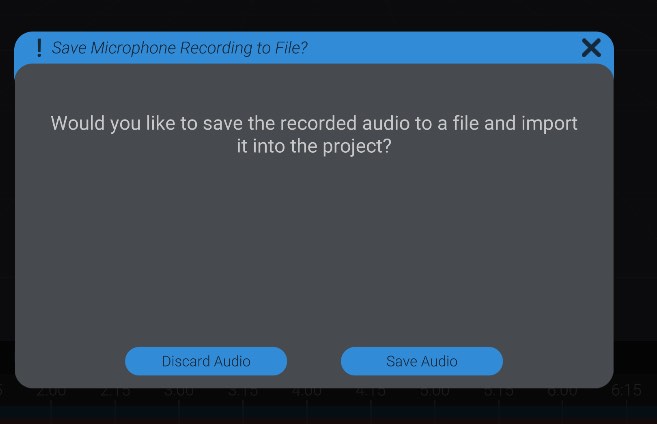
If you do select to save the audio file, you will be prompted to save a .wav file on your computer. Bottango will then automatically import the saved audio file, and add it to the animation in the correct spot to synchronize with the recording keyframes.