Essential Topic for learning Bottango.
A joint has a single axis of effect. A joint can either move or rotate, and in the local X, Y, or Z direction.
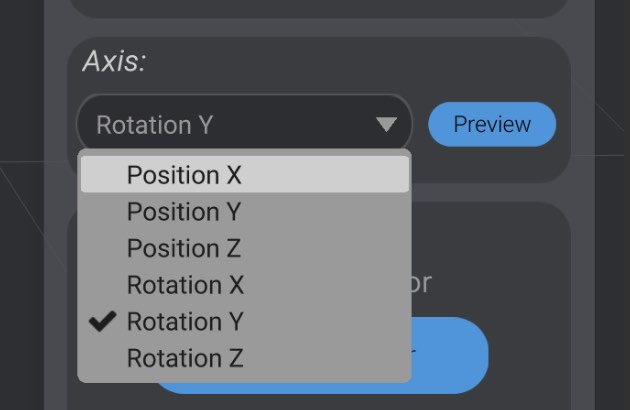
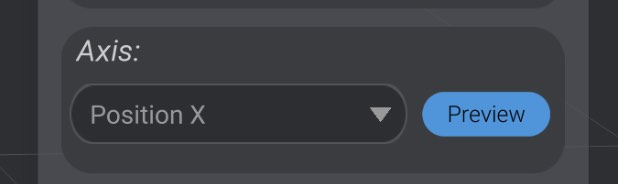
You can use the Axis dropdown when a joint is selected to change the axis of movement for a joint:
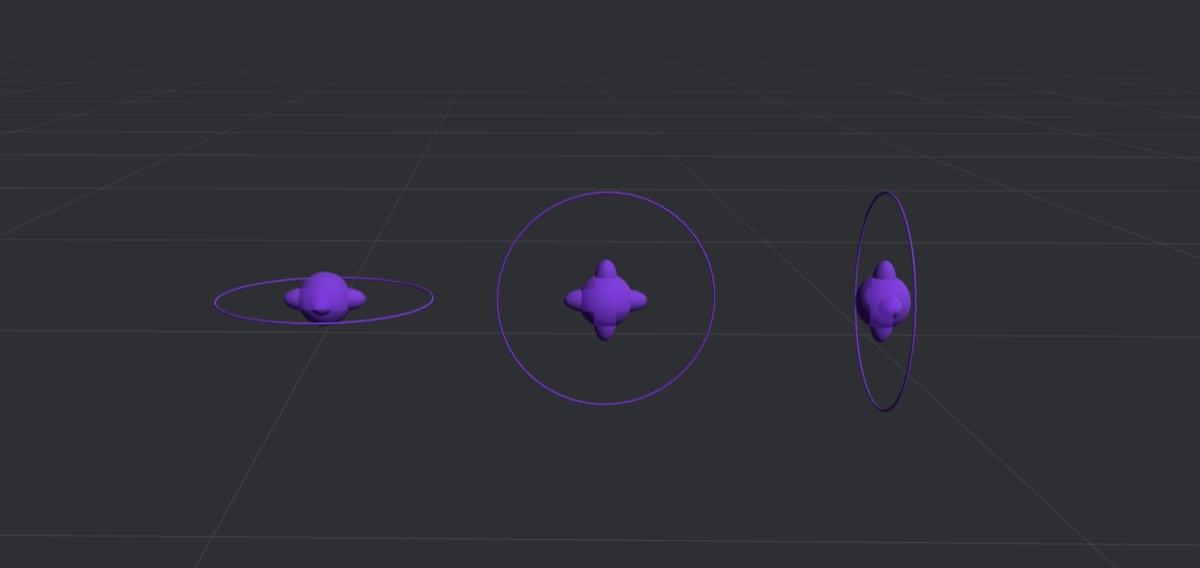
As you change the axis of a joint, its 3D representation changes as well. For a joint that rotates, the ring around the joint is oriented in the axis of the joint. Here, for example, are three joints, each configured to rotate in one of the three axes:
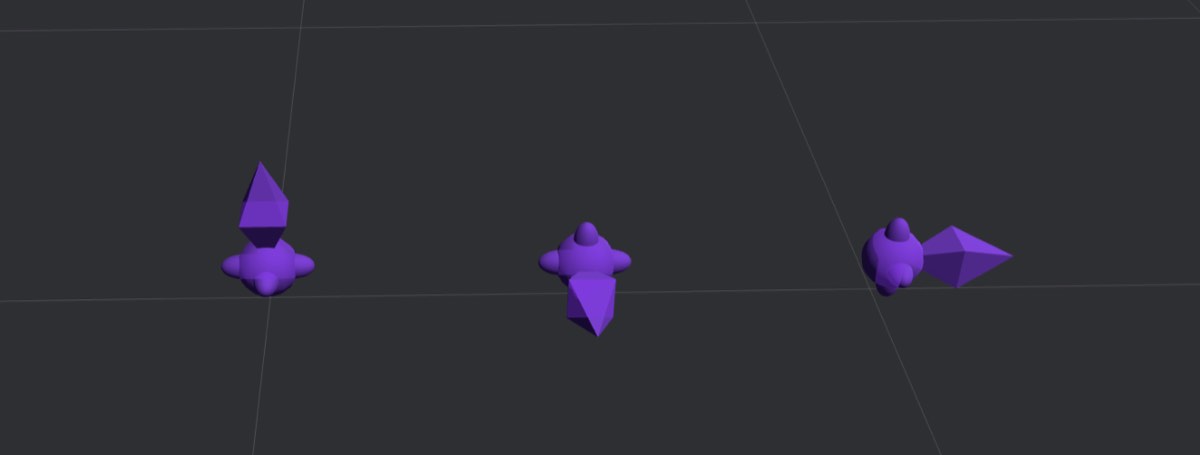
Joints can change position instead of rotate. Here are the same joints, with matching axis, that move instead:
If at any point you’re not sure if you have the right axis for a joint, you can click the Preview button, which will quickly animate the joint in the selected axis (without moving any linked motors), to ensure that you are moving/rotating the joint as intended.
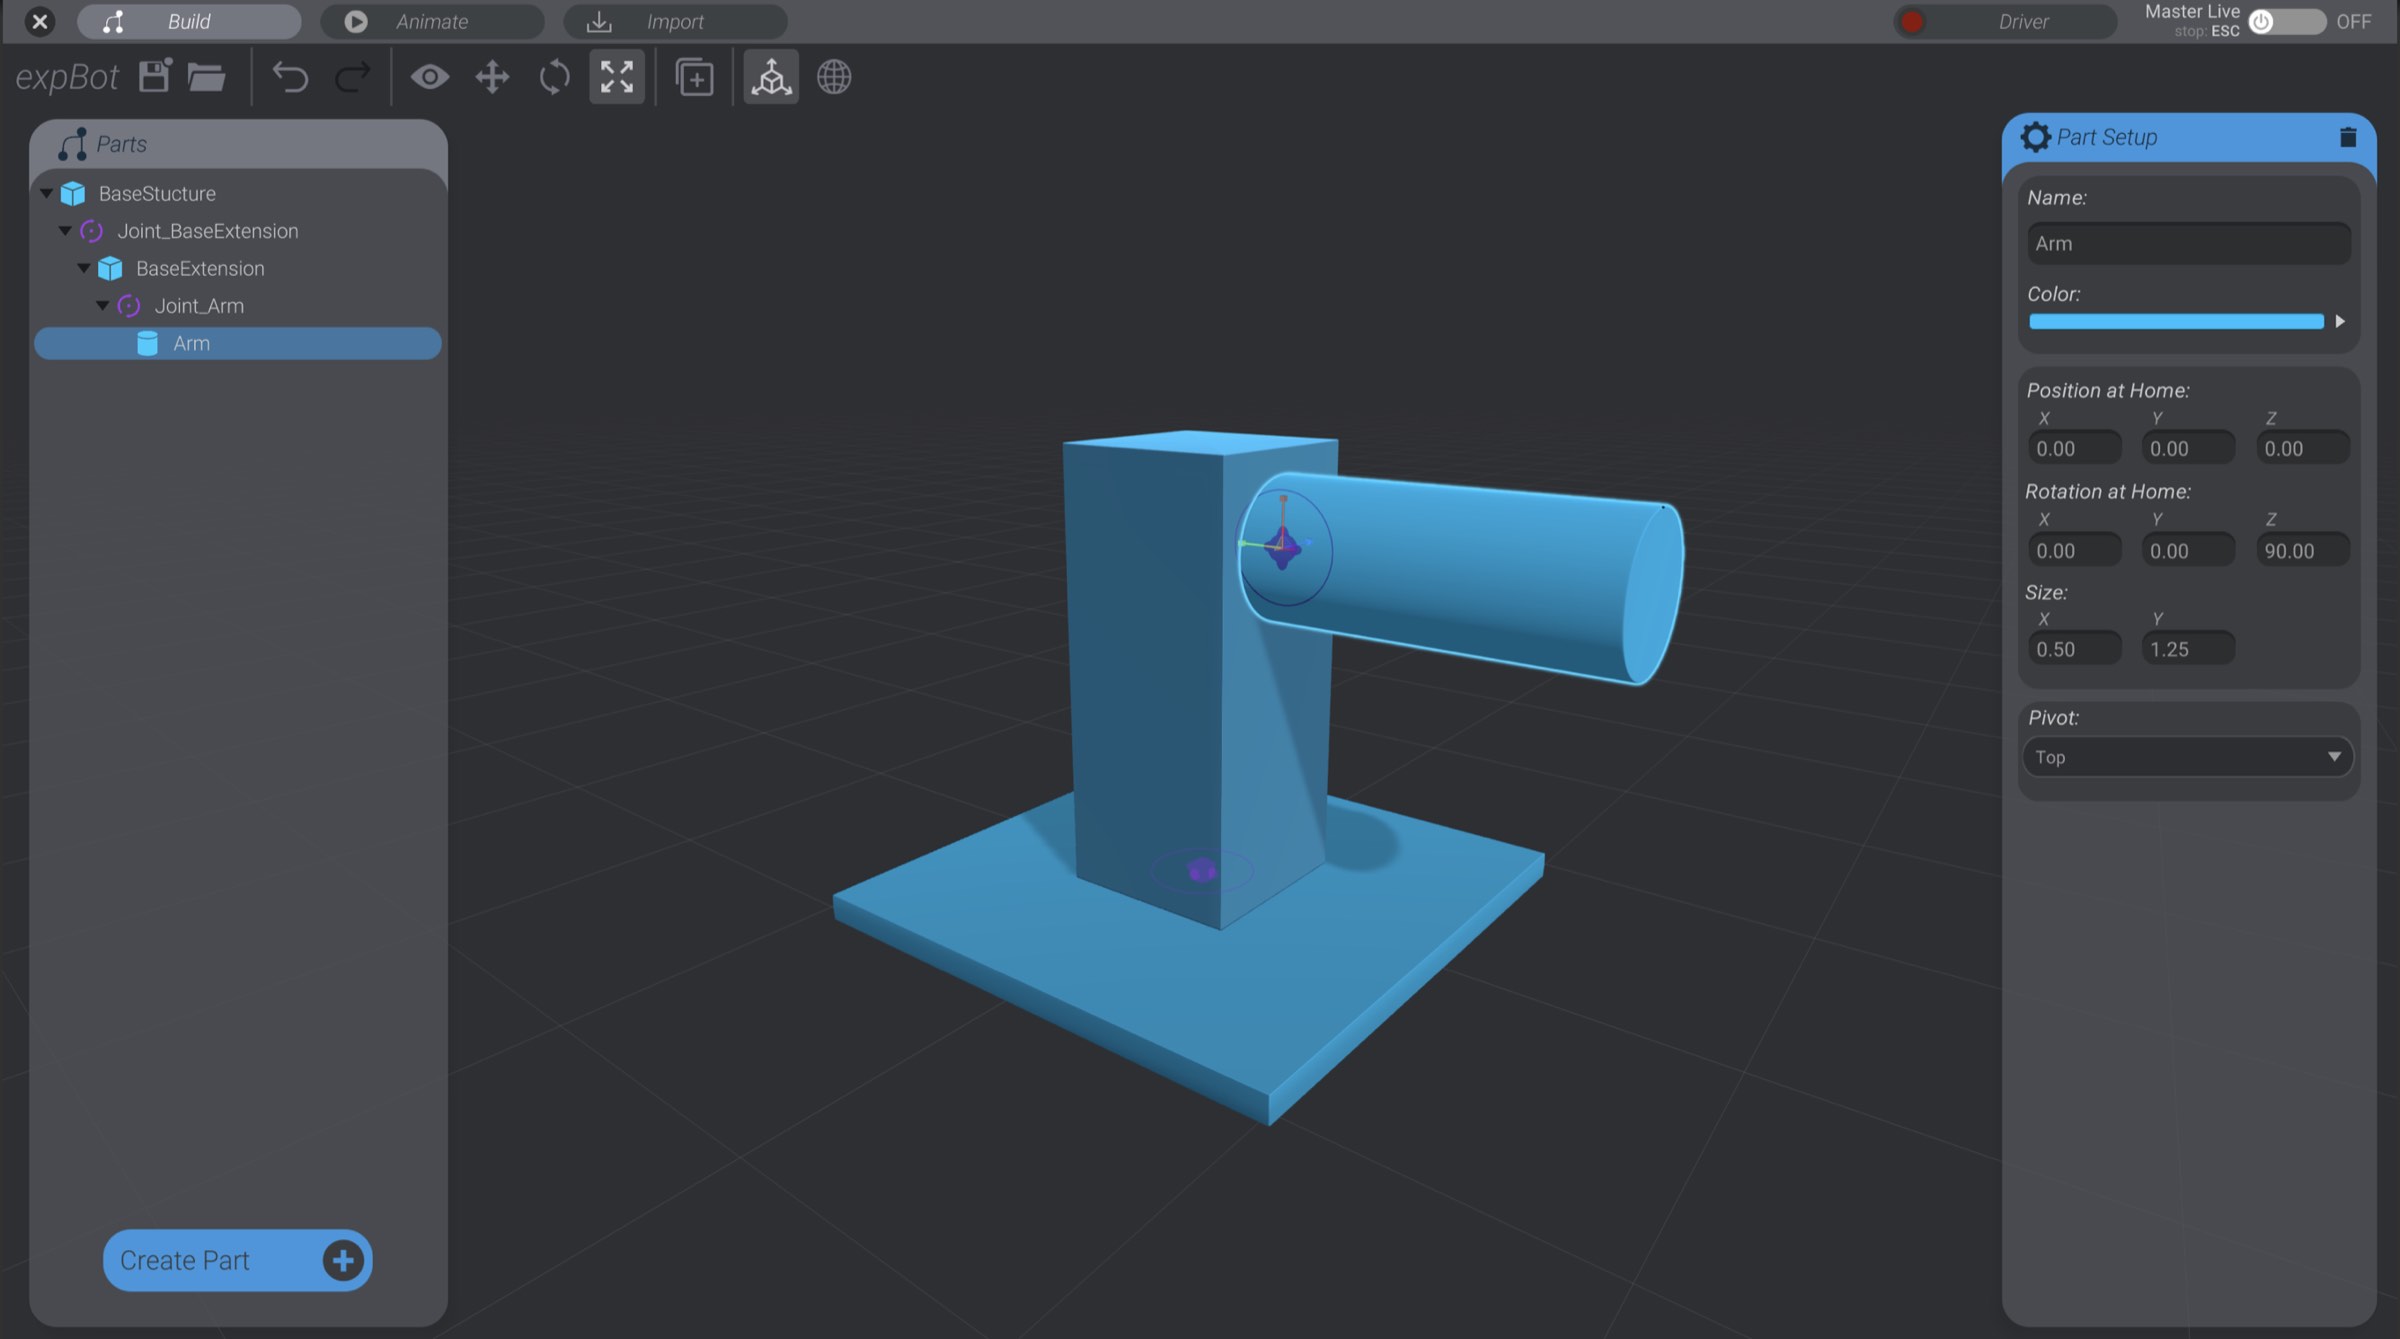
When we inserted the first joint as a parent of BaseExtension, the default axis (Y Rotation) happened to already be correct.
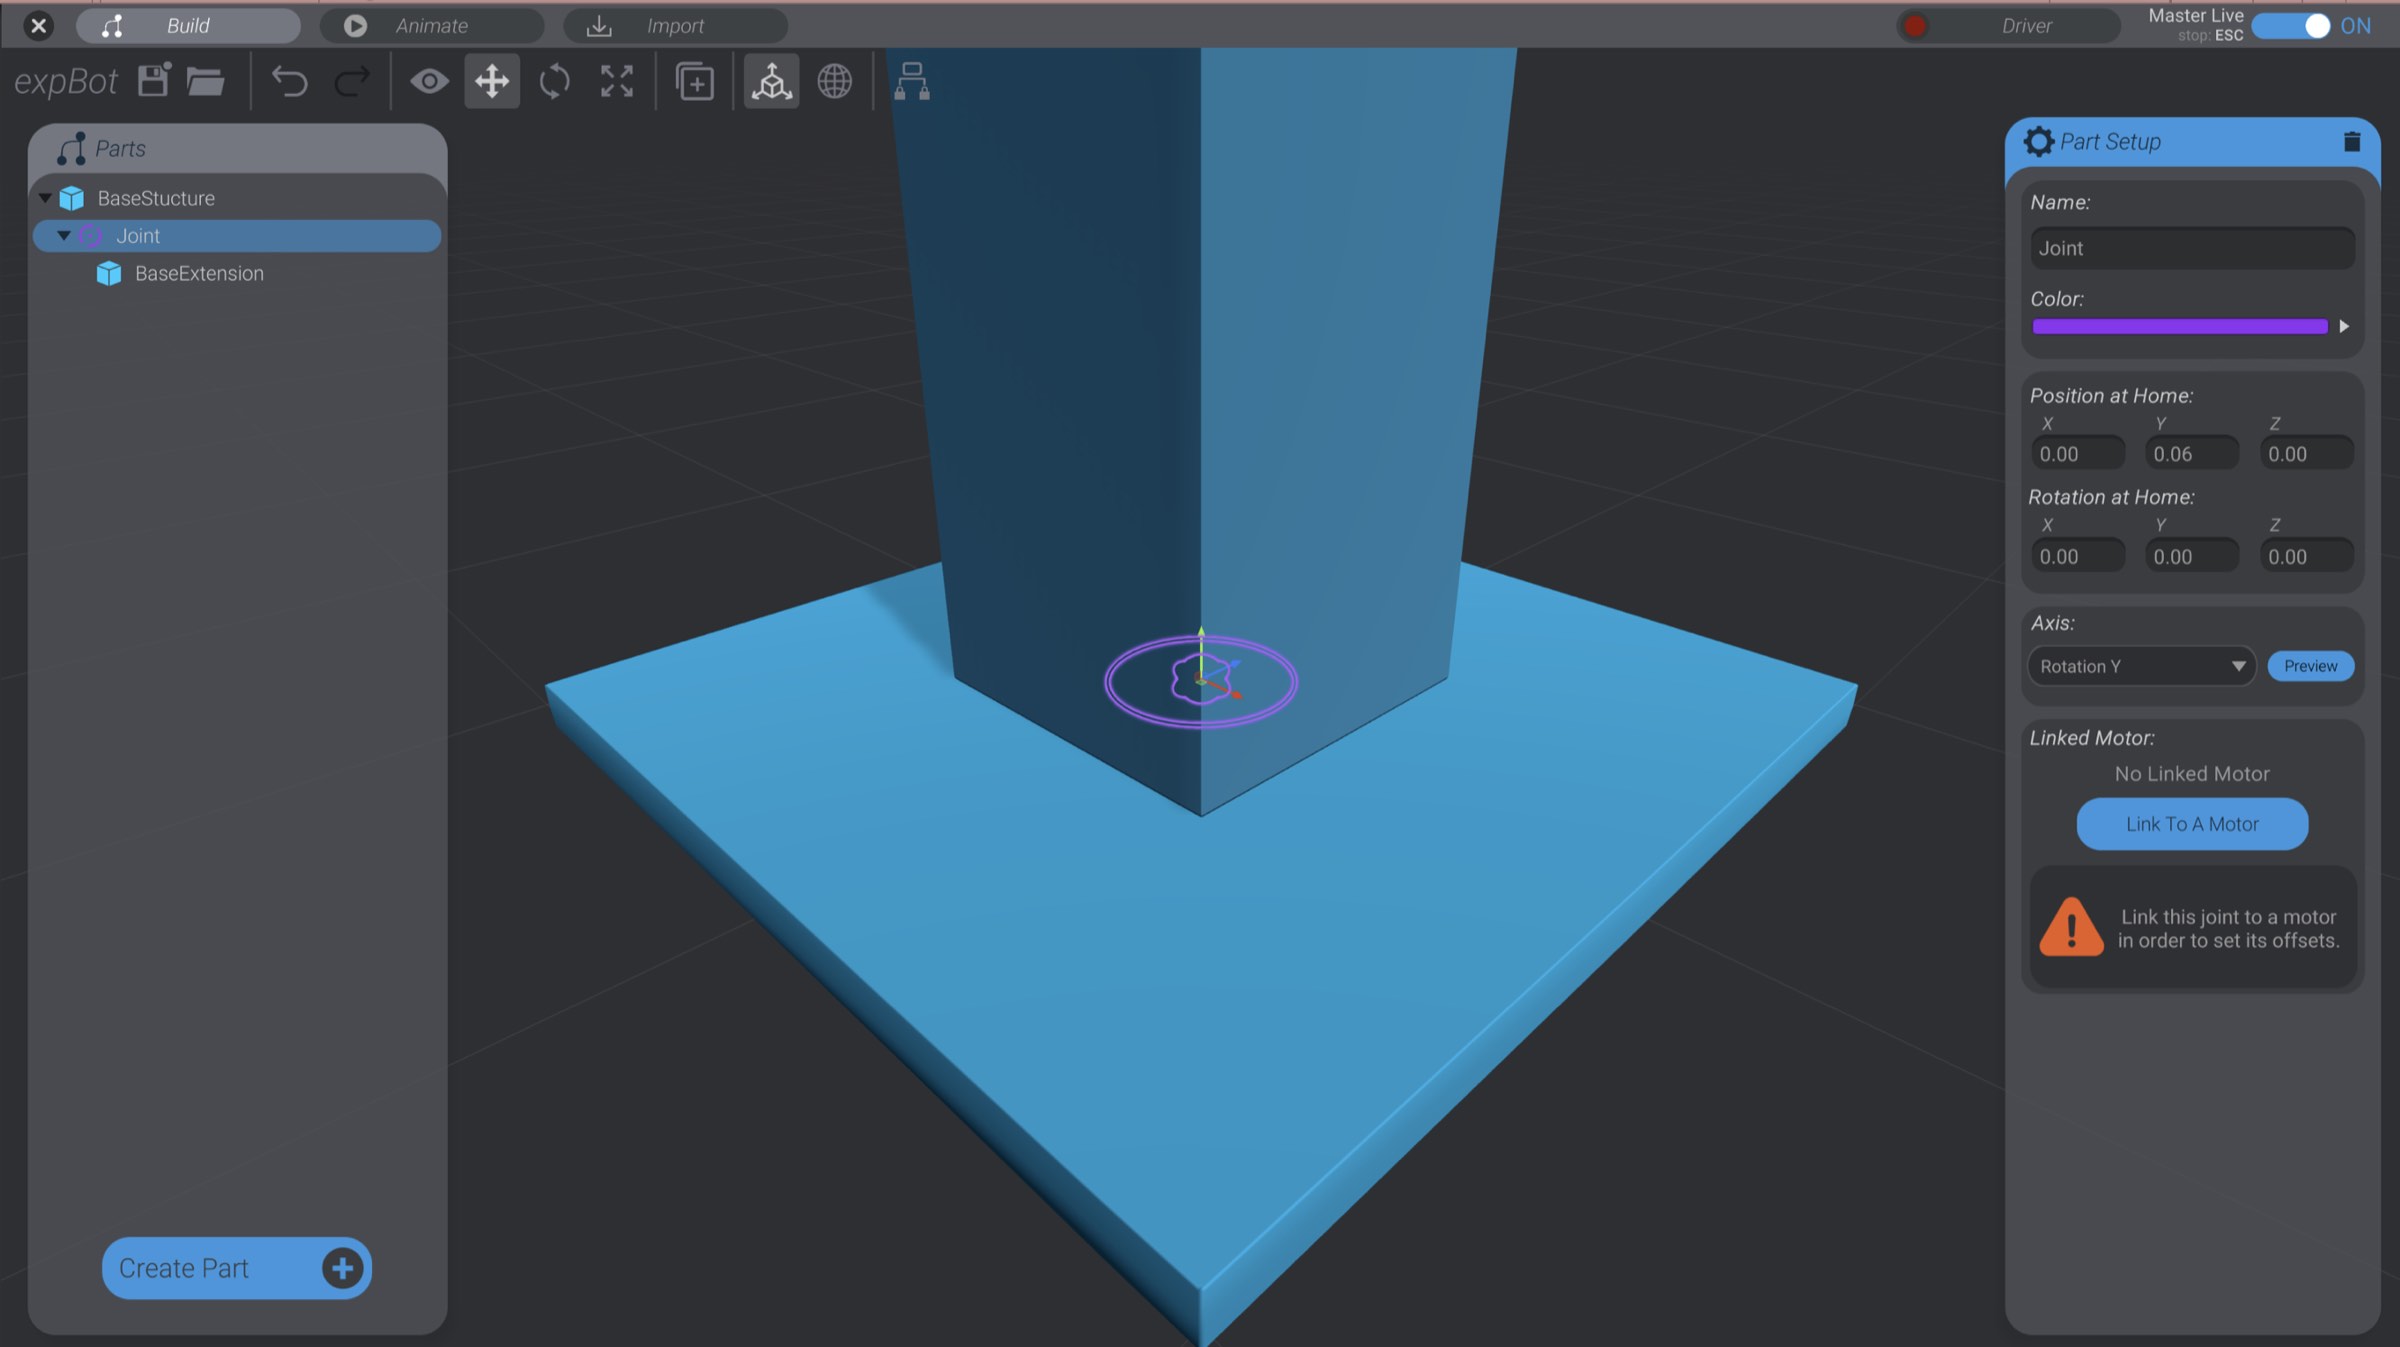
Select the second joint we created, that is a child of BaseExtension.
Set its axis to “Rotation Z” so that it will rotate up and down.
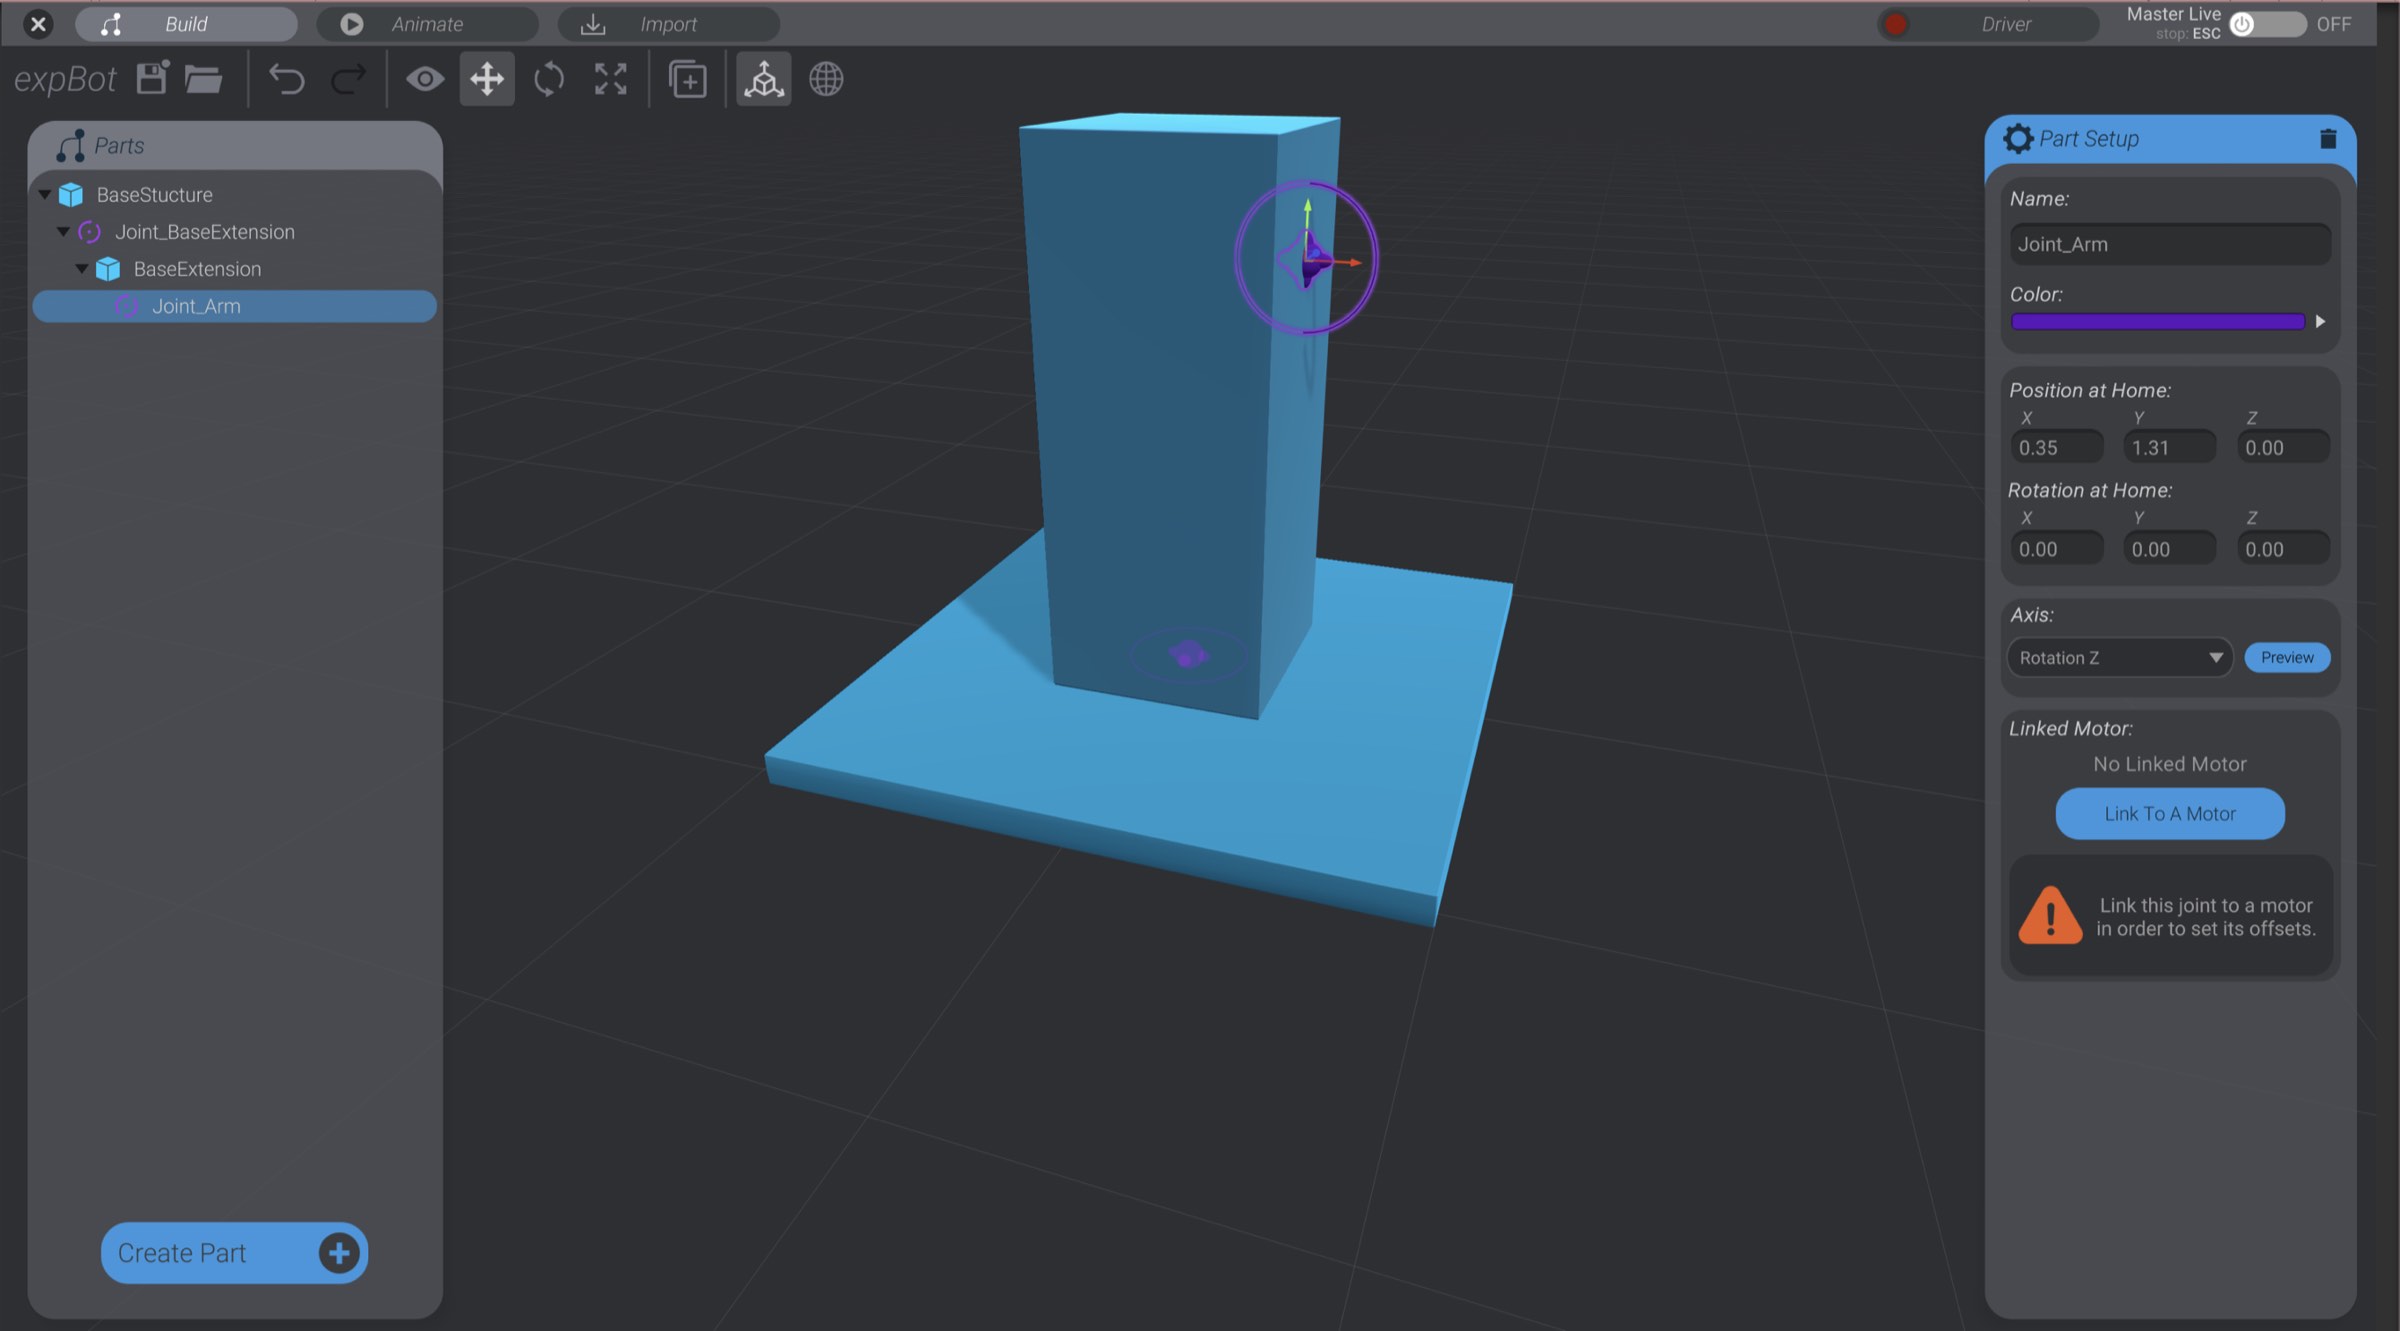
Rename both joints so that you can keep track. In this screenshot, you can see I’ve named the first one “Joint_BaseExtension” and the second “Joint_Arm.”
Create and orient a cylinder so that it acts as the arm section of the robot, as a child of Joint_Arm. Name this cylinder “Arm.”