Expert Topic for experienced builders.
As useful as it can be to import a model and use it as a piece of structure, it can be even more useful to import a fully composed robot and set up the assembled pieces in place from the imported model.
Here, for example, is a fully assembled 3D model that has been imported and configured to be used as the structure and joints in a Bottango project:
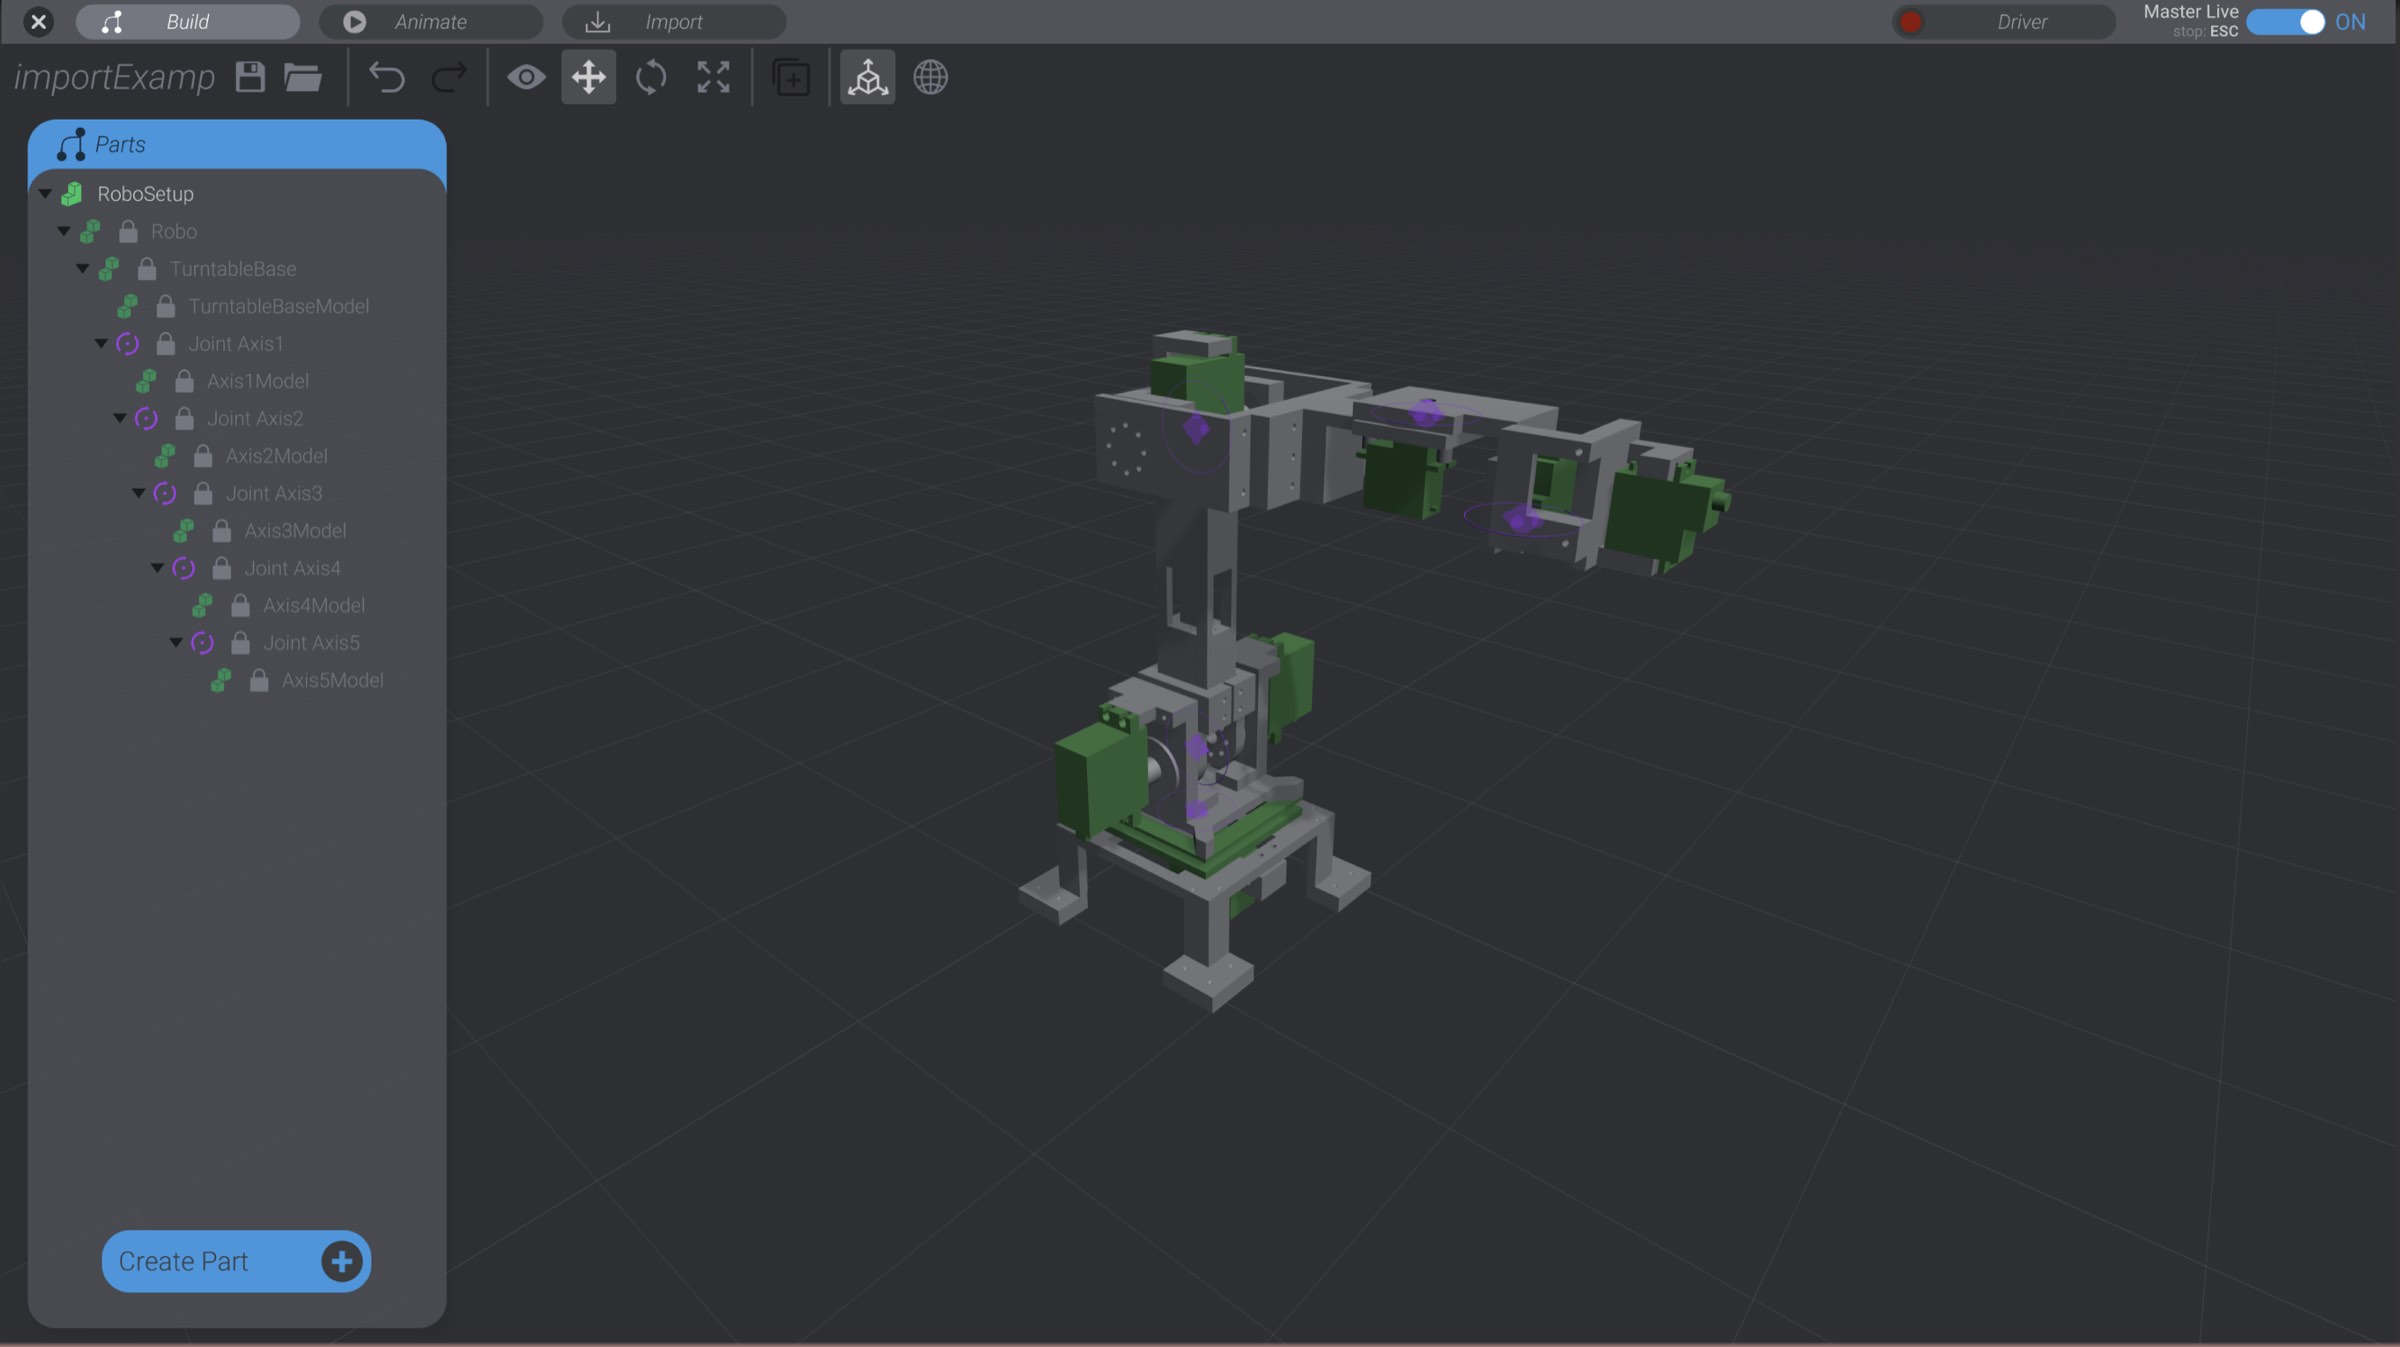
What’s more, Bottango can keep the imported model in sync with changes to the model file. As parts of the model file move, are added, or are deleted, the pieces in Bottango will do the same.
However, you will need to construct your 3D model in such a way that it works with the logic of Bottango.
To make a 3D model file work easily with Bottango as a full assembly, you should do the following:
Let’s go through creating an assembly of parts from a single model.
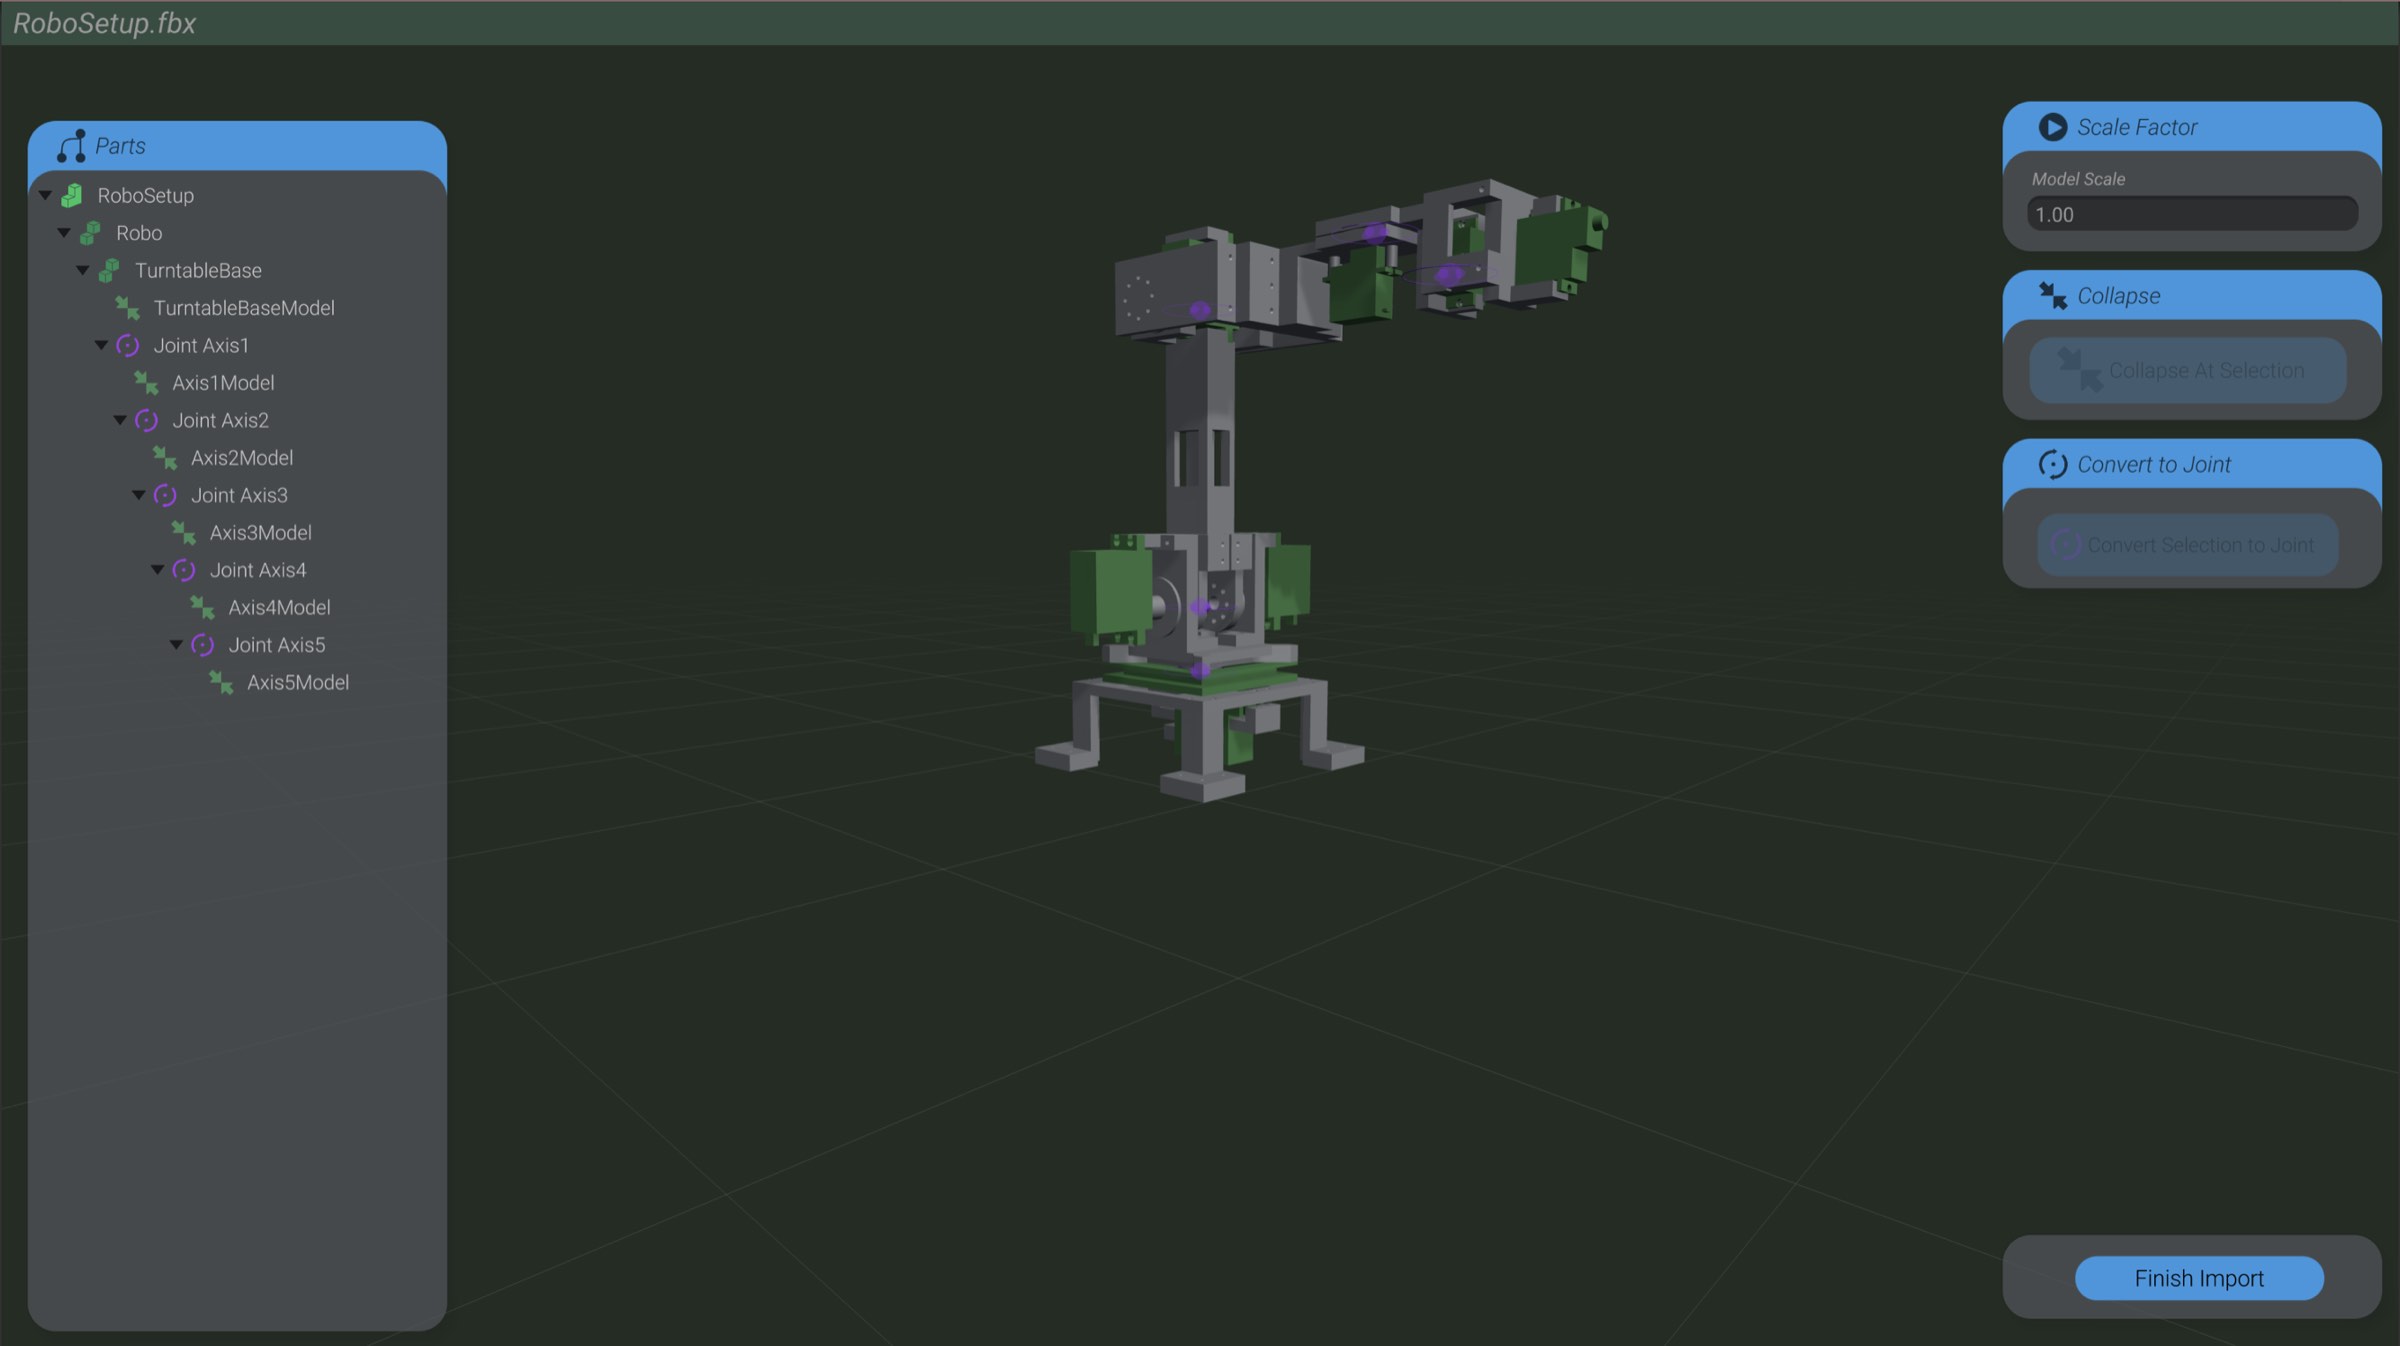
Here, for example, is a complicated model that has been constructed to work well with Bottango.
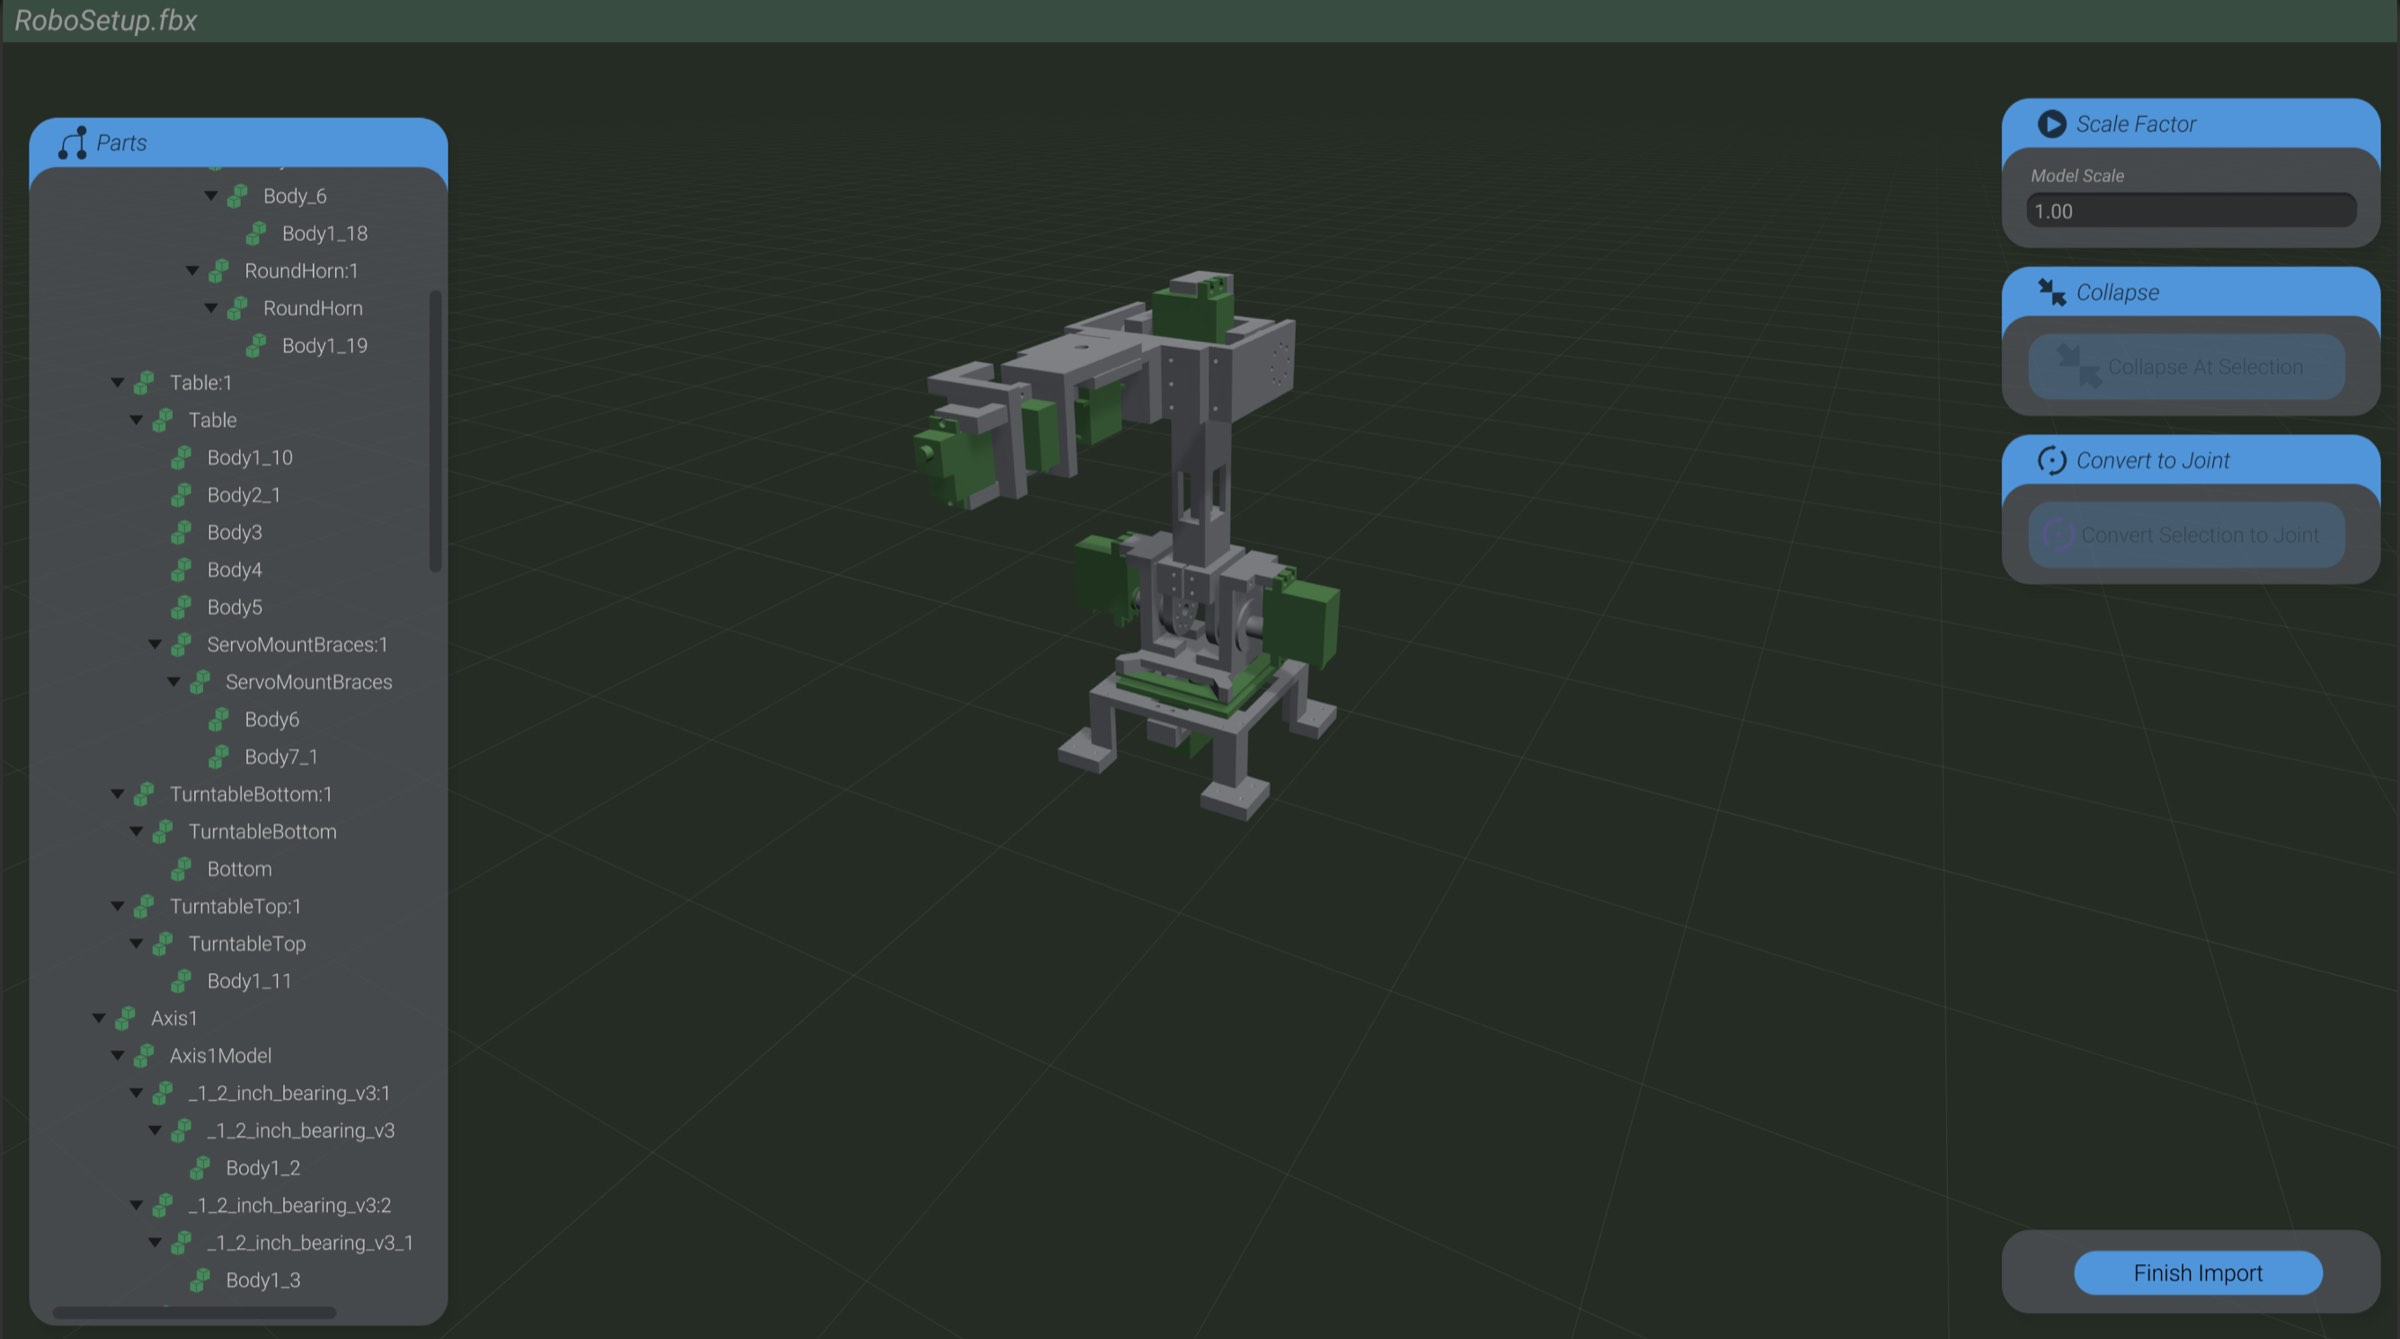
The first thing to notice is the many separate pieces that make up the model, most of which could be collapsed. When the model was created, the author anticipated collapsing so it was clear where to collapse pieces into single parts. Furthermore, the model was created with a hierarchy that makes sense for animating the robot.
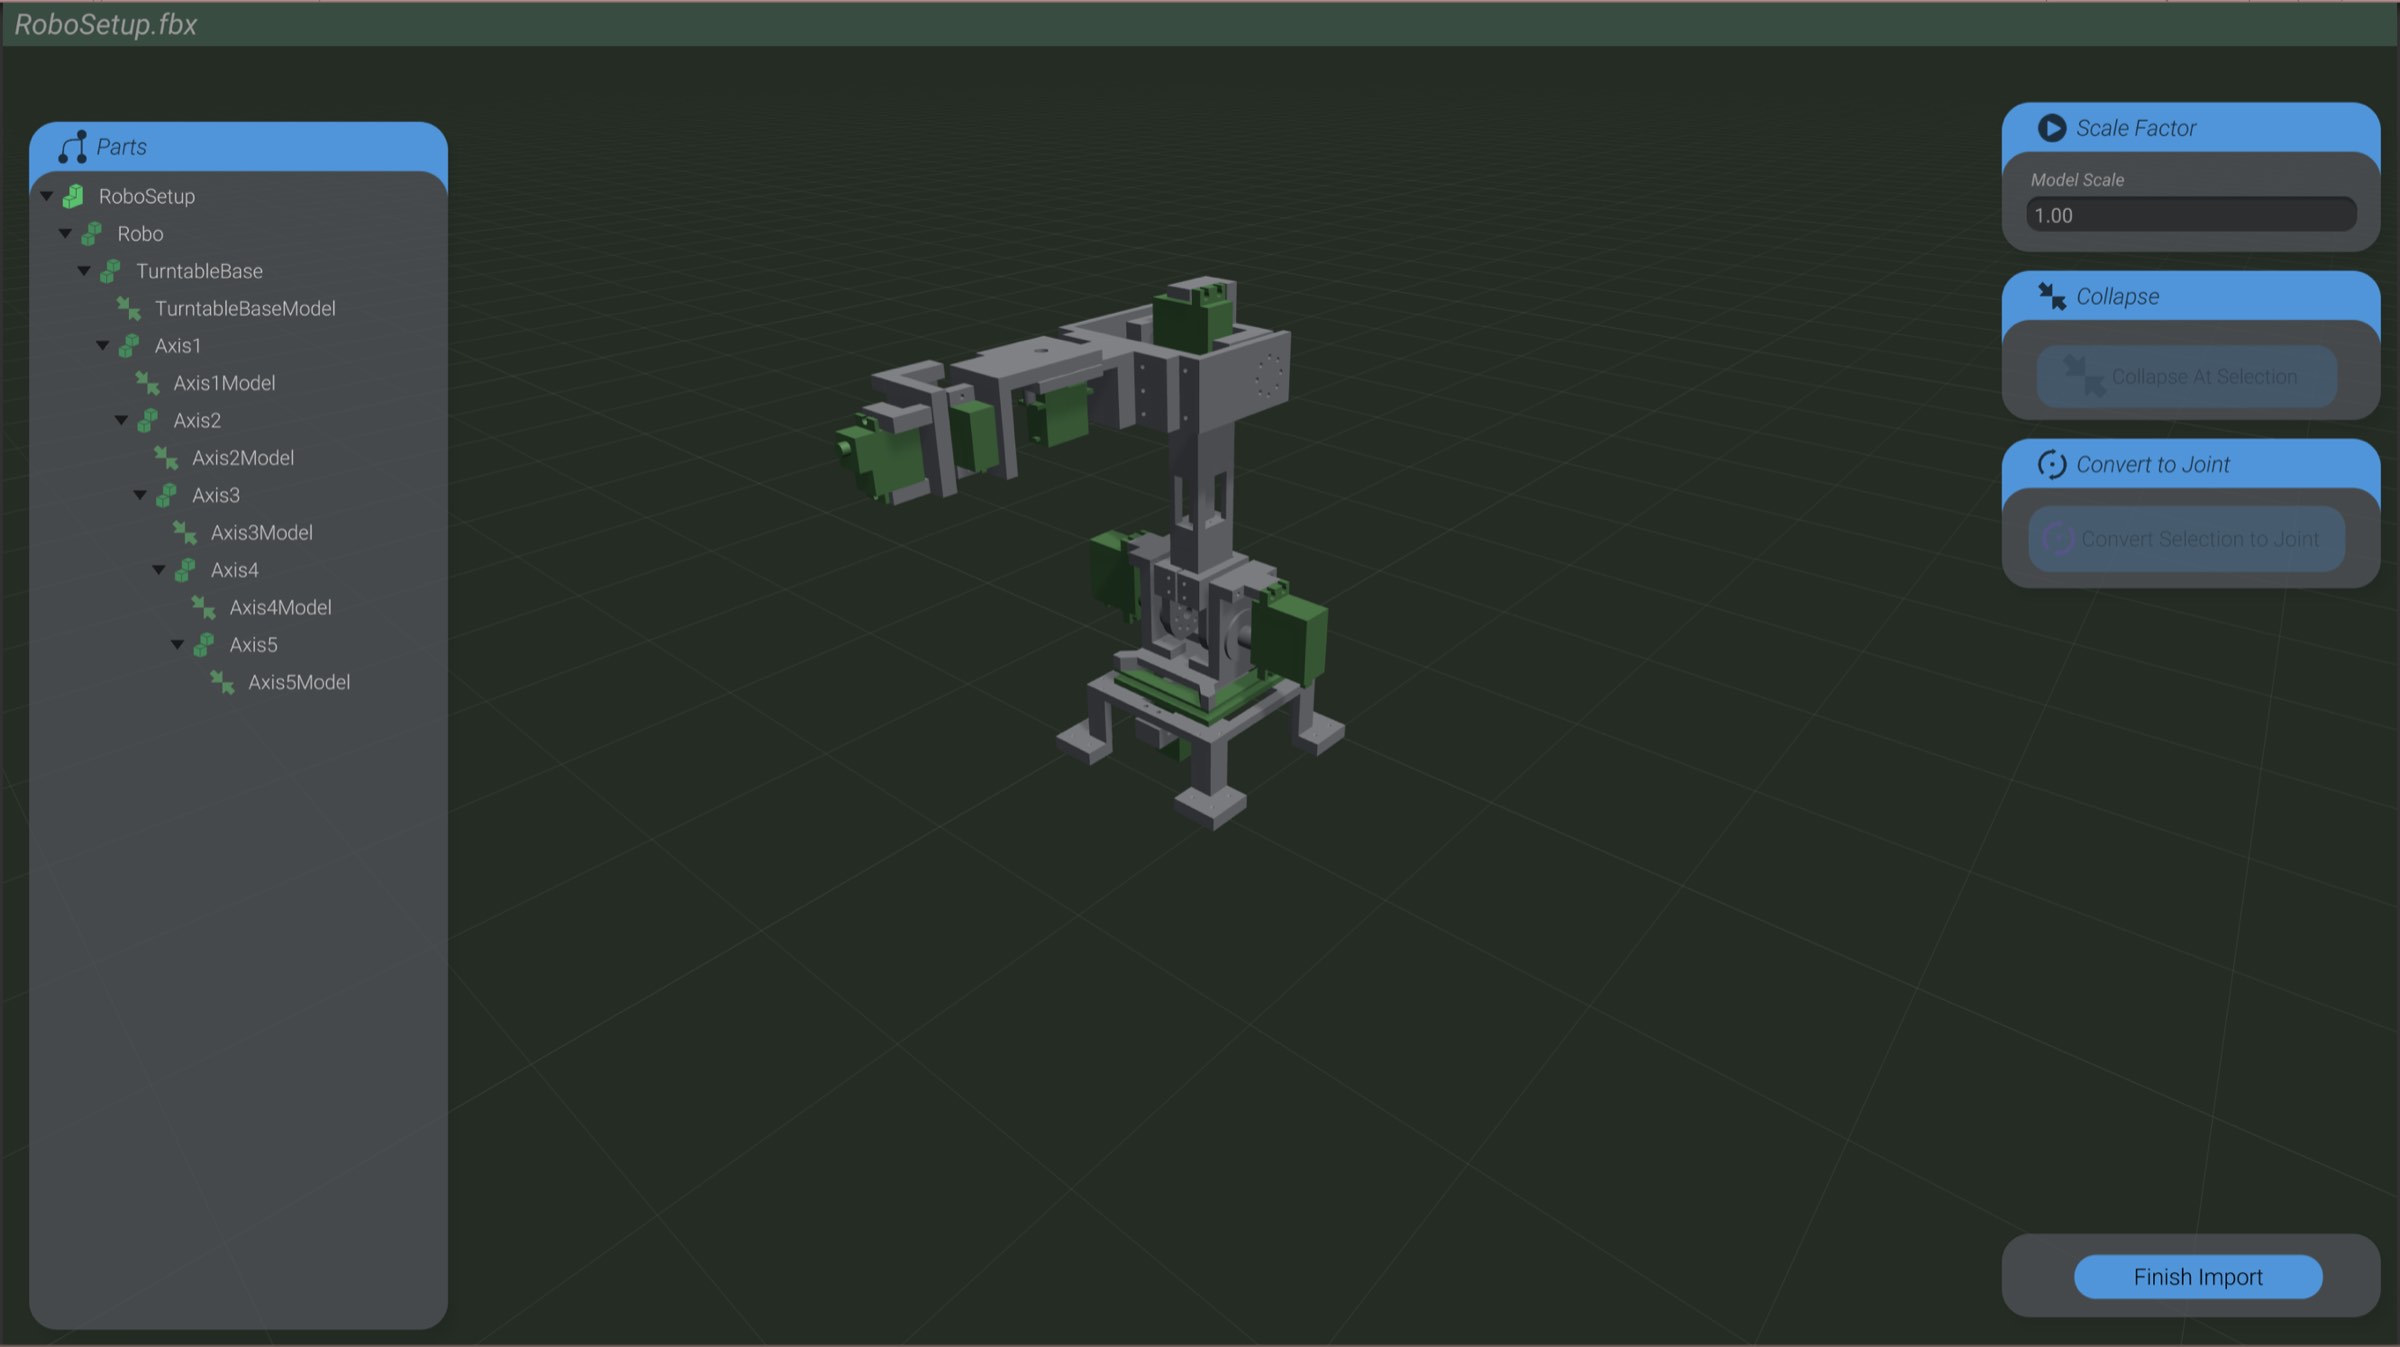
Finally, the parent of each collapsed part is placed and rotated so that it can behave as the pivot of a joint. Selecting a piece of the model and clicking “Convert To Joint” will convert this piece of the model to a joint.
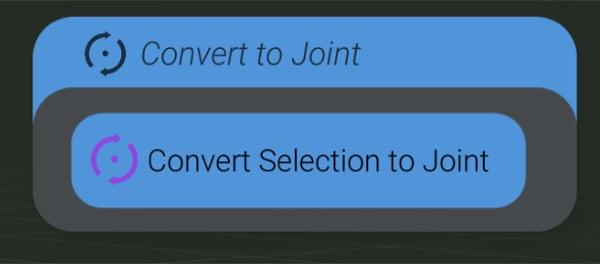

You can also select a converted joint and remove the conversion by clicking “Remove Joint.”

Here I have converted all the required pieces of the model into joints:
Joints created this way can’t set their axes or offsets while importing the model. Instead, create a new instance of the model in your project via the “Create Part” menu, and then you can configure and use a joint created this way like any other in Joint Axis and Joint Offsets.