Beginner Topic used frequently in Bottango workflows.
The hardware status tab is a view where you can see the connection and live/not live status of all the hardware in your project.
For the rest of this section, we’ll be working in the top “Hardware” tab of the app. If you haven’t already navigated there, do so.
The first view you’ll see in the Hardware view is the status of all your hardware. Here’s what a blank project will look like:
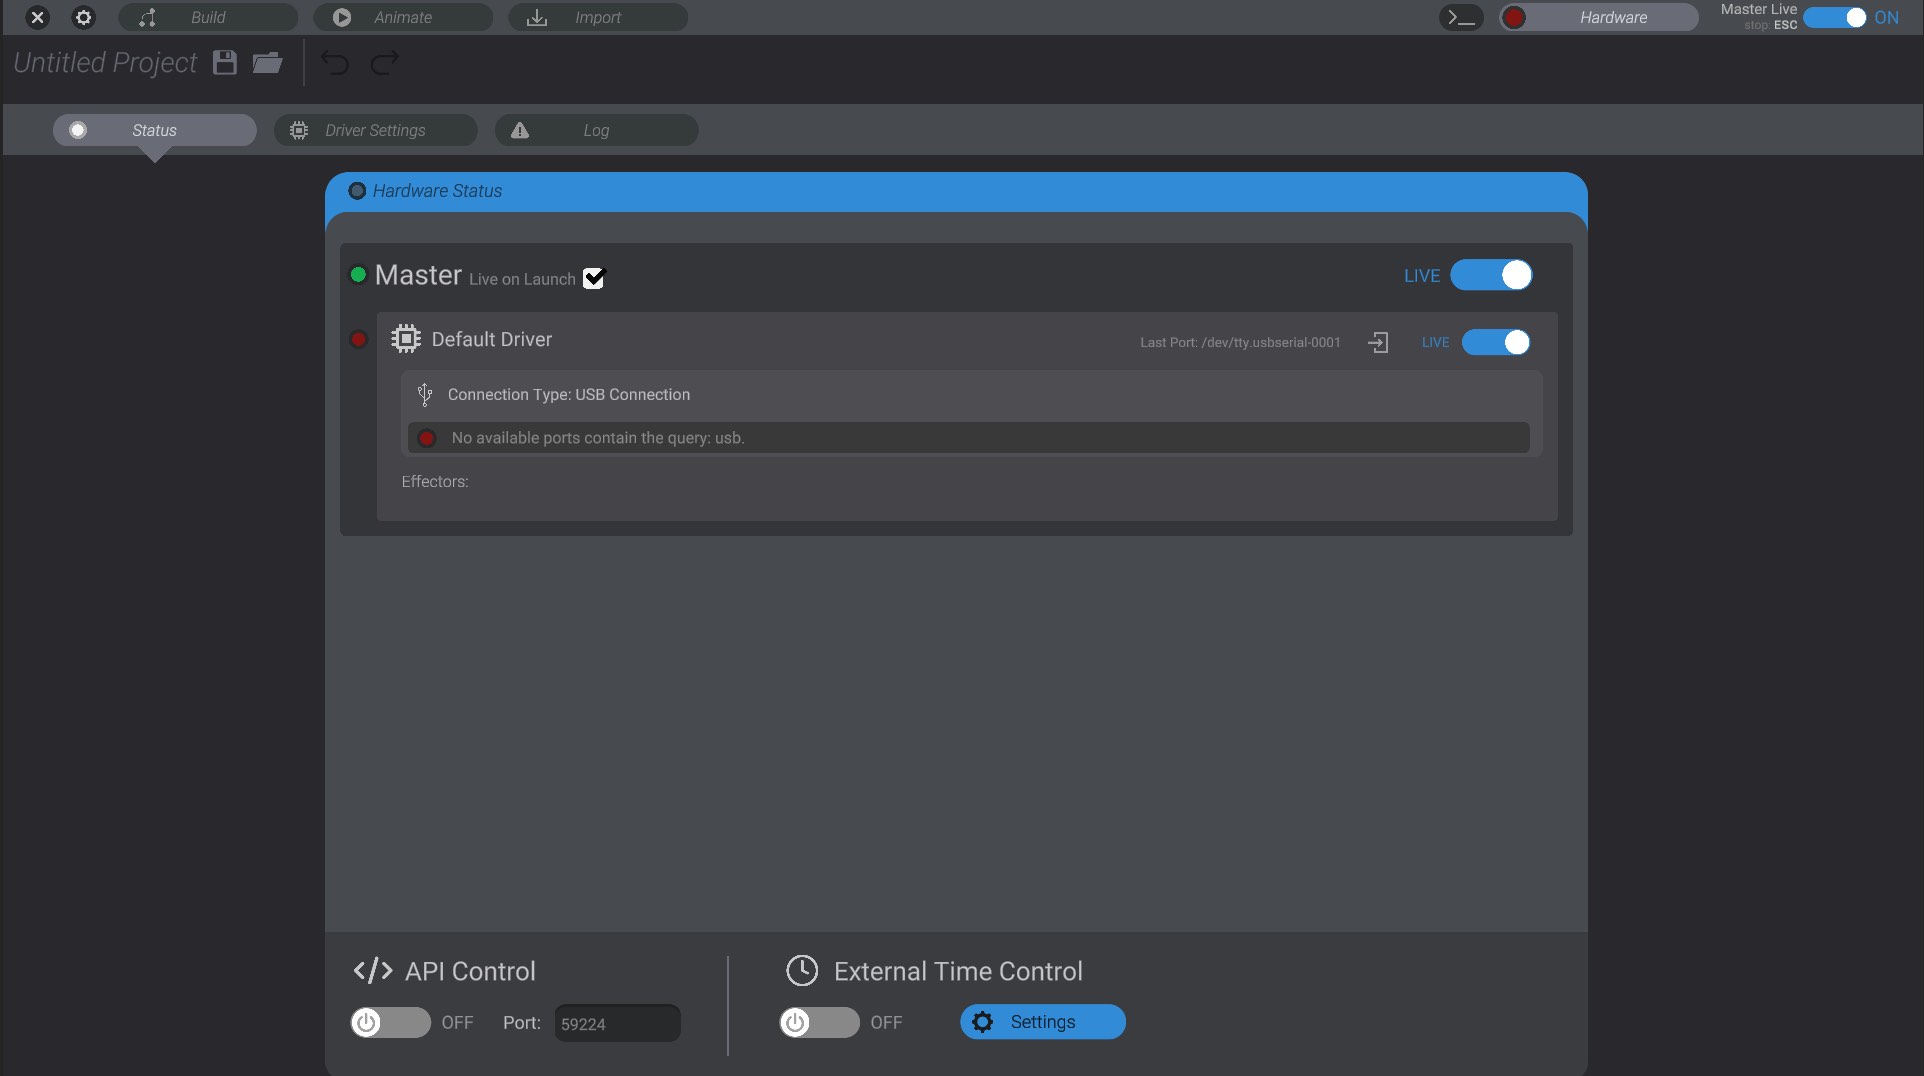
To start, you should only have two entities in this list:
As well, each entry in the status list has a small colored circle to the left of it, and a live/not live toggle. We don’t need to change anything in this specific menu yet, but let’s still go over what each piece means.
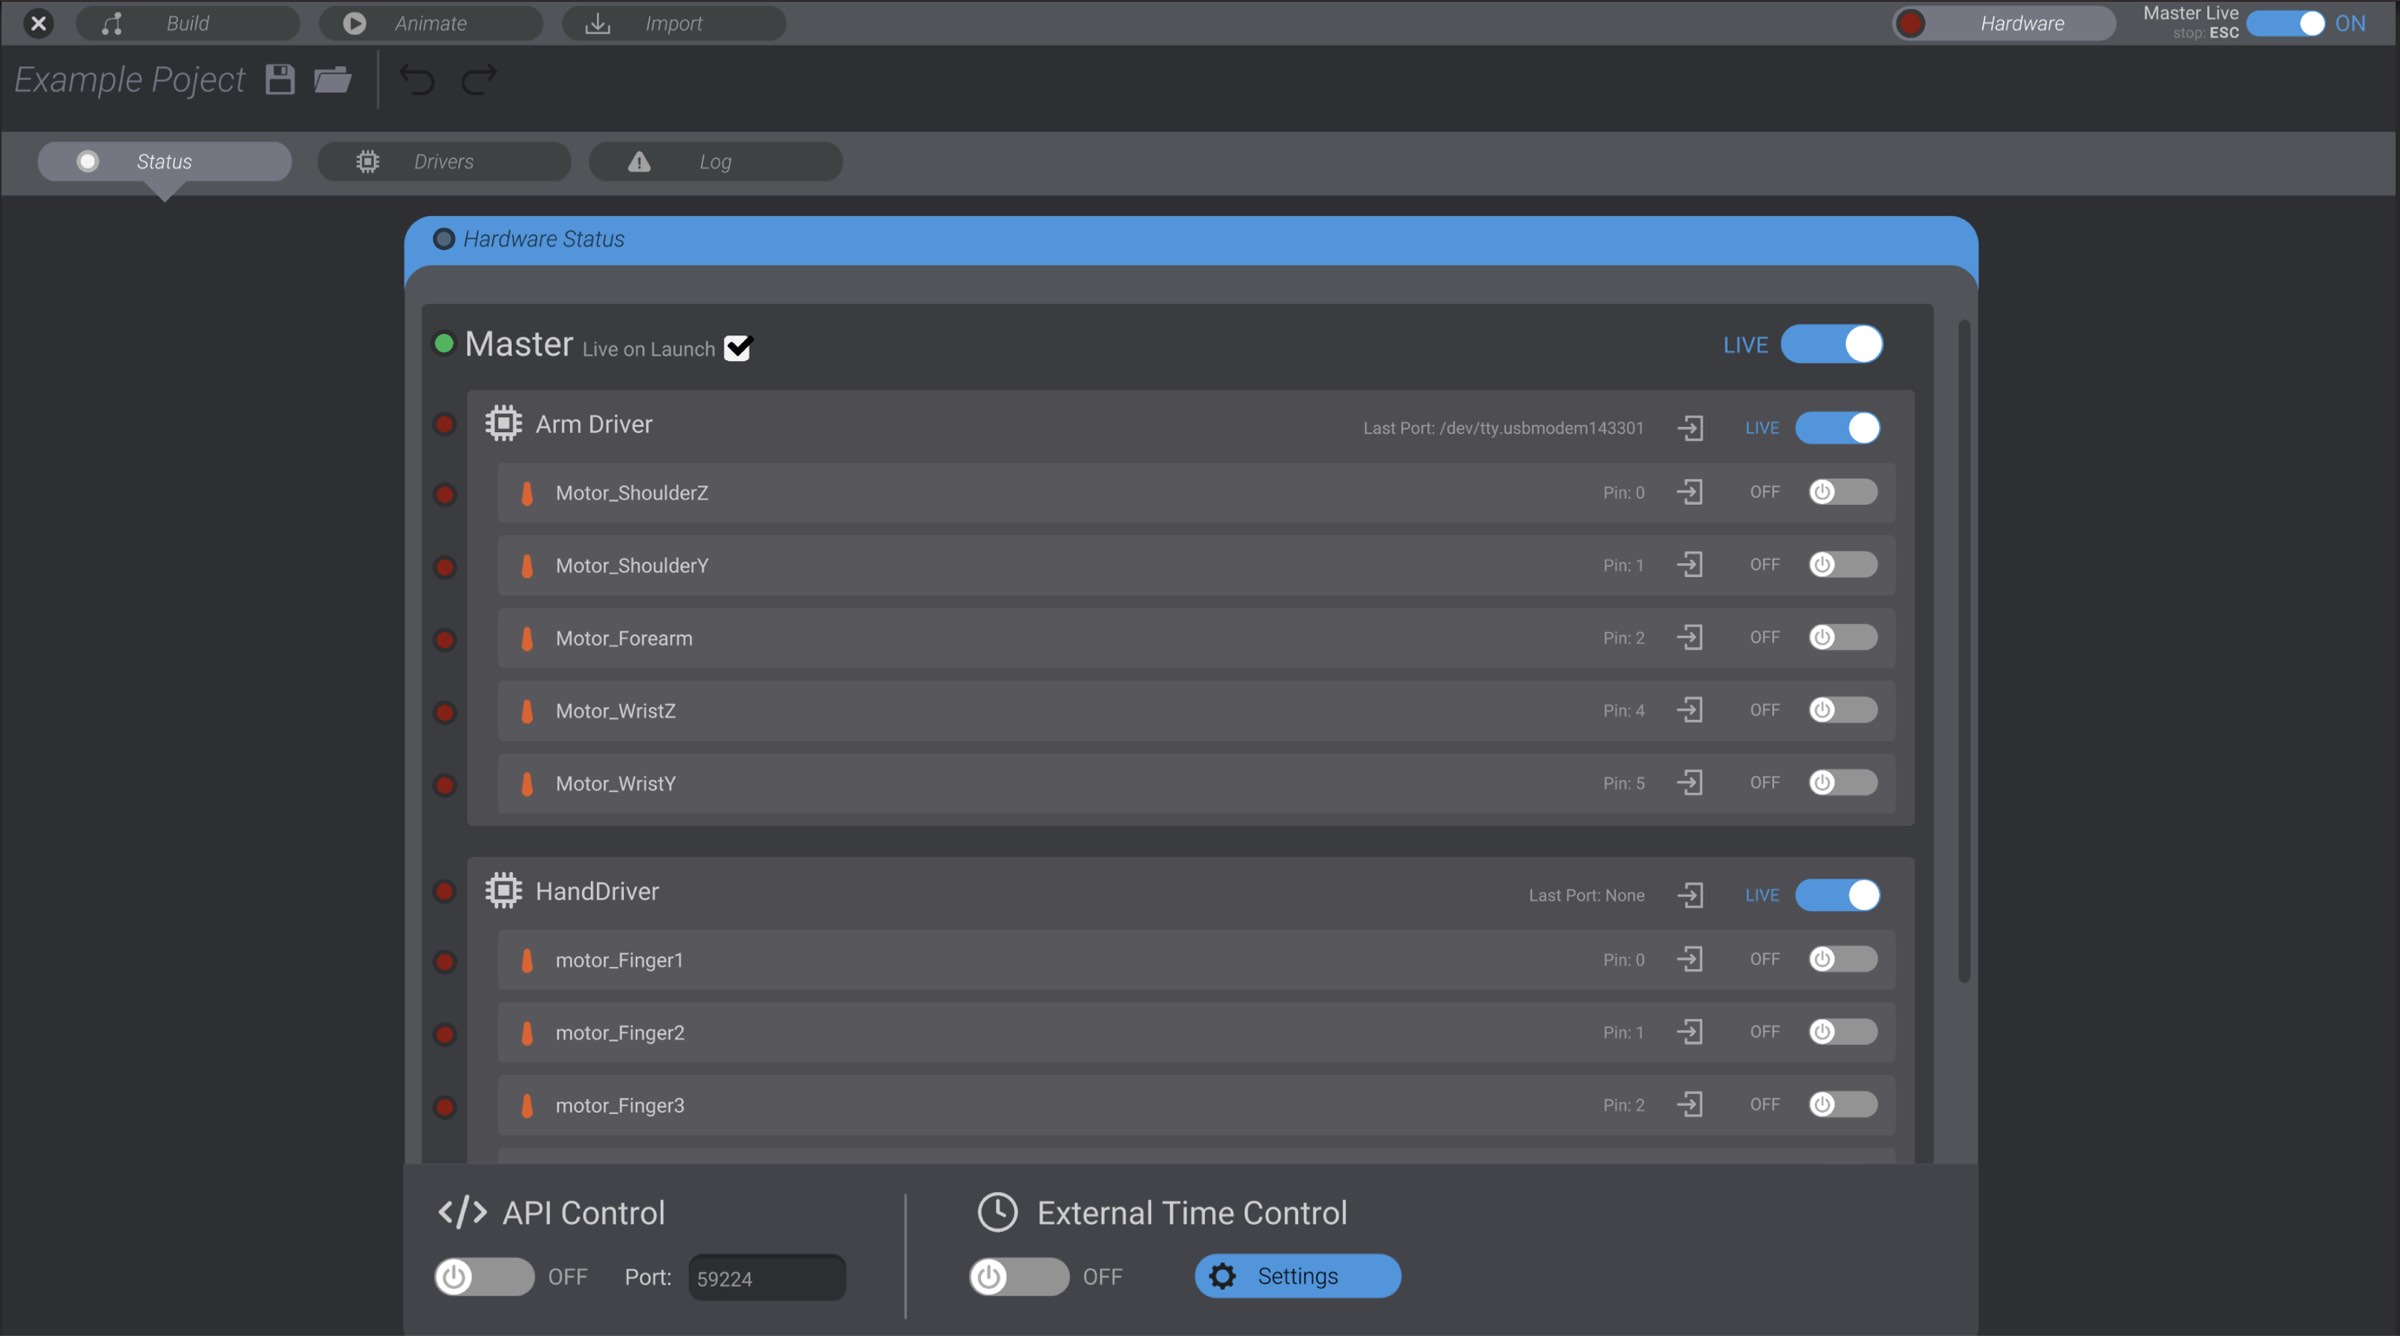
As you add more motors and drivers to your project, you’ll see this menu fill out and provide a convenient all in one spot to enable and disable specific hardware.
The topmost item in the status tab is a view of Master Live. This is a second view of the same functionality that is always visible in the top right of the screen, but behaves the same. You also have an option to set if Master should be live or not live when you first launch the project.

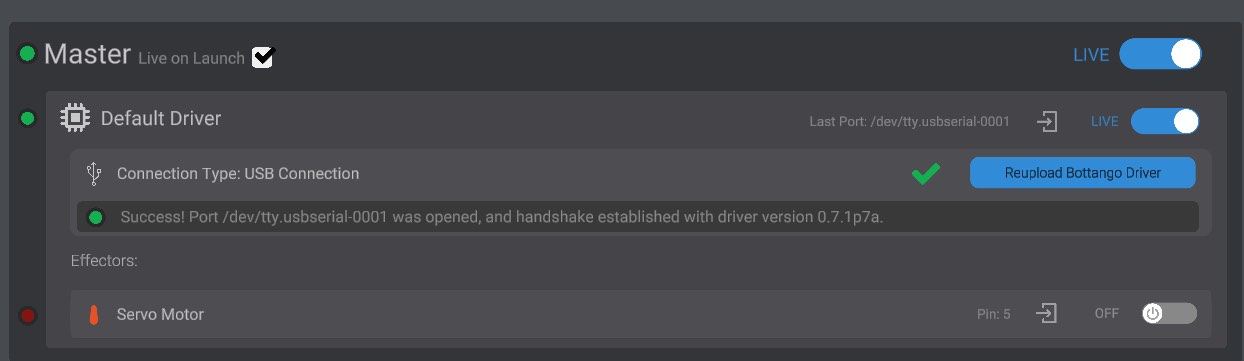
Most places hardware is shown throughout Bottango, a status indicator is also shown. That status indicator can be either red, yellow, or green.

As an example, here you can see the hardware status on the following items:
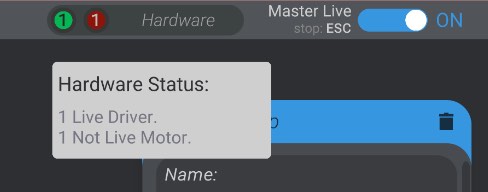
In the top menu, on the Hardware view button, you’ll see a collected total status of all hardware in your project. The total number of hardware items in each given state (red, yellow, or green) is shown.

If all hardware in the project are the same status, the count is hidden:

As well, you can mouse over the status indicator to see a quick tooltip of hardware status without having to visit the hardware status menu:
For some advanced features, like if your driver supports live toggling between connection to a computer or exported animations, you’ll be given options to make changes in this menu. As well, at the bottom of the menu are options to enable advanced functionality like the REST API or SMPTE timecode. We’ll cover those options in more detail in their related sections of this documentation.