Prepare and Connect Hardware
A computer alone cannot move a motor. Bottango needs to connect to a microcontroller running open-source Bottango firmware and communicate commands to it in order to move your real-world hardware.
This crash course is designed around the simplest hardware to use with Bottango:
- 1x Arduino Uno R3 connected to the computer via USB
- 2x PWM Servo Motors
- 1x Bottango Servo Shield to power the servos.
We need to prepare the Arduino Uno R3 by uploading the provided open-source Bottango firmware, and then connect to it via a USB serial port.
Prepare the Arduino Uno R3
Section titled “Prepare the Arduino Uno R3”For Arduino Uno R3, Arduino Nano, and Arduino Mega development boards, Bottango provides a tool to upload the Bottango firmware directly from inside the application. The process is slightly different between Windows computers and macOS/Linux computers.
-
Connect your Arduino Uno R3 to your computer via a USB port.
-
Go to the “
Hardware” view in Bottango.
-
Go to the “
Driver Settings” subtab view in the “Hardware” view.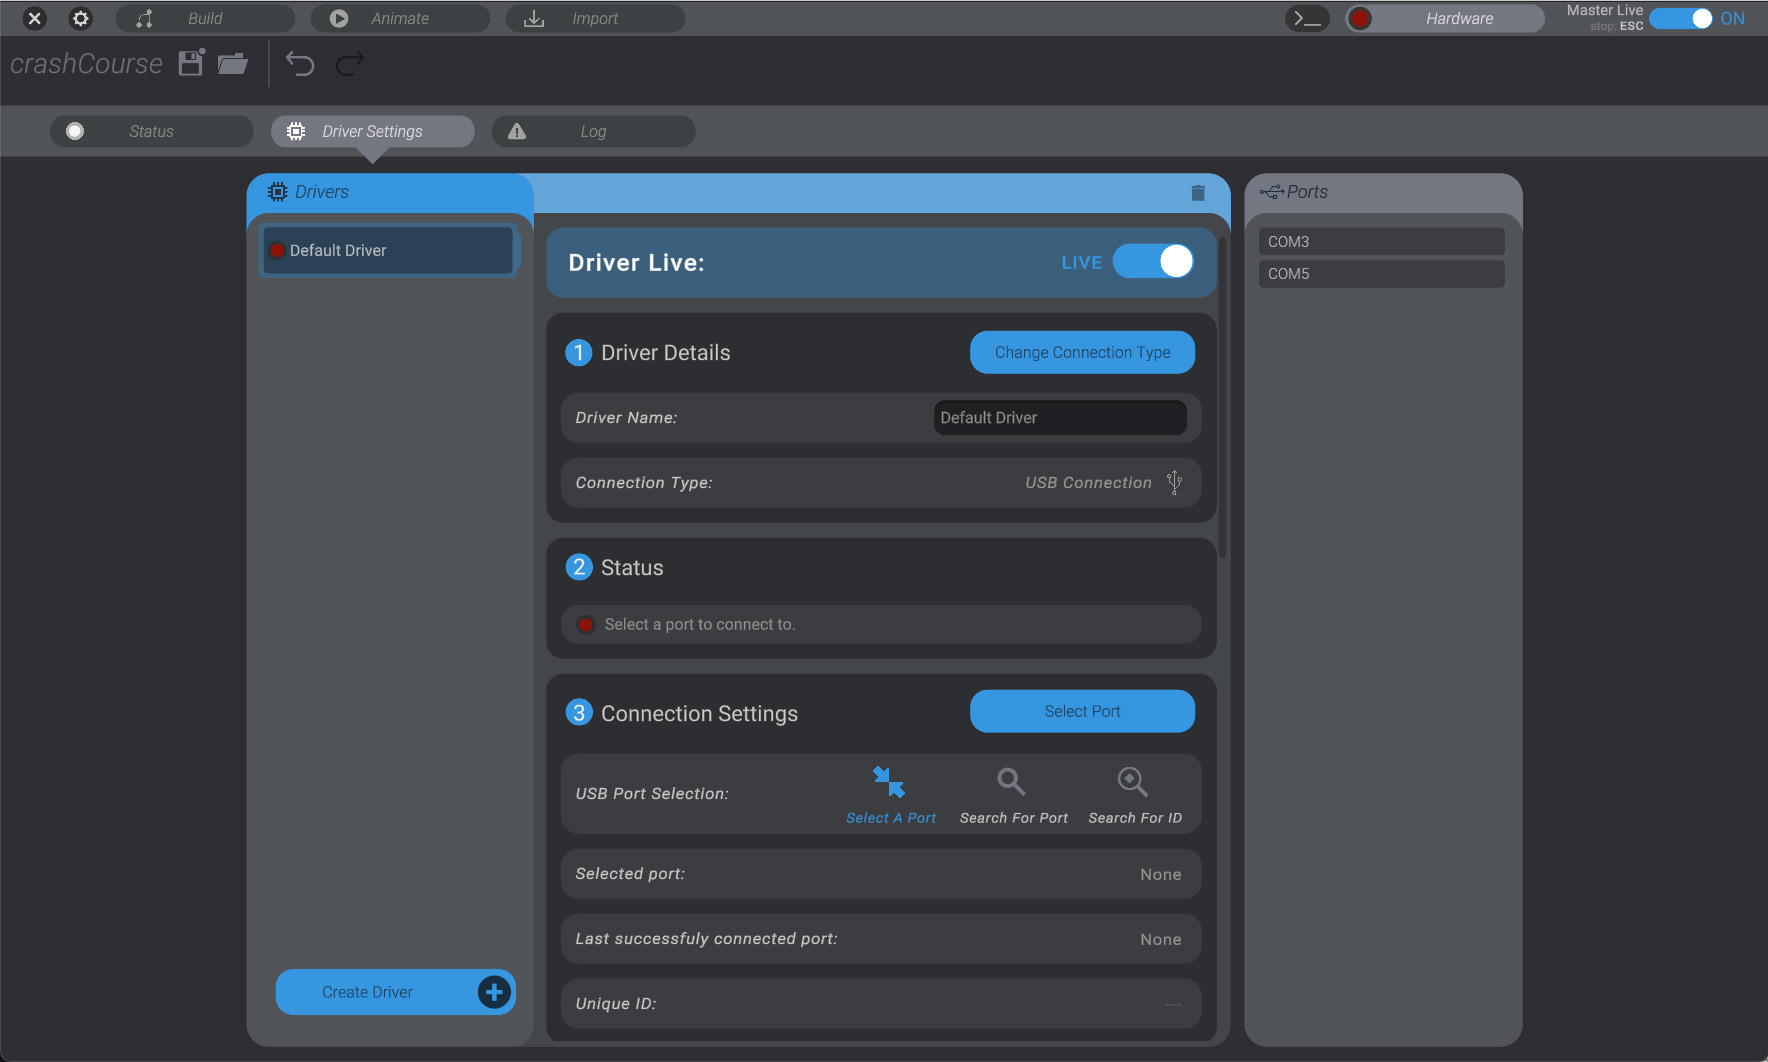
-
On Windows, Bottango needs to be told what COM port to connect to. On the right side of the screen, you’ll see the COM ports Windows currently detects. In the example here, there are two:
COM3andCOM5. If you have multiple, and you’re not sure which is the right one for your hardware, try unplugging / plugging in the Arduino Uno R3 via USB, and take note of which port on the right side of the screen disappears and reappears. That’s the port we want to connect to. -
Click the “
Select Port” button, and then click on the port you want to use on the right side of the screen. In my case, I connected to portCOM5.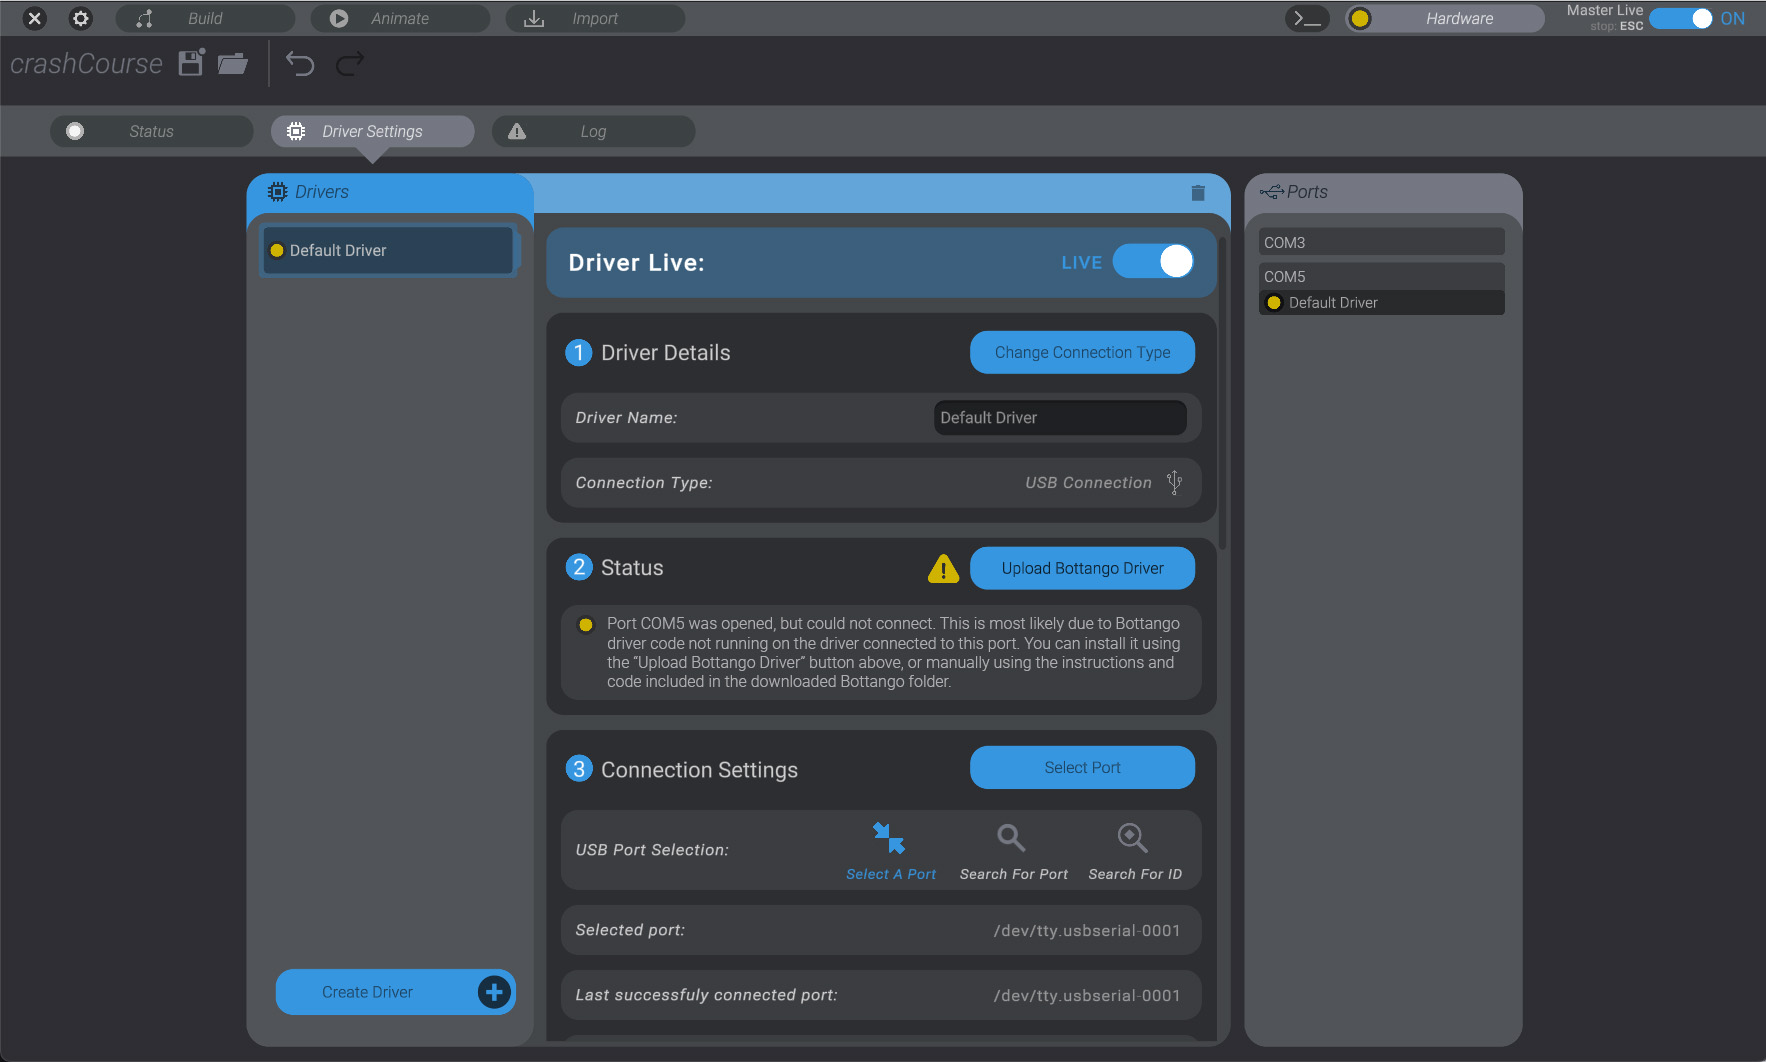
-
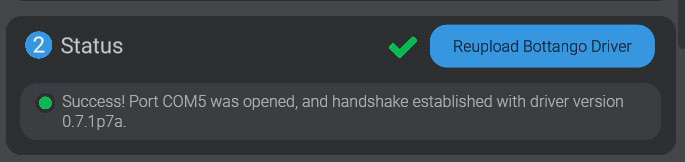
You can see by the status message in this example that Bottango has connected to “
COM5” but didn’t find the Bottango firmware running. That’s expected, as we haven’t actually put it on the Arduino Uno R3 yet. -
Click the “
Upload Bottango Driver” button in the “2 Status” sub-menu.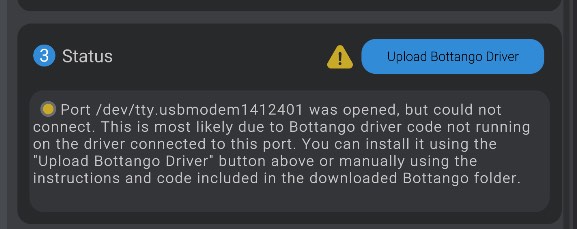
-
Select the “
Arduino Uno / Nano” option, since that’s the kind of board we’re using in this example crash course.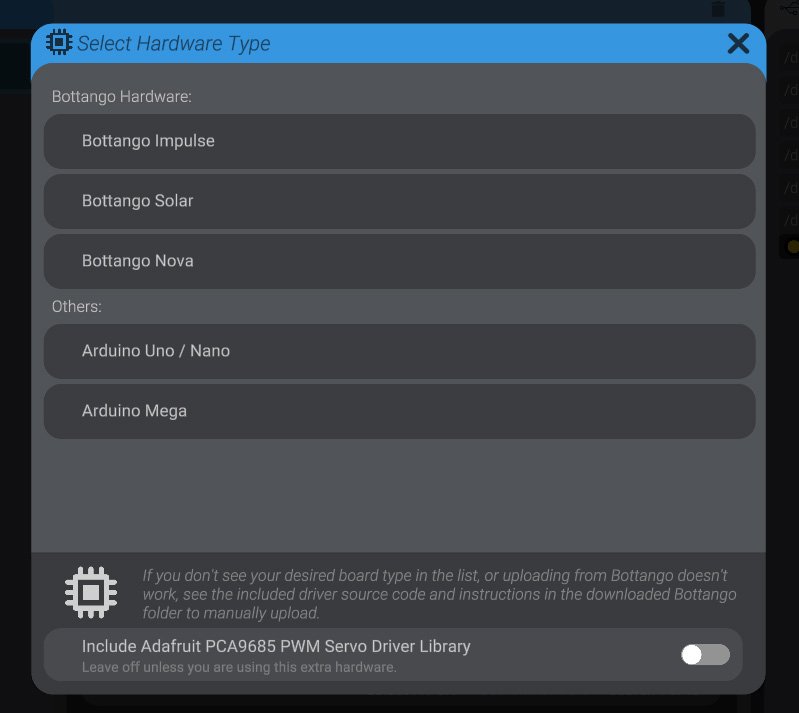
-
Wait for the firmware to upload to your board. Bottango will restart the connection, and you should have a successful connection from the app to the Bottango firmware.
-
Connect your Arduino Uno R3 to your computer via a USB port.
-
Go to the “
Hardware” view in Bottango.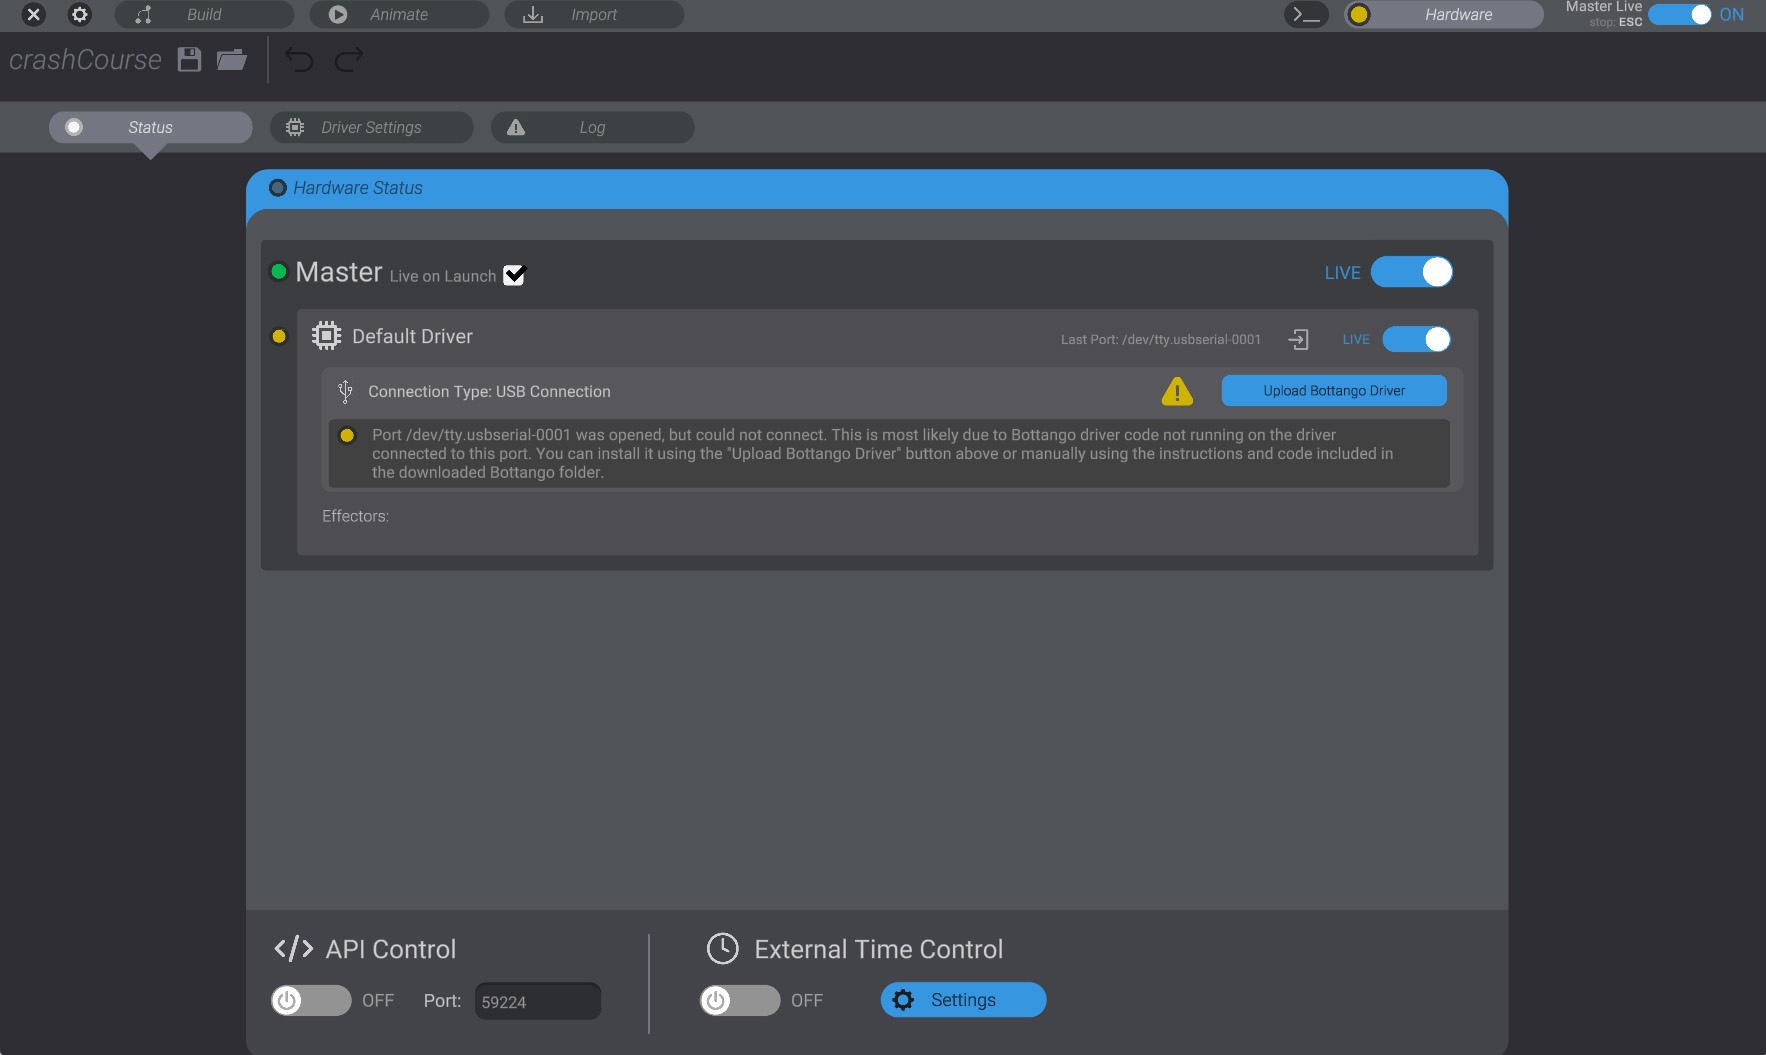
-
Go to the “
Driver Setup” subtab view in the “Hardware” view.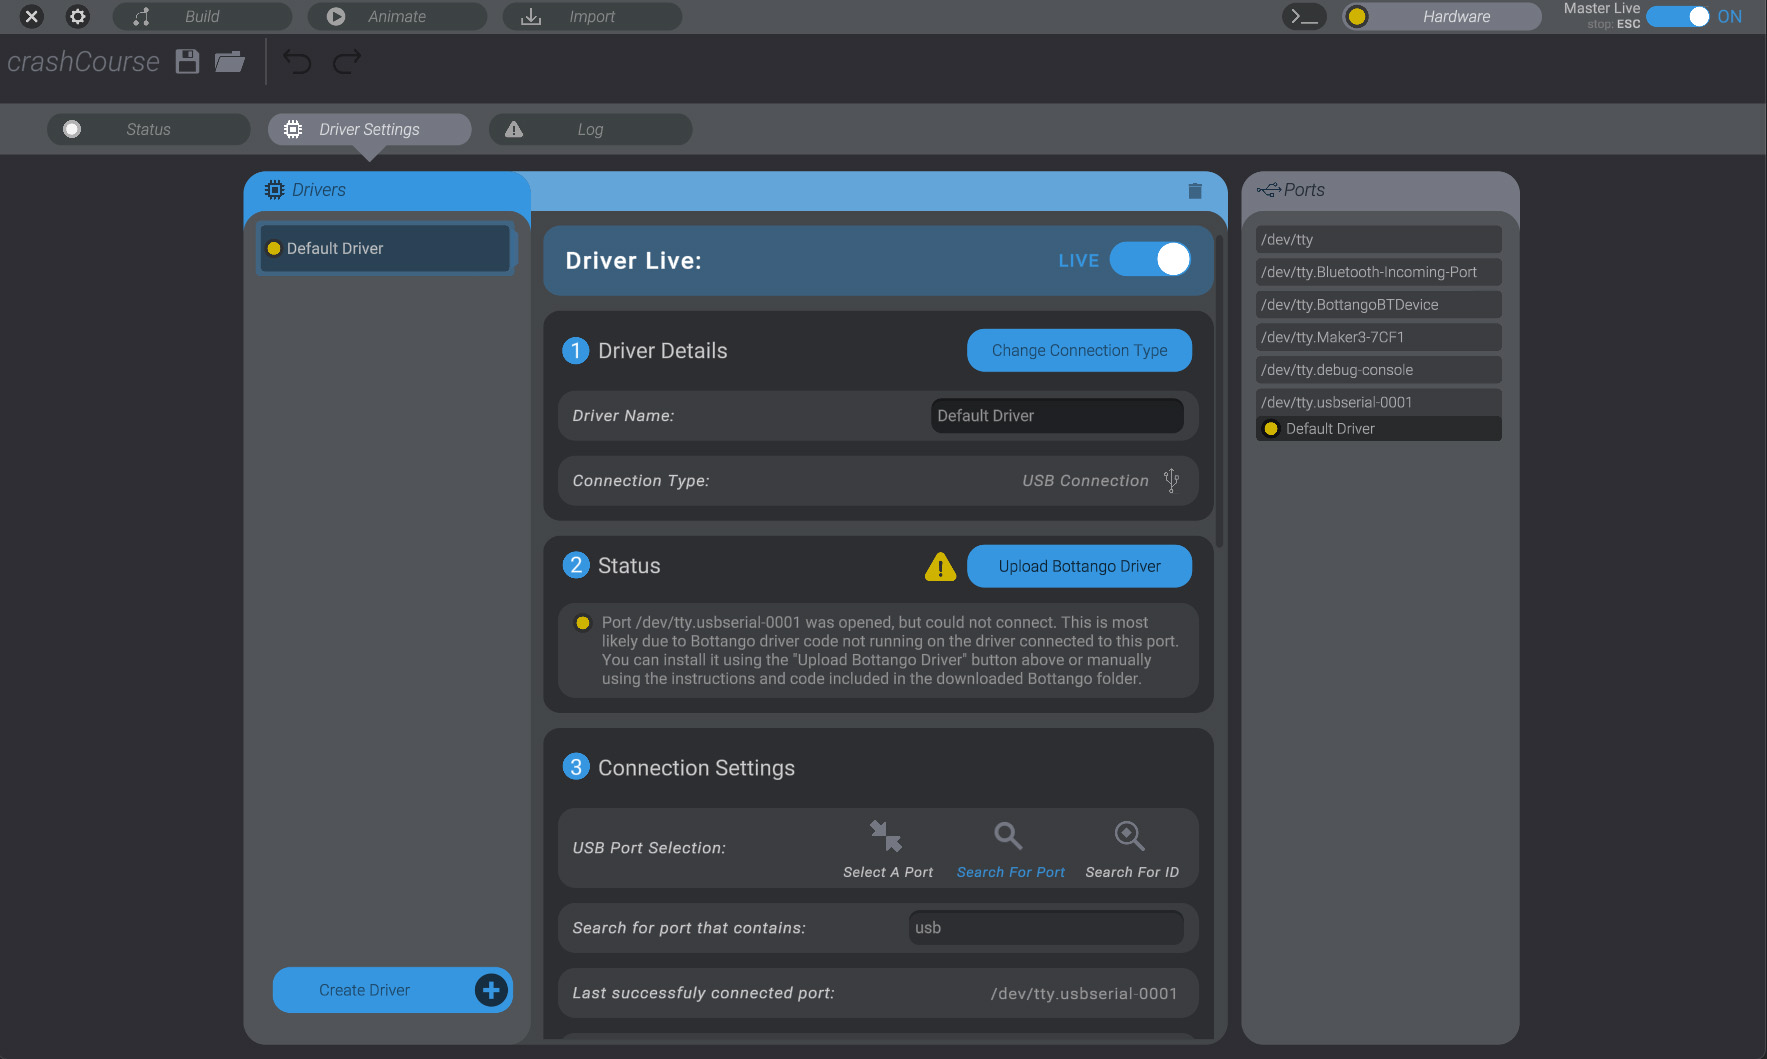
-
On macOS/Linux, Bottango will try and look for a possible port name that is a good candidate to connect to. Port names for an Arduino Uno R3 on macOS/Linux will usually be named something like “
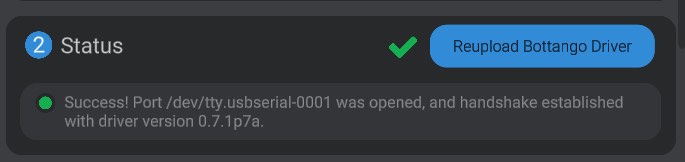
usbserial” or “usbmodem.” You can see by the status message in this example that Bottango has connected to “usbserial-0001” but didn’t find the Bottango firmware running. That’s expected, as we haven’t actually put it on the Arduino Uno R3 yet. -
If you look like the image above, you can skip this step.
If you haven’t connected to a port automatically, there may be multiple possibilities or a name that Bottango wasn’t able to guess. Try unplugging / plugging in the Arduino Uno R3 via USB, and take note of which port on the right side of the screen disappears and reappears. That’s the port we want to connect to.
You can then change to the “Select A Port” option to tell Bottango exactly which port to use:
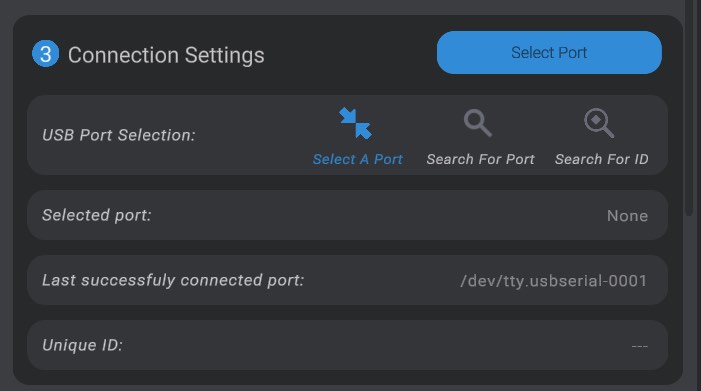
With “Select a Port” chosen in the “
3. Connection Settings” sub-menu, you can click the “Select Port” button, and then click on the port you want to use on the right side of the screen. -
Now that we’re connected to the port, we need to upload the Bottango firmware. Click on the “
Upload Bottango Driver” button. -
Select the “
Arduino Uno / Nano” option, since that’s the kind of board we’re using in this example crash course. -
Wait for the firmware to upload to your board. Bottango will restart the connection, and you should have a successful connection from the app to the Bottango firmware.
With your computer connected to an Arduino Uno R3 via USB that is running the Bottango firmware, we’re ready to move on to adding servo motors to the project.