Expert Topic for experienced builders.
The easiest workflow for audio playback is to simply use your computer as the audio playback device. Whenever audio plays in an animation, it will play back on your computer.
However, you can also set up an imported audio/video track to play back on Bottango-controlled hardware as well. In order to do so, toggle on the “Play On Hardware” option on each track you want to play on Bottango-controlled hardware in Importing Audio and Video.
With this option on, you’ll see some more configuration options. However, the big “idea” to understand is that at this point, Bottango treats any animation track using this audio or video as if it were a trigger custom event. In order to understand how to respond to audio hardware cues, please read the Custom Events docs, especially Media Events.
Just like any other custom event, you can set whether the audio/video track event is live, whether it should be live on launch, the associated hardware driver, and the unique identifier for the trigger event. The custom identifier follows the same rules (alphanumeric, up to 8 characters).
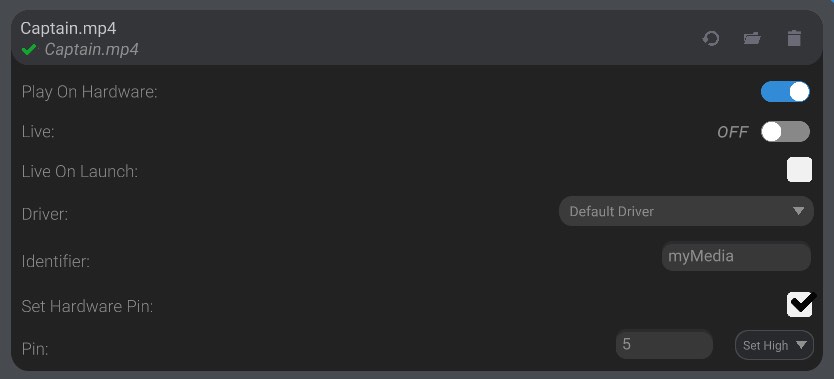
You can also set to take a pin high or low on the driver when the audio trigger event fires. This can be helpful to interface with extra audio hardware. As an example, that Adafruit Sound FX board allows you to upload audio files to it, and then trigger those files by taking one of the pins mapped to an audio file LOW. Using that hardware and these tools, you can have audio synchronized on your hardware with playback on Bottango.
A limitation to note with playback of audio triggers on Bottango-controlled hardware is that if you enable “Play On Hardware” on an audio/video track, it behaves in every way like a trigger custom event. That means it will take up memory and count toward the maximum allowed registered effectors.
An expert-level feature is to enable the I2S audio module in the Bottango firmware. With this module enabled, and additional hardware, you can directly play audio files with the Bottango firmware, including seek to specific times of the audio file. You will need:
The upcoming Bottango Solar control board has all the hardware needed to play audio, and reports the module automatically.
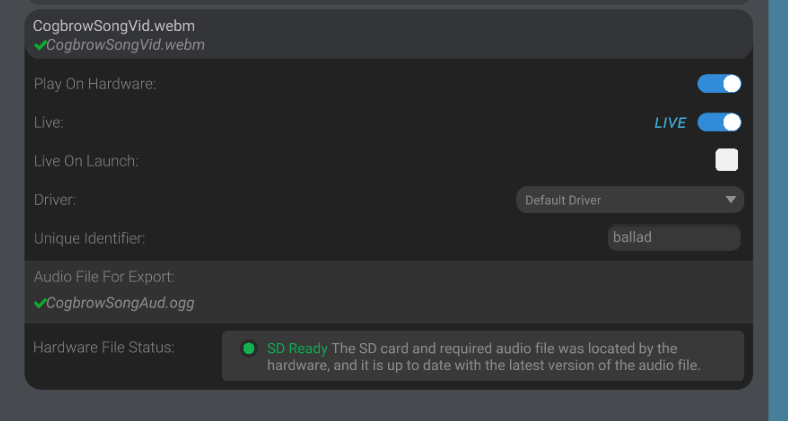
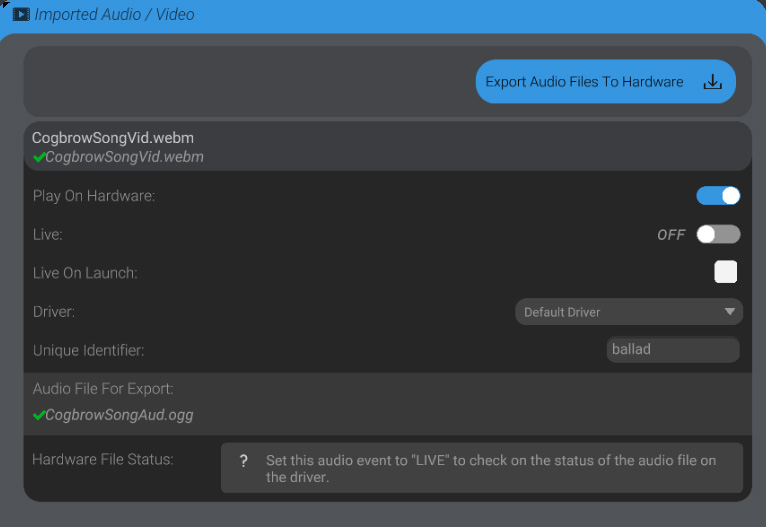
When “Play On Hardware” is enabled on an imported audio file, and associated with a driver that has reported the I2S audio module is available, the import settings will look different:
At the top of the import menu is an “Export Audio Files To Hardware” button.
Following the prompts of that menu will save out an “audio” folder with audio files converted to the format the Bottango format expects. Place the exported “audio” folder at the root of the SD card.
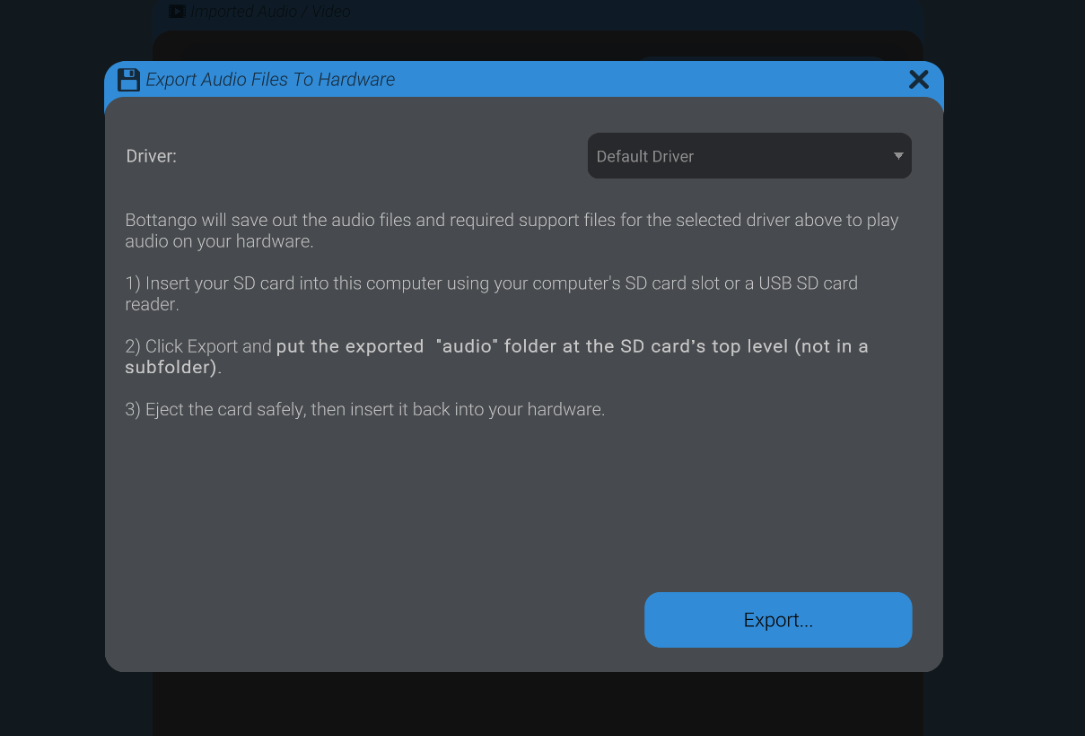
A future version of Bottango will allow for uploading the audio files directly to the device, rather than requiring you to mount the SD card on your computer.