Advanced Topic Skip if you’re new, explore when you’re ready.
In order to blend between poses, you’ll want to create and define the unique positions or poses your robot can be in for the mechanism or control you want to create. Once you have them, you’ll use them in a Pose Blend or Pose Mixer.
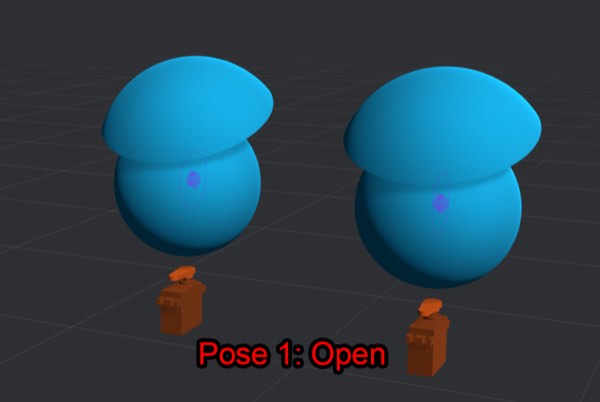
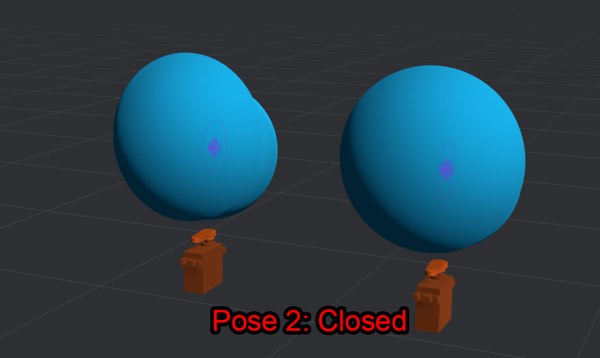
For example, let’s say we wanted to animate a pair of eyelids to always open and close together. Without pose blending, you’d have to animate each joint independently, and manually ensure that the animations for both eyelids match. In this case, we would need two poses: one pose for the eyelids fully closed and the associated joint and motor settings, and another for the eyelids fully opened. Once created, we’d blend between those two setup poses.
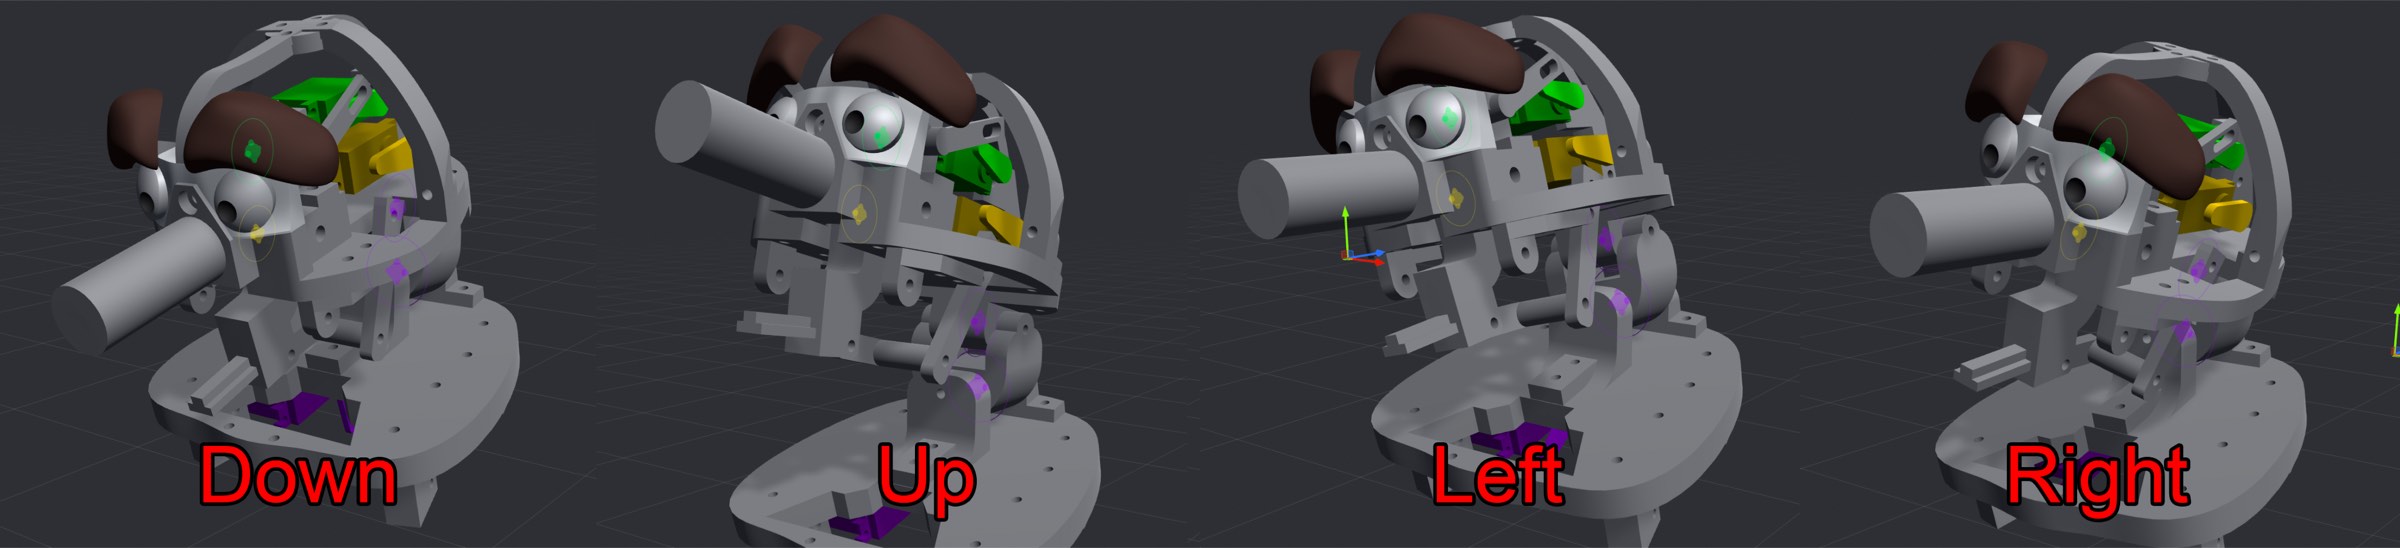
In a more complicated example, let’s think about a neck that can rotate on two axes via a u-joint, with two motors pushing on either side of the head. In this mechanism, there isn’t a single motor per axis, but instead each axis of the u-joint is partially influenced by both motors.
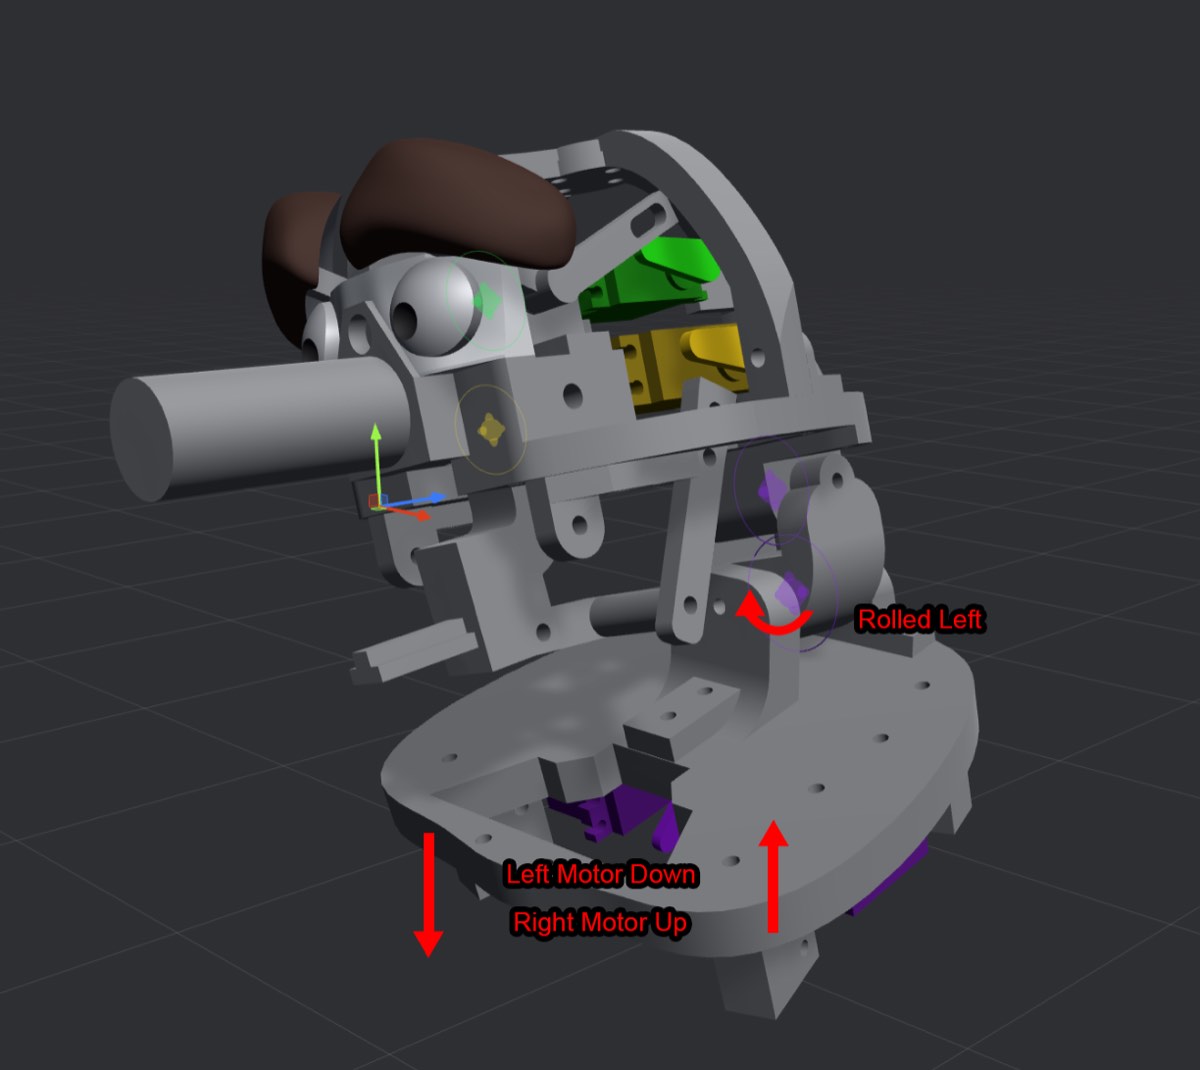
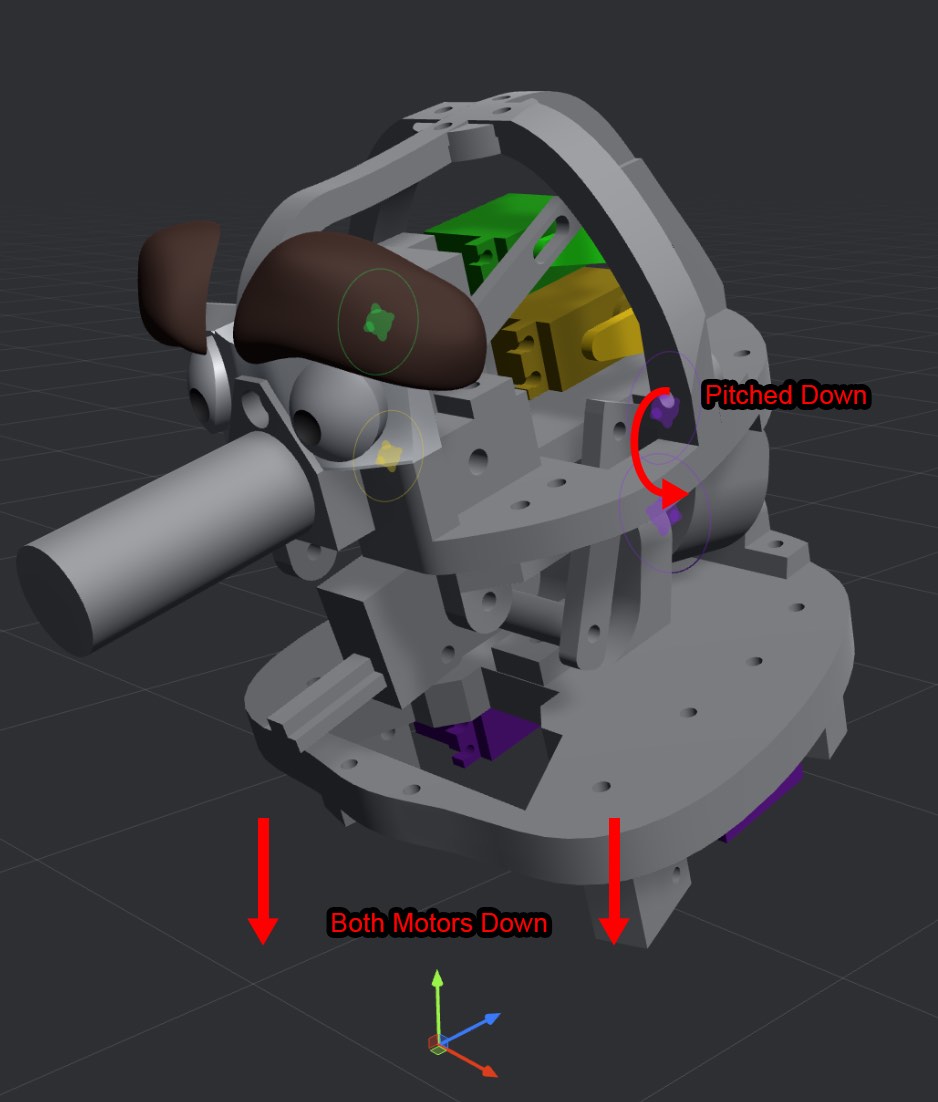
In this example, we’d want to create four total poses: one for looking up, one for looking down, one for looking left, and one for looking right. In each pose, we’d set up the joints and motor positions that achieve the desired head rotation.
When you create and edit a target pose, you move any joints, motors, events, etc. to the desired position and rotation for the pose you are editing.
One thing to consider is you may not always want joints and motors linked to each other in order to properly set up a target pose. Let’s take the above neck example. If you were to link a neck joint to a motor, which motor would you pick? Neither motor is entirely responsible for the joint’s axis. The answer is simple: don’t link them. Create and configure the joints’ and motors’ ranges of signal and motion independently, and then set them to the desired positions instead via target poses.
Create a new target pose from the Create Part menu.

Click “Edit Pose.”

Move any motor, joint, or custom event to the desired position or rotation.
If you have any motors that are not linked to a joint, you’ll see a slider to adjust its movement independently without needing a joint.
You can also type in movement values directly once a part has been added to the target pose.
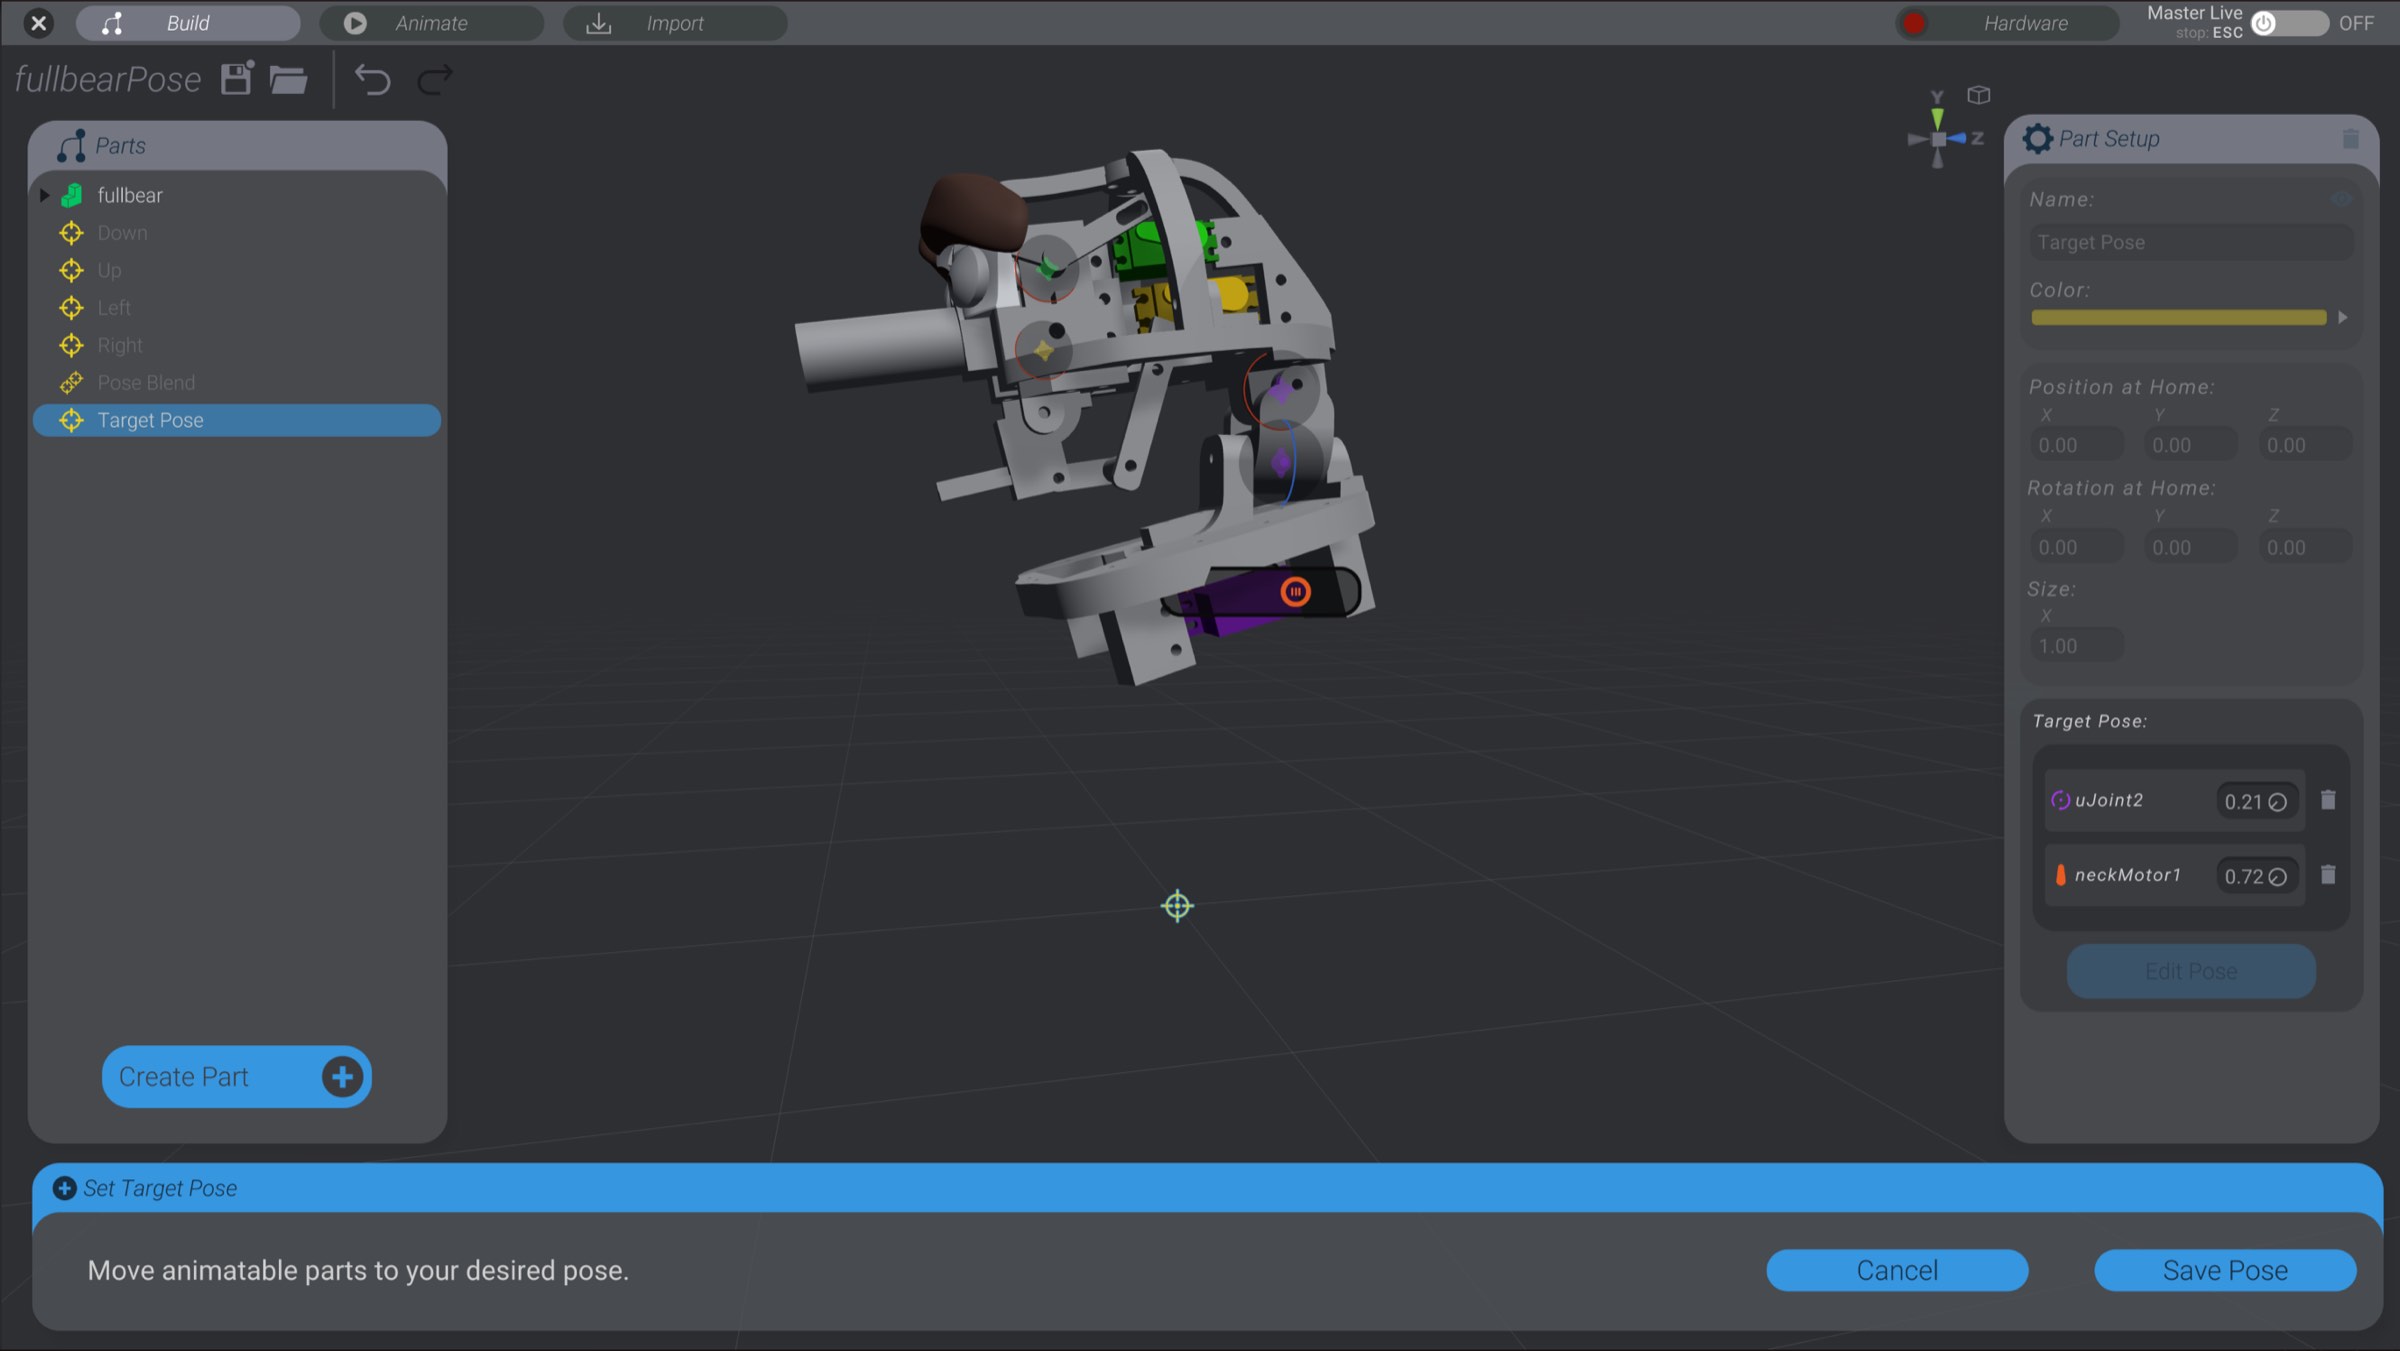
Save the target pose.
If you want to remove a part from a target pose, you can click the delete button in the list of parts to remove it from the target pose.
You can also edit the target pose to return to setting it up.