Expert Topic for experienced builders.
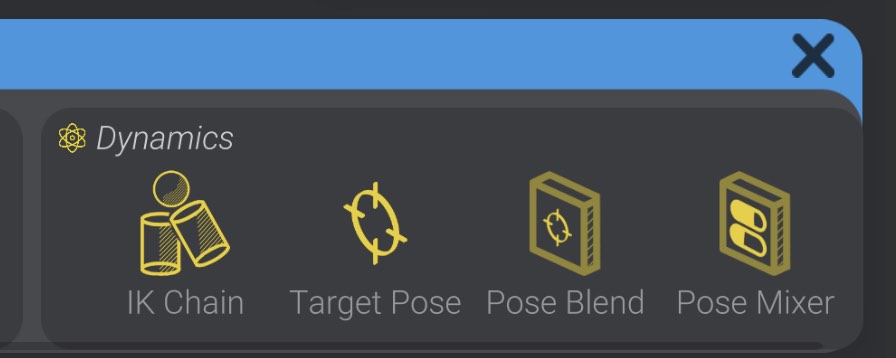
You may have noticed an additional item in the create panel next to Pose Blend, the Pose Mixer:
Pose Blends are powerful tools for blending between target poses in either one or two dimensions. A one dimensional pose blend is a great fit for the opening and closing of eyelids, and a two dimensional pose blend is a great fit for the movement of the pupils of an eye. But what if you have a mechanism that doesn’t follow such positional mappings?
Pose Mixers instead allow you to create blends between target poses that don’t have an intuitive mapping to one or two dimensions.
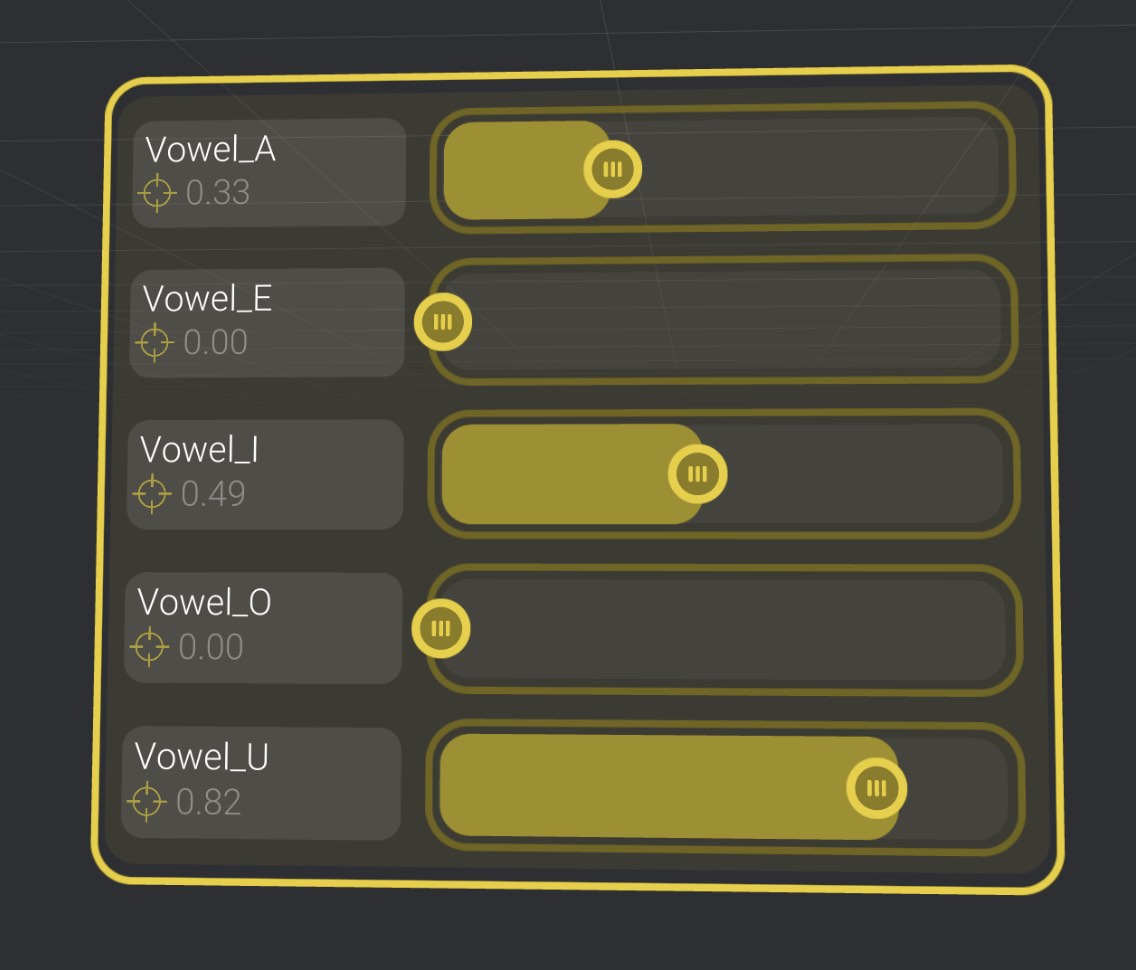
As an example, imagine that you had a target pose set up for the motors that controlled a robot’s lips, and each target pose mapped to a vowel shape (A, E, I, O, U). Maybe in this case you want to mix in 70% E and 30% U, and then blend to 30% U and 70% A. Positioning those vowel shape poses on a 1 or 2 dimensional controller doesn’t intuitively make sense and it restricts you to make choices about the relationship between the poses that may not be true.
This is where a Pose Mixer becomes the right tool for the job.
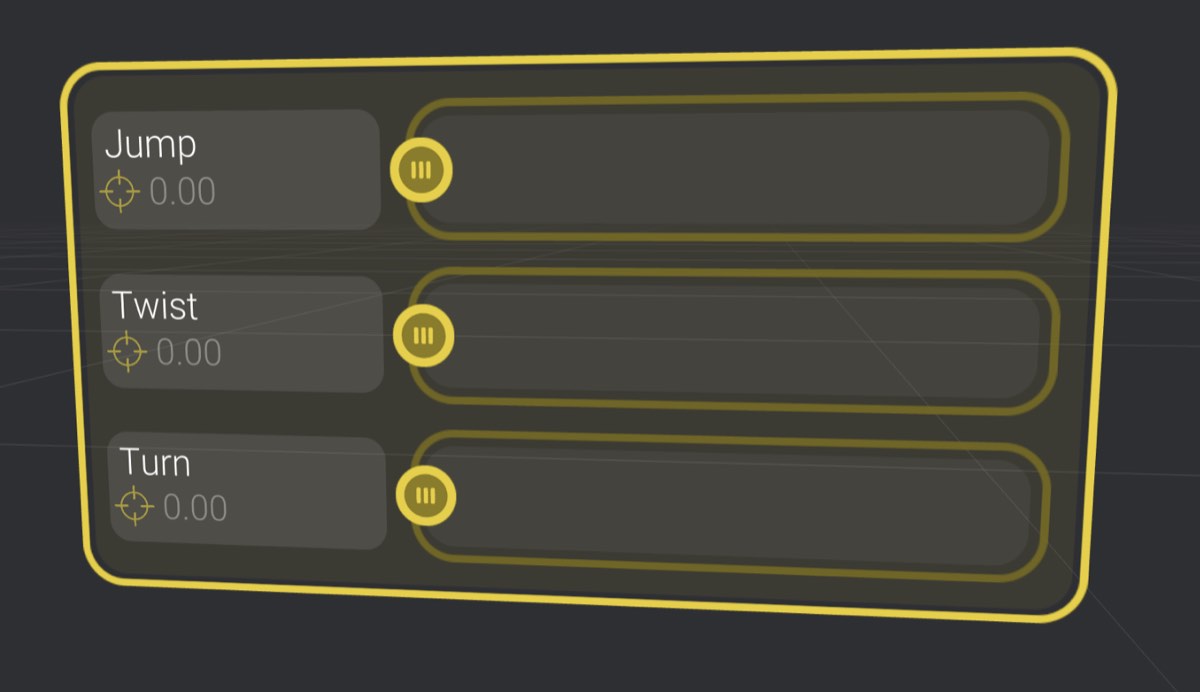
When you create a Pose Mixer from the create panel, it will be initially empty:
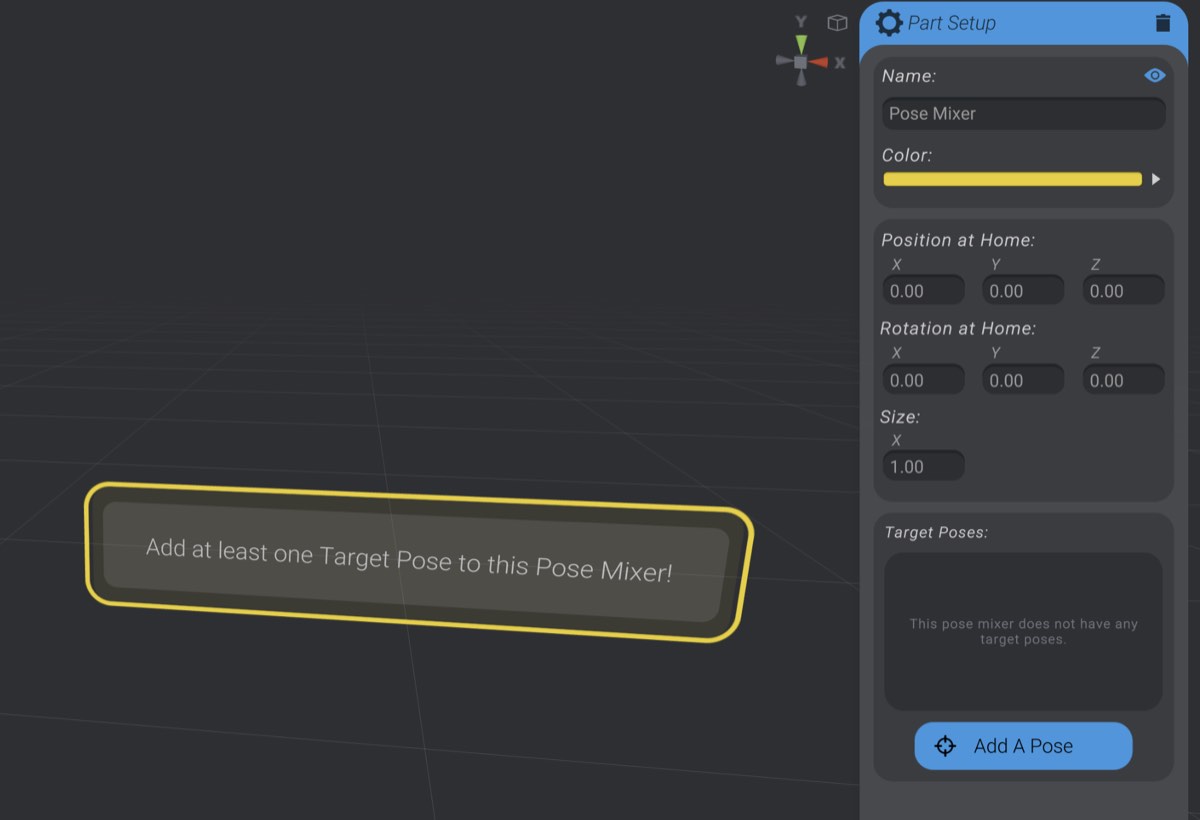
You can click the “Add a Pose” button to add target poses to the pose mixer in the exact same way as a Pose Blend.
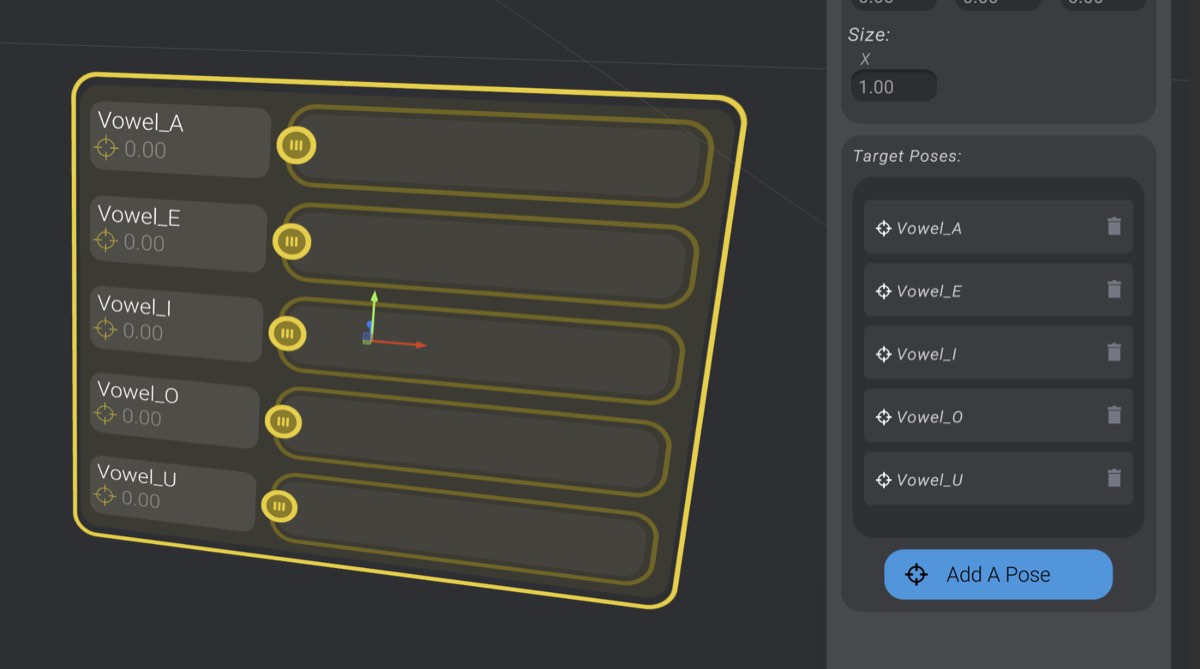
Once you have added Target Poses to the pose mixer, they will show up both on the pose mixer itself, and in the part details menu. You can delete target poses from the pose mixer using the “trash” button, or drag to rearrange the order of the poses in the pose mixer.
If I were to drag up the Vowel_A slider and the Vowel_O slider as shown:
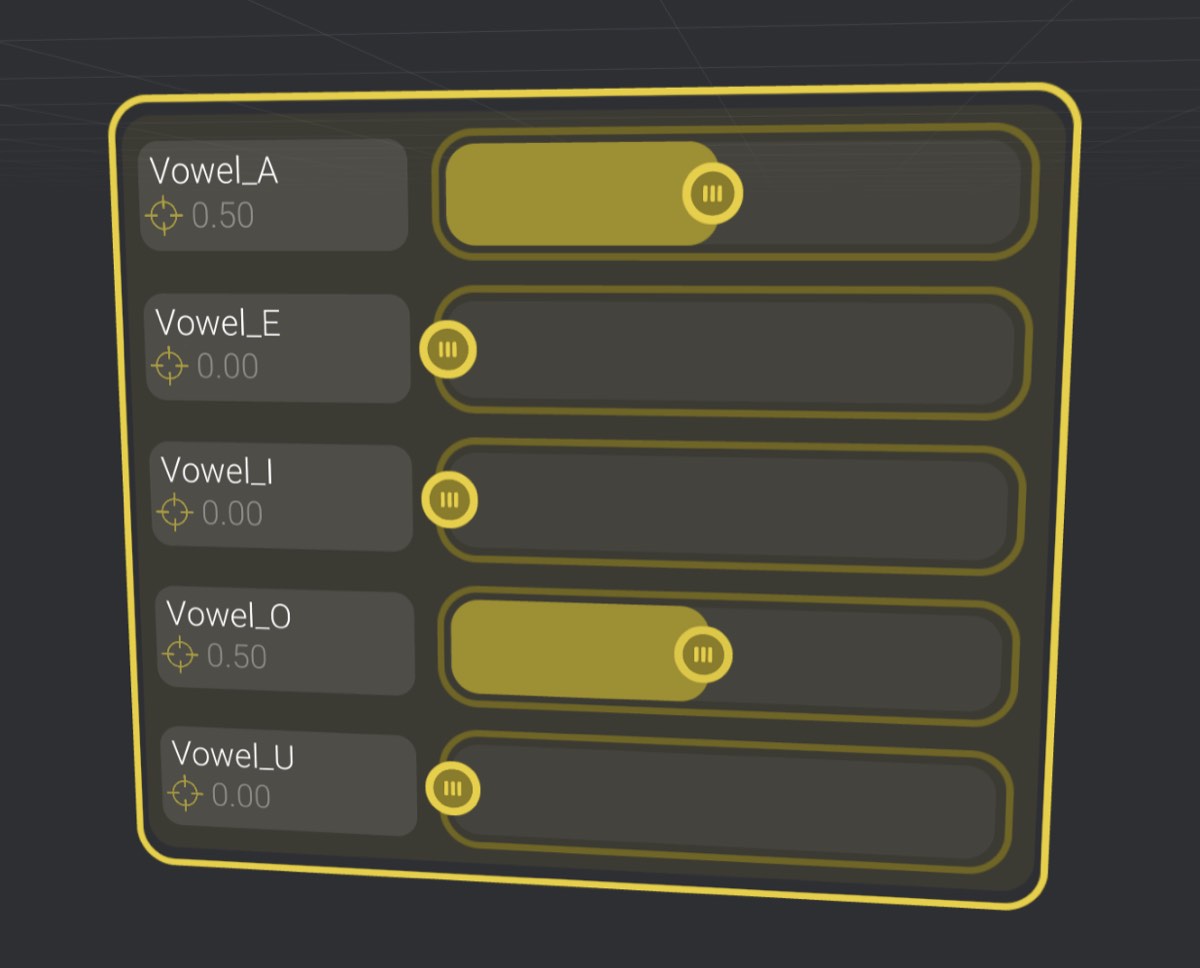
The final pose will be calculated as a 50/50 blend of Vowel_A and Vowel_O.
Let’s look at a 2D pose blend for a moment:

In this pose blend, the target pose is roughly a blend of 50/50 between the top and right target poses. Because there’s always a “closest” target pose in the map, the final calculated pose will always be some mix of the target poses in the pose blend.
However, now let’s look at this pose mixer:
We would intuitively expect with this setting that we’re not blending in any of Jump, Twist, or Turn, and instead we’re at home for all three. This is exactly how a Pose Mixer works. Fully left on a slider is the home position of all the parts in that target pose. Fully right on a slider is a full expression of the target pose.
This means in the following pose mix:
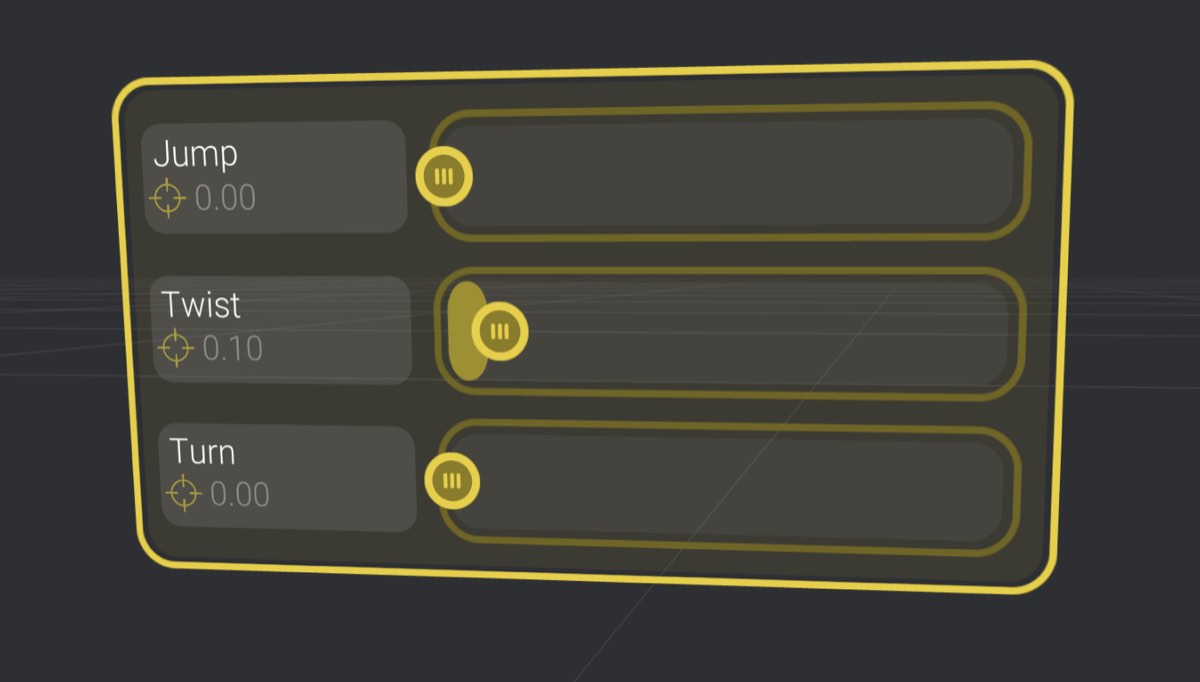
The calculated pose would be 10% twist expressed, 90% twist home, and the other poses are ignored.
You can also take your total mix percentage over 100%:
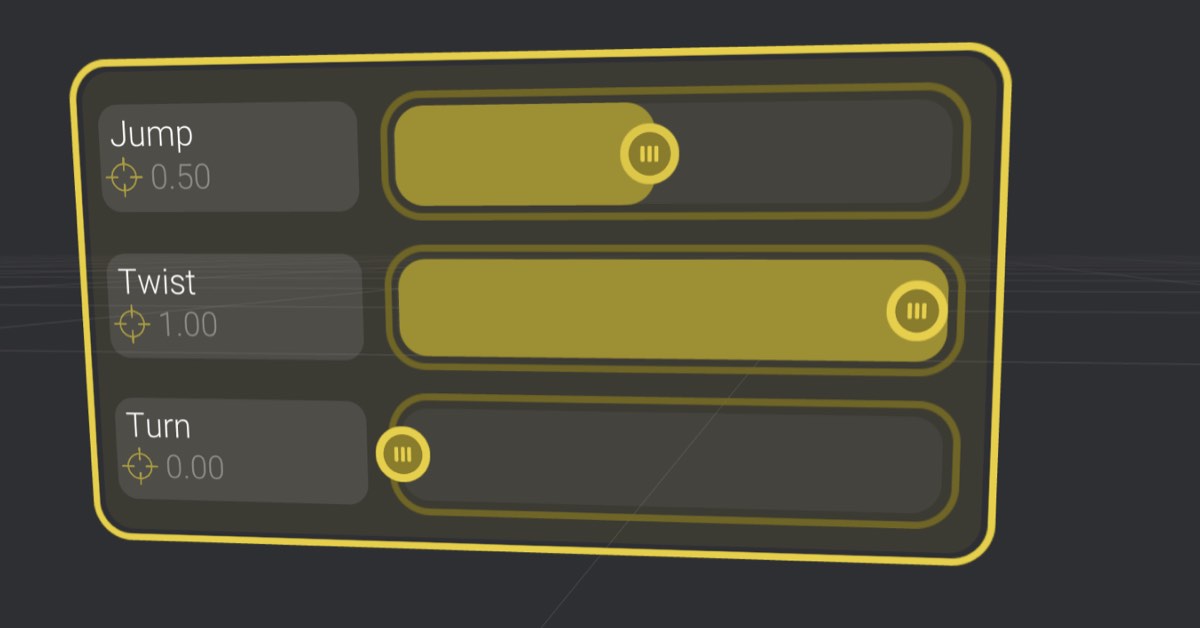
In this setup, the final mix would be two-thirds “Twist”, one-third “Jump”, and no “Turn.”
If this is unintuitive to read through, try it out in practice and the end result will become quickly predictable. This is a behavior that plays out as you would expect, but is difficult to describe in text.
If you have any experience animating in Bottango, animating Pose Mixers should behave as expected. Drag on the sliders to set keyframes, and modify those keyframes using the dope sheet and graph view.
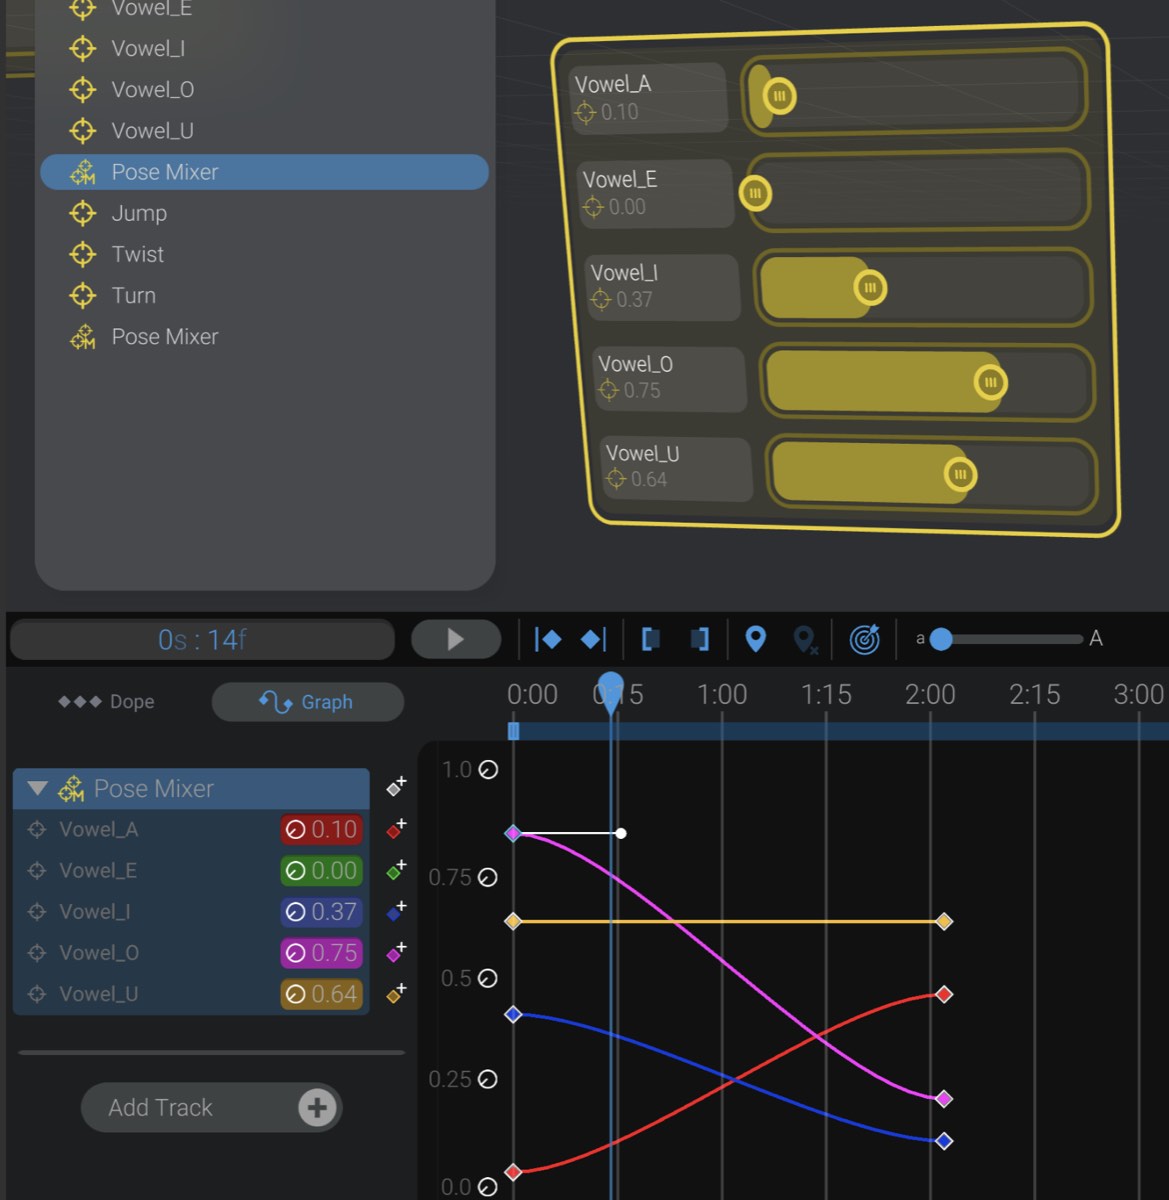
Expanding the track in the tracks panel of the animation window will show the value of each target pose in the pose mixer, and allow you to set each target pose’s blend value explicitly.