Bottango Servo Shield
Bottango Servo Shield
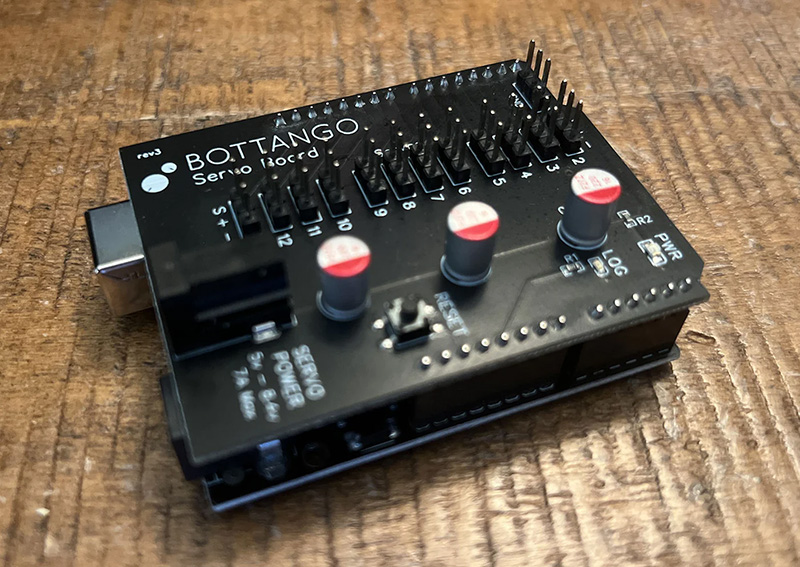
The Bottango Servo Shield is an easy way to power servos for your Bottango builds.
- Compatible with the Arduino shield form factor, and “plug and play” with an Arduino Uno R3 or Arduino Mega.
- 12 Servo headers connected to digital pins 2 - 11, with no extra overhead like i2c, etc.
- Easy barrel jack DC power input, rated 5v - 8.4v, up to 7 amps. (See power supply information below)
- Decoupling Capacitors, reset button, and status LED.
Power Supply Requirements
Section titled “Power Supply Requirements”You’ll need to bring your own power supply:
Compatible power supply connectors with the Bottango Servo Shield are those with the very common 5.5 mm outer sleeve diameter with 2.1 mm inner sleeve diameter. Make sure your power supply has a positive inner pin or you’ll damage your servos.
Servo Count Limit on an Arduino Uno R3
Section titled “Servo Count Limit on an Arduino Uno R3”Due to the requirements of Bottango and the limited resources of an Arduino Uno R3, Bottango is limited to 8 servos maximum on each Arduino R3. You will not be able to use all 12 channels of the servo shield if you use it with an Arduino Uno R3.
If you need more than 8 servos, there’s lots of options:
- You can use all 12 channels with an Arduino Mega and the shield is plug and play with that form factor.
- See this guide on how to scale up projects with Bottango.
- You can also use a more advanced board like an ESP32 and control more than 8 servos.
Using the Servo Shield With an Arduino Uno R3 / Arduino Mega
Section titled “Using the Servo Shield With an Arduino Uno R3 / Arduino Mega”-
Insert the servo shield into your Arduino Uno R3 / Arduino Mega. Due to the design of the Arduino shield form factor, it will only fit one way. The power input should be facing the same direction on both the Servo shield and the microcontroller. The last back pin of the servo shield should be inserted into the last back header of the Arduino.
-
Plug your servos into one of the 12 servo headers labeled 2 - 11. Be sure to have the correct orientation. Most servo cords are either (White / Red / Black) or (Orange / Red / Brown).
- (S) == White / Orange
- (+) == Red
- (-) == Black / Brown
Take note of the servo header number. Because the Servo Shield connects directly between the servo shield and the pins of your microcontroller, this is the pin number you’ll input when setting up the servo in Bottango.
- Plug your servo power supply into the servo shield. For the most common and basic use case, the Arduino itself will be powered by it’s USB connection, and you should ignore the DC power input on the Arduino.
Using The Servo Shield with Other Boards
Section titled “Using The Servo Shield with Other Boards”Though the servo shield is designed to “plug in” to an Arduino Uno R3 or Arduino Mega, you are not limited to using it with just those two options. The design of the board is quite simple, and it can be used with any development board, but will take a little extra wiring on your part.
-
Plug in servos and servo power as in the above steps for an Arduino Uno R3 / Arduino Mega. Let’s say in this example you plug a servo into servo header “5.”
-
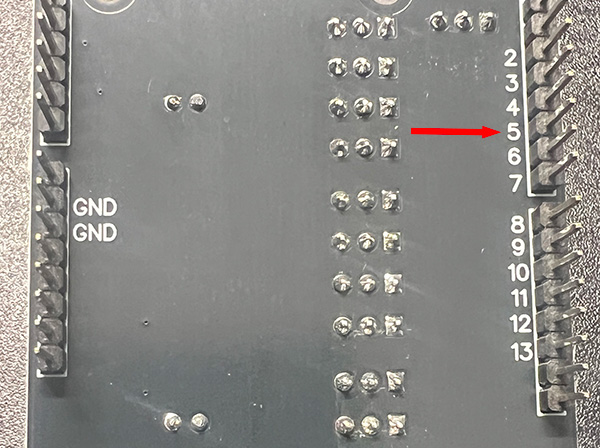
Flip the shield over. On the bottom of the shield, where all the pins are that usually insert into an Arduino Uno R3, there’s a matching “5” label on one of the pins on the bottom. Use a simple jumper wire or other cable of your choice to connect a GPIO pin of your microcontroller (we’ll say pin 20 on the microcontroller for this example) to the bottom side number 5 pin.
-
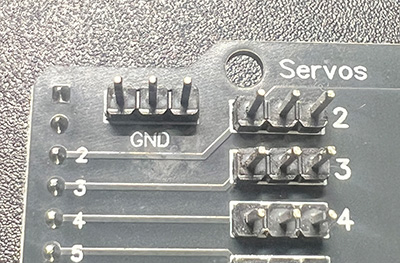
Connect a ground pin of your microcontroller to one of the three extra GND labeled pins on the top of the Servo shield.
-
In this example The GPIO pin you connected on your servo shield to servo header 5 is what you should input when setting up the servo in Bottango, not “5.” In this example, you’d input 20. You would only input 5 if that happened to also be the pin on your microcontroller.