Essential Topic for learning Bottango.
In order to set up your microcontroller with Bottango using the driver source code, you will need the following:
When you download the .zip archive containing the installer for the desktop app, there’s also a “BottangoArduinoDriver” folder.
After extracting the .zip contents, open up the BottangoArduinoDriver.ino file in the BottangoArduinoDriver folder, to open the source code in the Arduino IDE.
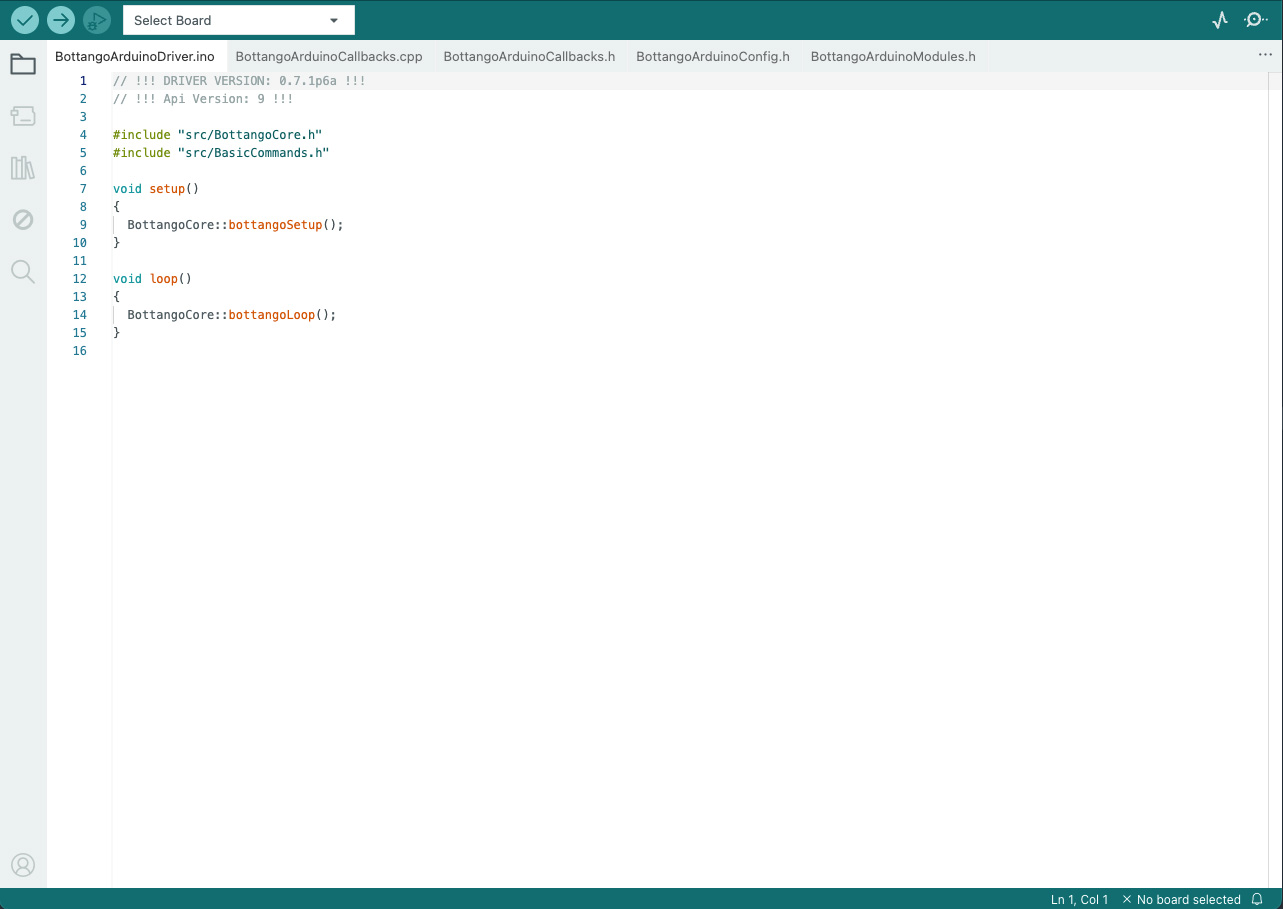
If the only tab you see is “BottangoArduinoDriver.ino” and you don’t see the other tabs like “BottangoArduinoCallbacks.cpp” etc. see the Windows note above.
Connect your Arduino compatible microcontroller to your computer via USB
Select your board and port from the top left “Select Board” dropdown.
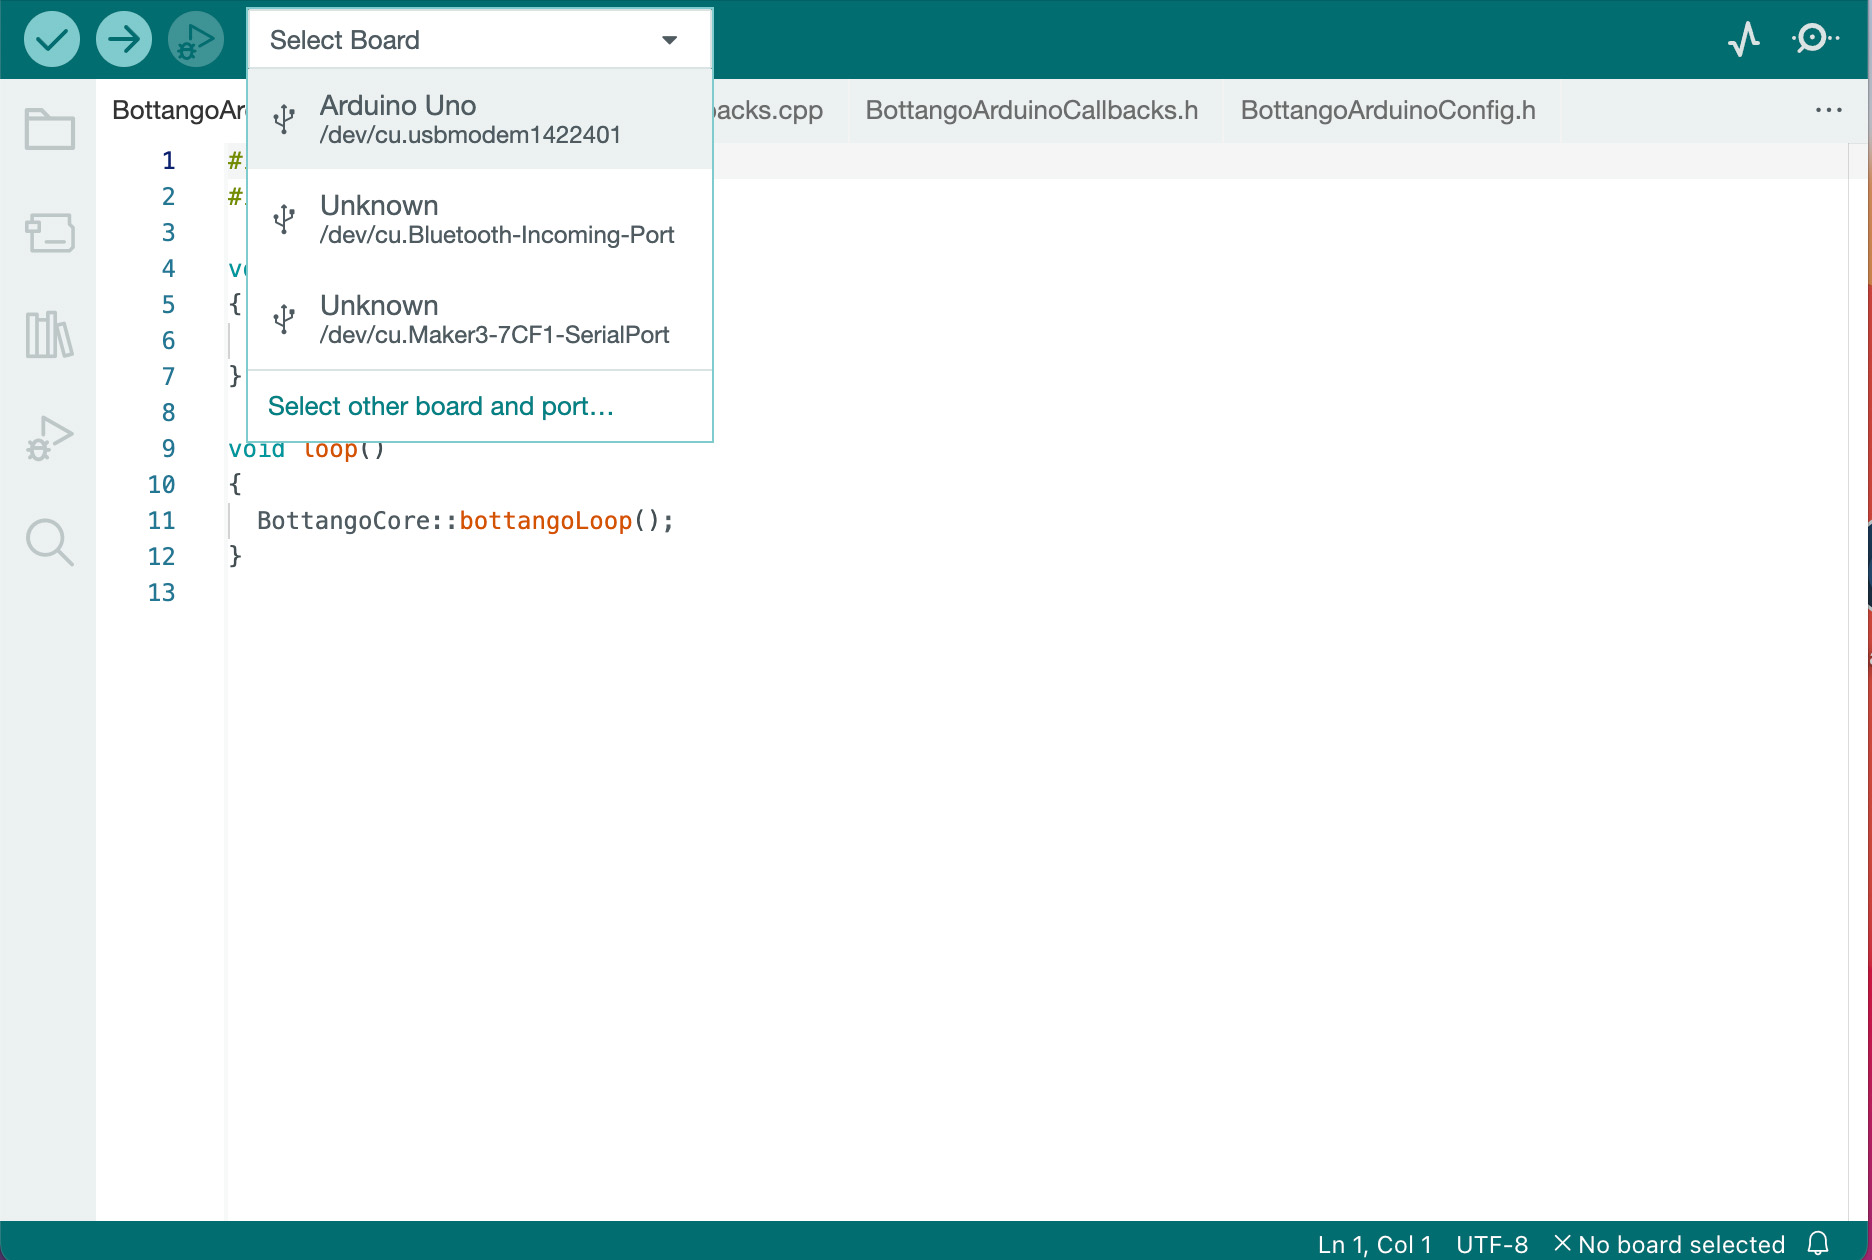
Not sure what to pick? The choices will be different on Windows vs macOS/Linux. On Windows, the port will likely be “COM” followed by a number. On macOS/Linux the name may have something like “usbmodem” in it.
If you aren’t sure, or there’s multiple possible choices, an easy test is to unplug the board and take note of what options are in the list. Then plug it back in, the new entry in the list that wasn’t there when unplugged is probably the port to choose.
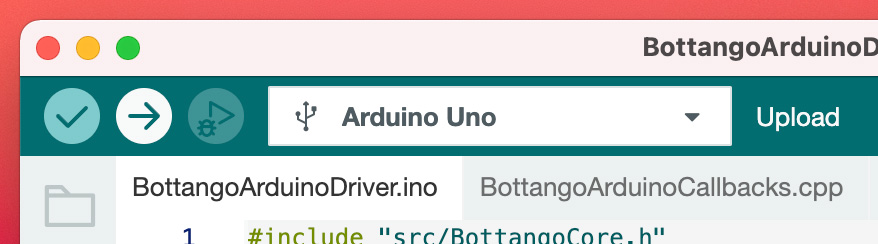
Click the “Upload” button, which is the circle with an arrow pointing to the right in the top right of the window.
Wait for it to finish. If you get no errors, you should have the microcontroller set up to work with Bottango. If you run into issues, try troubleshooting by learning to upload a basic blink sketch for your microcontroller. There’s countless tutorials on how to use the Arduino IDE across the internet. Once you get a blink sketch uploading, you should be able to apply those lessons to uploading the provided Bottango firmware.