Beginner Topic used frequently in Bottango workflows.
Once you open BottangoArduinoDriver.ino in the Arduino IDE, you should see multiple tabs. One of those tabs is named “BottangoArduinoModules.h”
You can use this file to turn on and off special functionality of the firmware. Once you have made the changes you want, you’ll need to recompile and reupload the driver from the Arduino IDE with these changes made. The desktop app can only upload the stock, unchanged version of the driver with the default modules (or with PCA9685 support enabled).
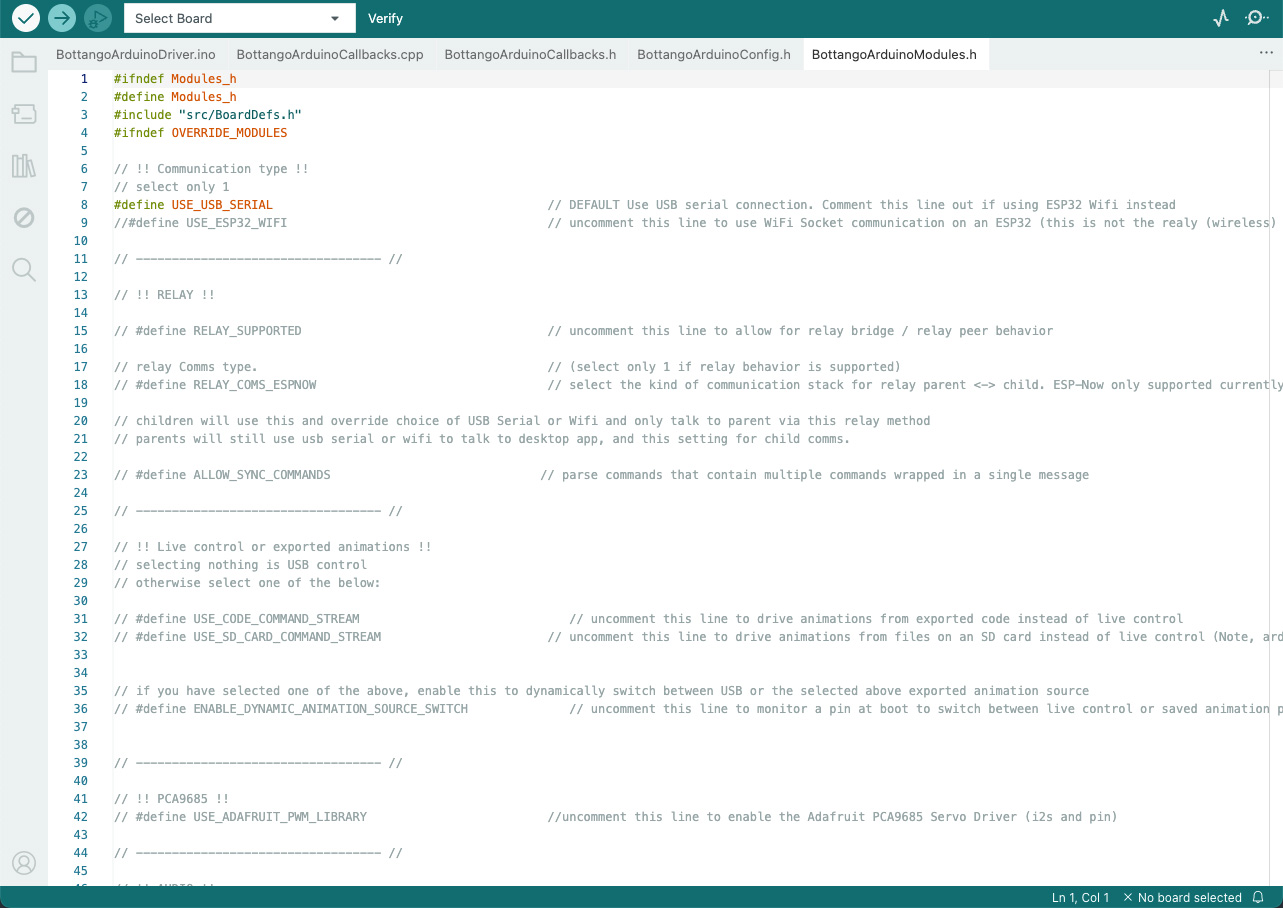
Each line that starts with a “#” represents a module. If there is a “//“ before the “#” symbol, that means that the module is turned off.
Here’s an example disabled module in the default modules file:
// #define ALLOW_SYNC_COMMANDSHere’s that same module now enabled:
#define ALLOW_SYNC_COMMANDSIn order to enable a module, delete the starting ”//” characters and then save and reupload the firmware. To disable, add ”//” back to the front of the line.
For nearly all beginning workflows, the only modules you’re likely to change will be support for PCA9685 and enabling playback of exported animations. All other modules are for expert usage.