Pro Back Brace
Assemble and Attach Pro Back Brace and Speakers
Section titled “Assemble and Attach Pro Back Brace and Speakers”In this step, we’ll attach the speakers to the new back brace, and then attach it back onto your animatronic.
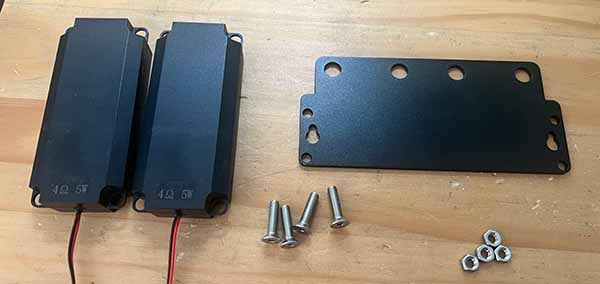
Parts Needed:
- Pro back brace
- Speakers (both)
- M5 flat head bolts
- M5 nuts
- M3 flat head bolts (from previous step)
- M3 washers (from previous step)
- Washer mounting stickers
Attach the First Speaker
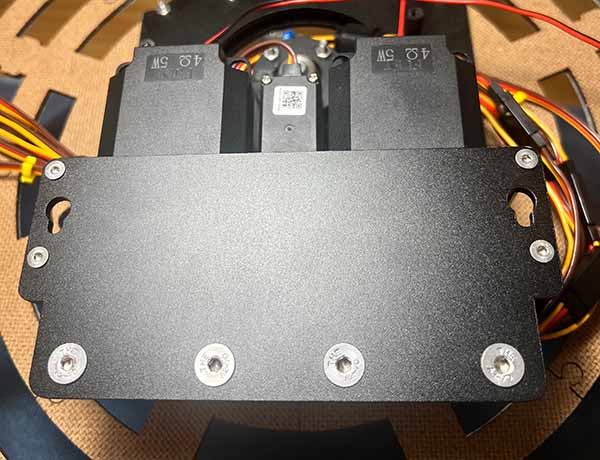
Section titled “Attach the First Speaker”Grab the two speakers, the pro back brace, and the M5 flat head nuts and bolts.
Attach the first speaker to the back brace, top side only of the speaker. It doesn’t matter which speaker goes on which side.
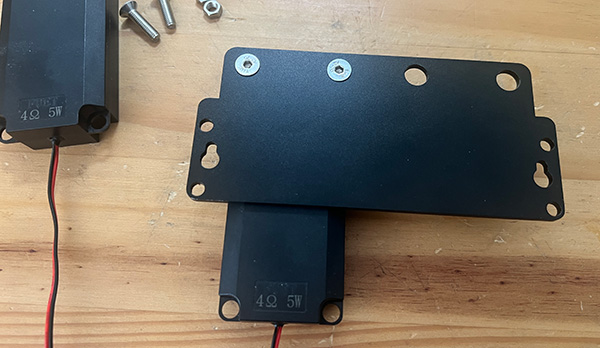
Attach the Second Speaker
Section titled “Attach the Second Speaker”Repeat the process for the second speaker.
Because you didn’t over tighten, you can adjust the angle of the speakers a little as needed, to ensure that they are both pointing straight down once mounted.
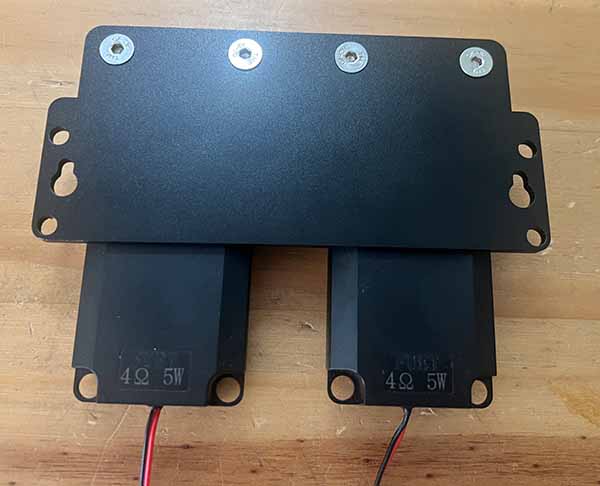
Prep the Washers on the Back Brace
Section titled “Prep the Washers on the Back Brace”Flip the pro back brace over so the speakers are now facing up, then use the washer mounting stickers to hold in place four washers (saved from the previous step), one on each of the 4 mounting holes. Your stickers may be brown or black.
It’s usually easier to put the sticker on the washer first, then put it in place and press the rest of the sticker down. We don’t need perfect alignment here, this is just to make it easier to move the back brace back into place with washers in the right spot.
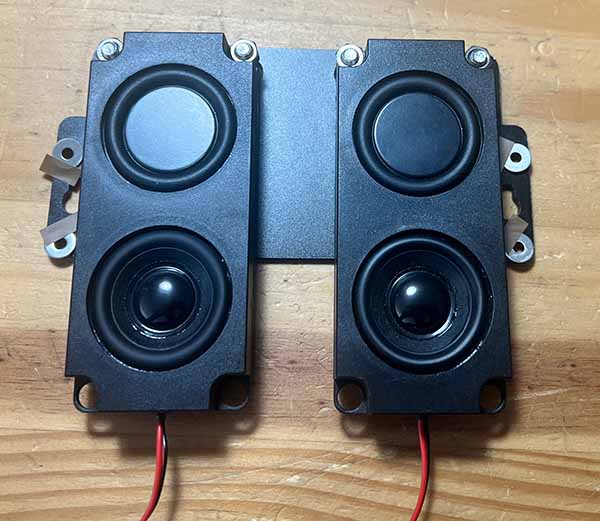
Attach the New Back Brace
Section titled “Attach the New Back Brace”Go back to your animatronic, and mount the new back brace in the place where the standard edition version was. The speakers will have a gap in the center where the number 1 servo will fit.
Use the four small flat head metal bolts we saved from the previous step.
Next Up
Section titled “Next Up”Next up we’ll route cables, attach the new Bottango Solar board, and get everything hooked up!